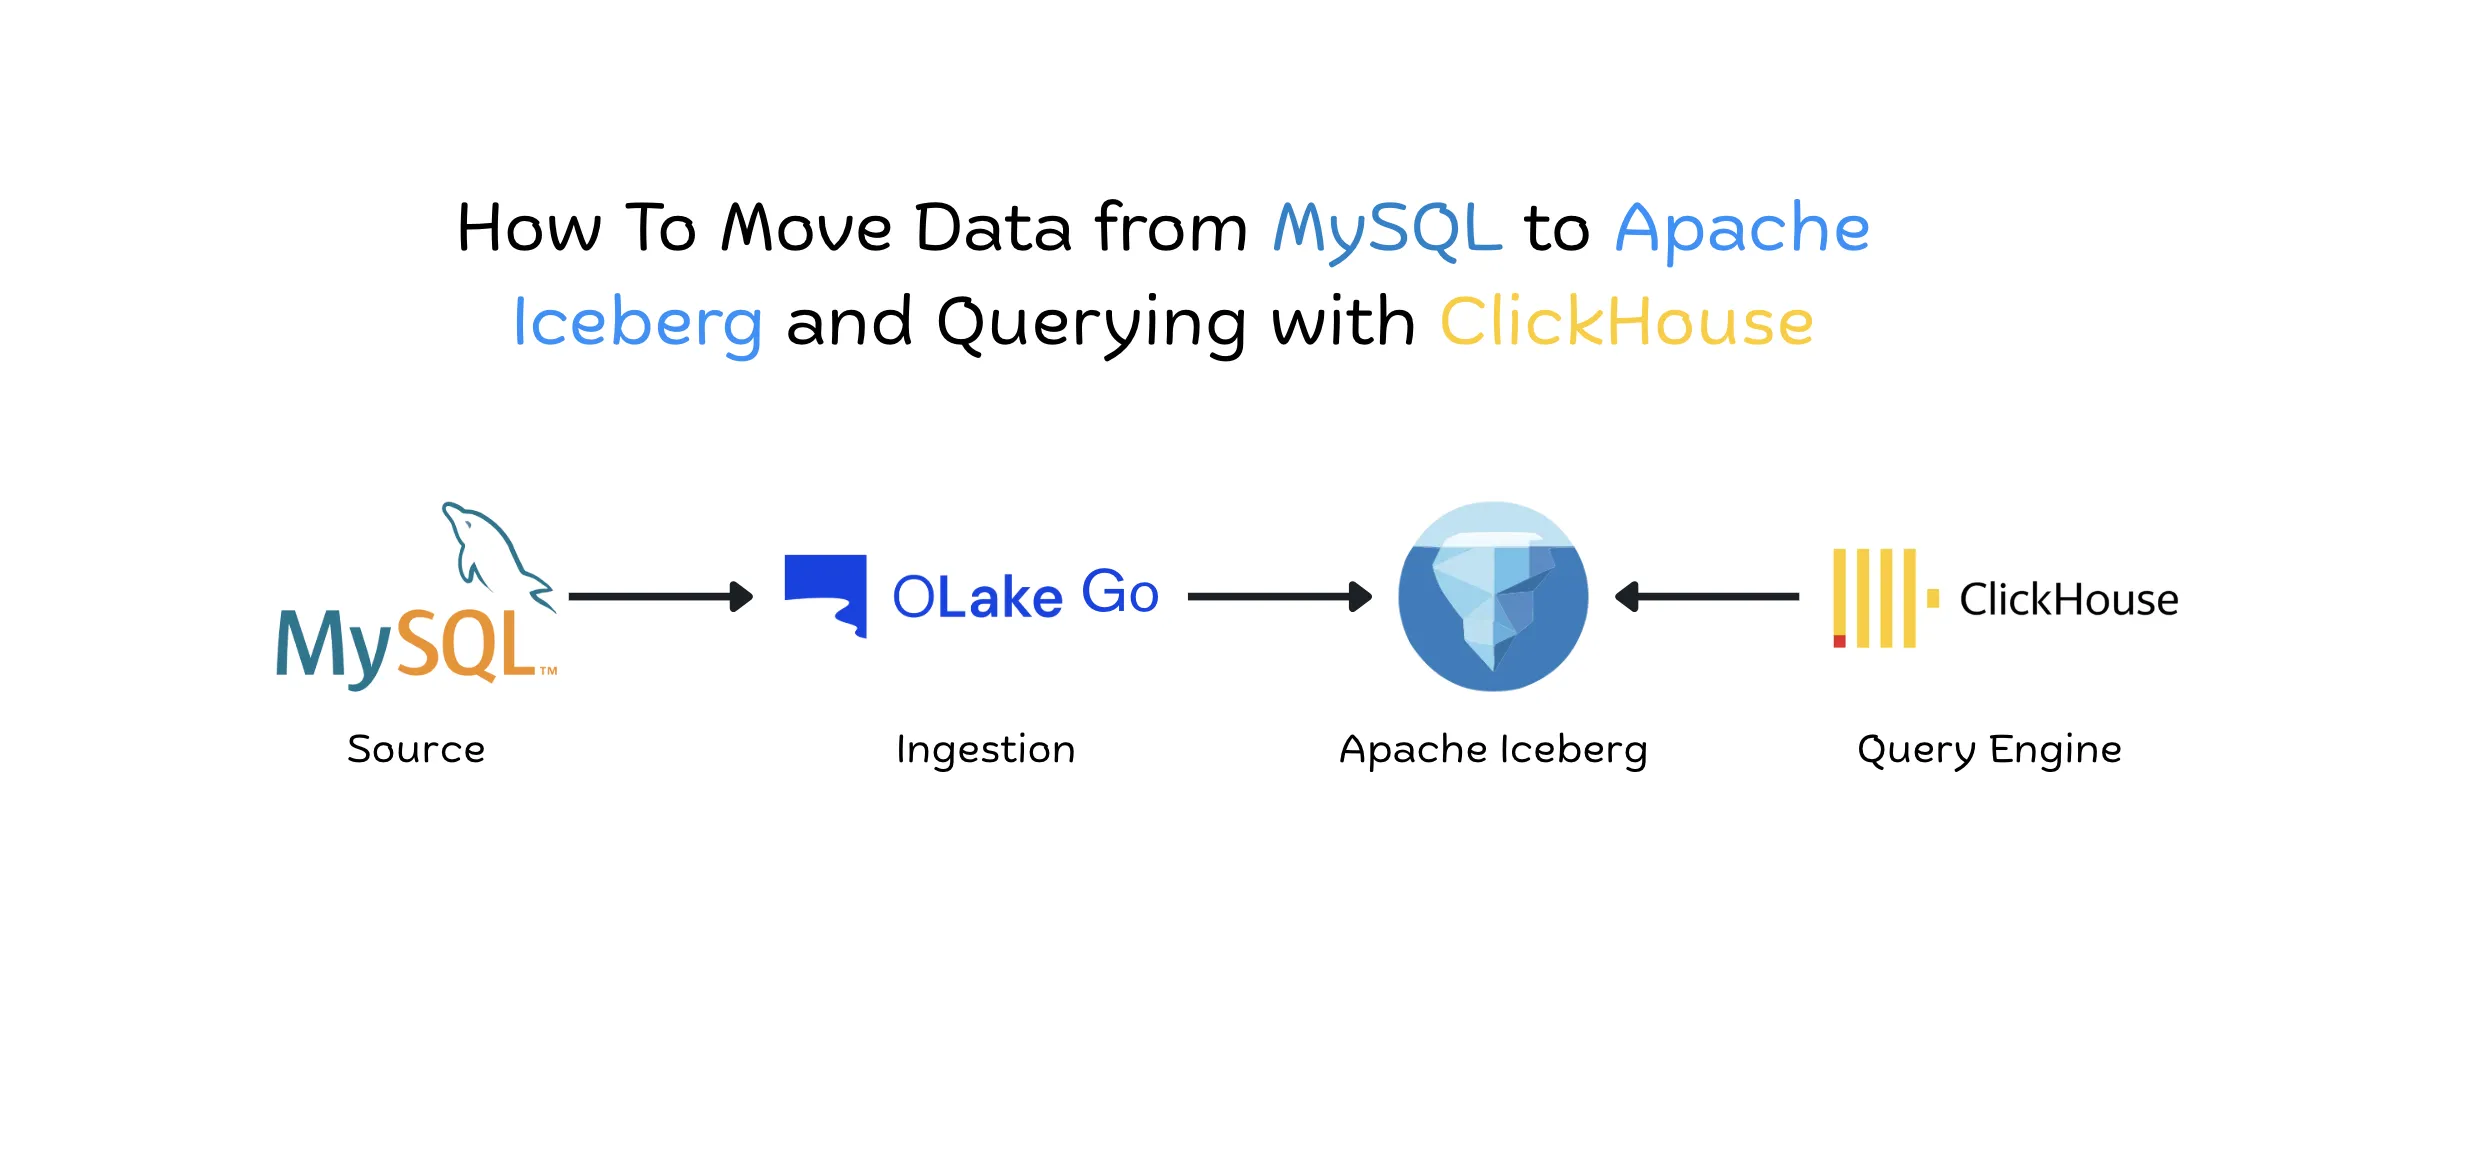
How To Move Data from MySQL to Apache Iceberg and Querying with ClickHouse
7 min read
Introduction
MySQL is built to serve your application one row at a time: a login, a checkout, a profile update. ClickHouse is built for the opposite job, scanning millions of rows in seconds to power dashboards and ad hoc analysis. Pointing those analytical scans at a production MySQL instance competes with the transactions your users are waiting on, and maintaining a separate MySQL-to-ClickHouse ETL pipeline means one more copy of the data that only one engine can read.
Apache Iceberg sits neatly between the two. You land MySQL data once as open Iceberg tables in object storage, and ClickHouse reads them directly through its catalog integration, with no reloading into MergeTree tables. The same tables stay available to any other Iceberg-compatible engine your team adopts later.
OLake Go handles the replication from MySQL into Iceberg, including ongoing CDC, and writes the tables in a format ClickHouse can read. In this guide, you'll connect MySQL, replicate the data to Iceberg tables in the catalog of your choice, pick ClickHouse as your query engine, choose which tables to ingest, run the sync, and then query the data in ClickHouse.
Step 1: Set Up the Source and Destination
The OLake Go docs explain how to set up MySQL and Iceberg, so follow the links below for each one. Pick the catalog you want to use and follow the link below to help you set it up. To see which engines work with which catalogs, check Compatibility with Query Engines.
When both Sources and Destinations are created, you can move on to the next step.
| Source | Setup Guide |
|---|---|
| MySQL | Link |
| Destination | Catalog | Link |
|---|---|---|
| Apache Iceberg | HIVE | Link |
| REST | Link | |
| NESSIE | Link | |
| AWS GLUE | Link | |
| JDBC | Link | |
| Polaris | Link | |
| BigLake | Link | |
| Lakekeeper | Link | |
| Unity | Link | |
| S3 tables | Link | |
| Horizon | Link |
Step 2: Create a Job and Select the Query Engine
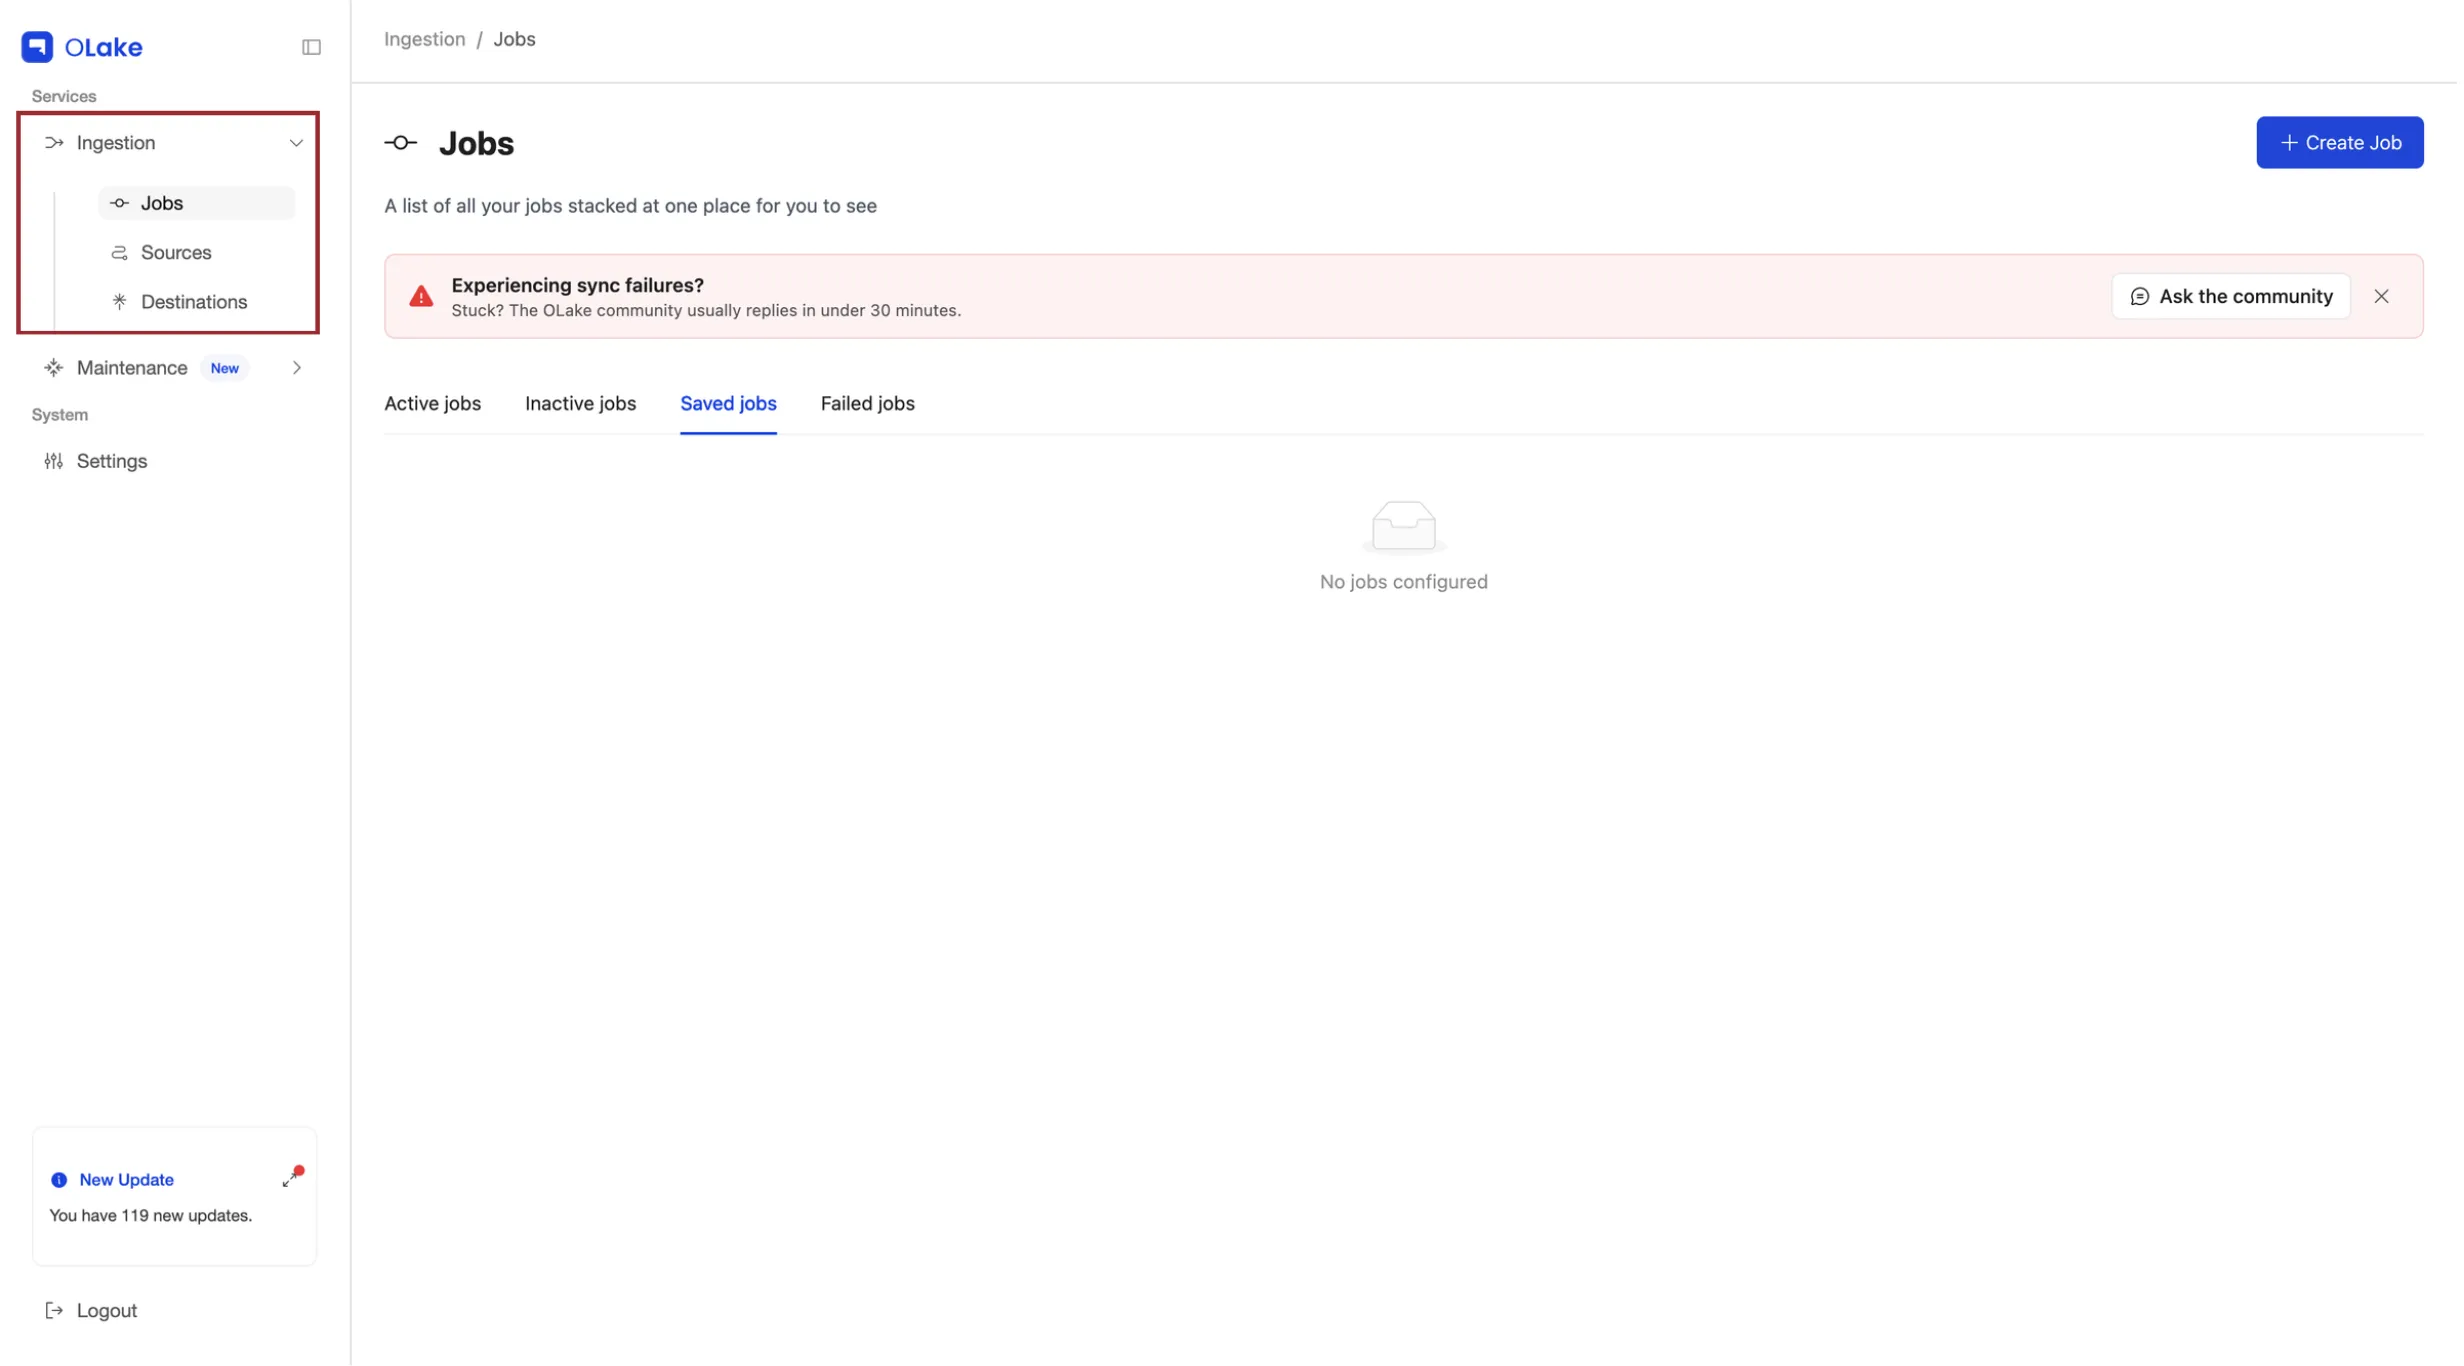
In the left menu, go to Ingestion > Jobs.
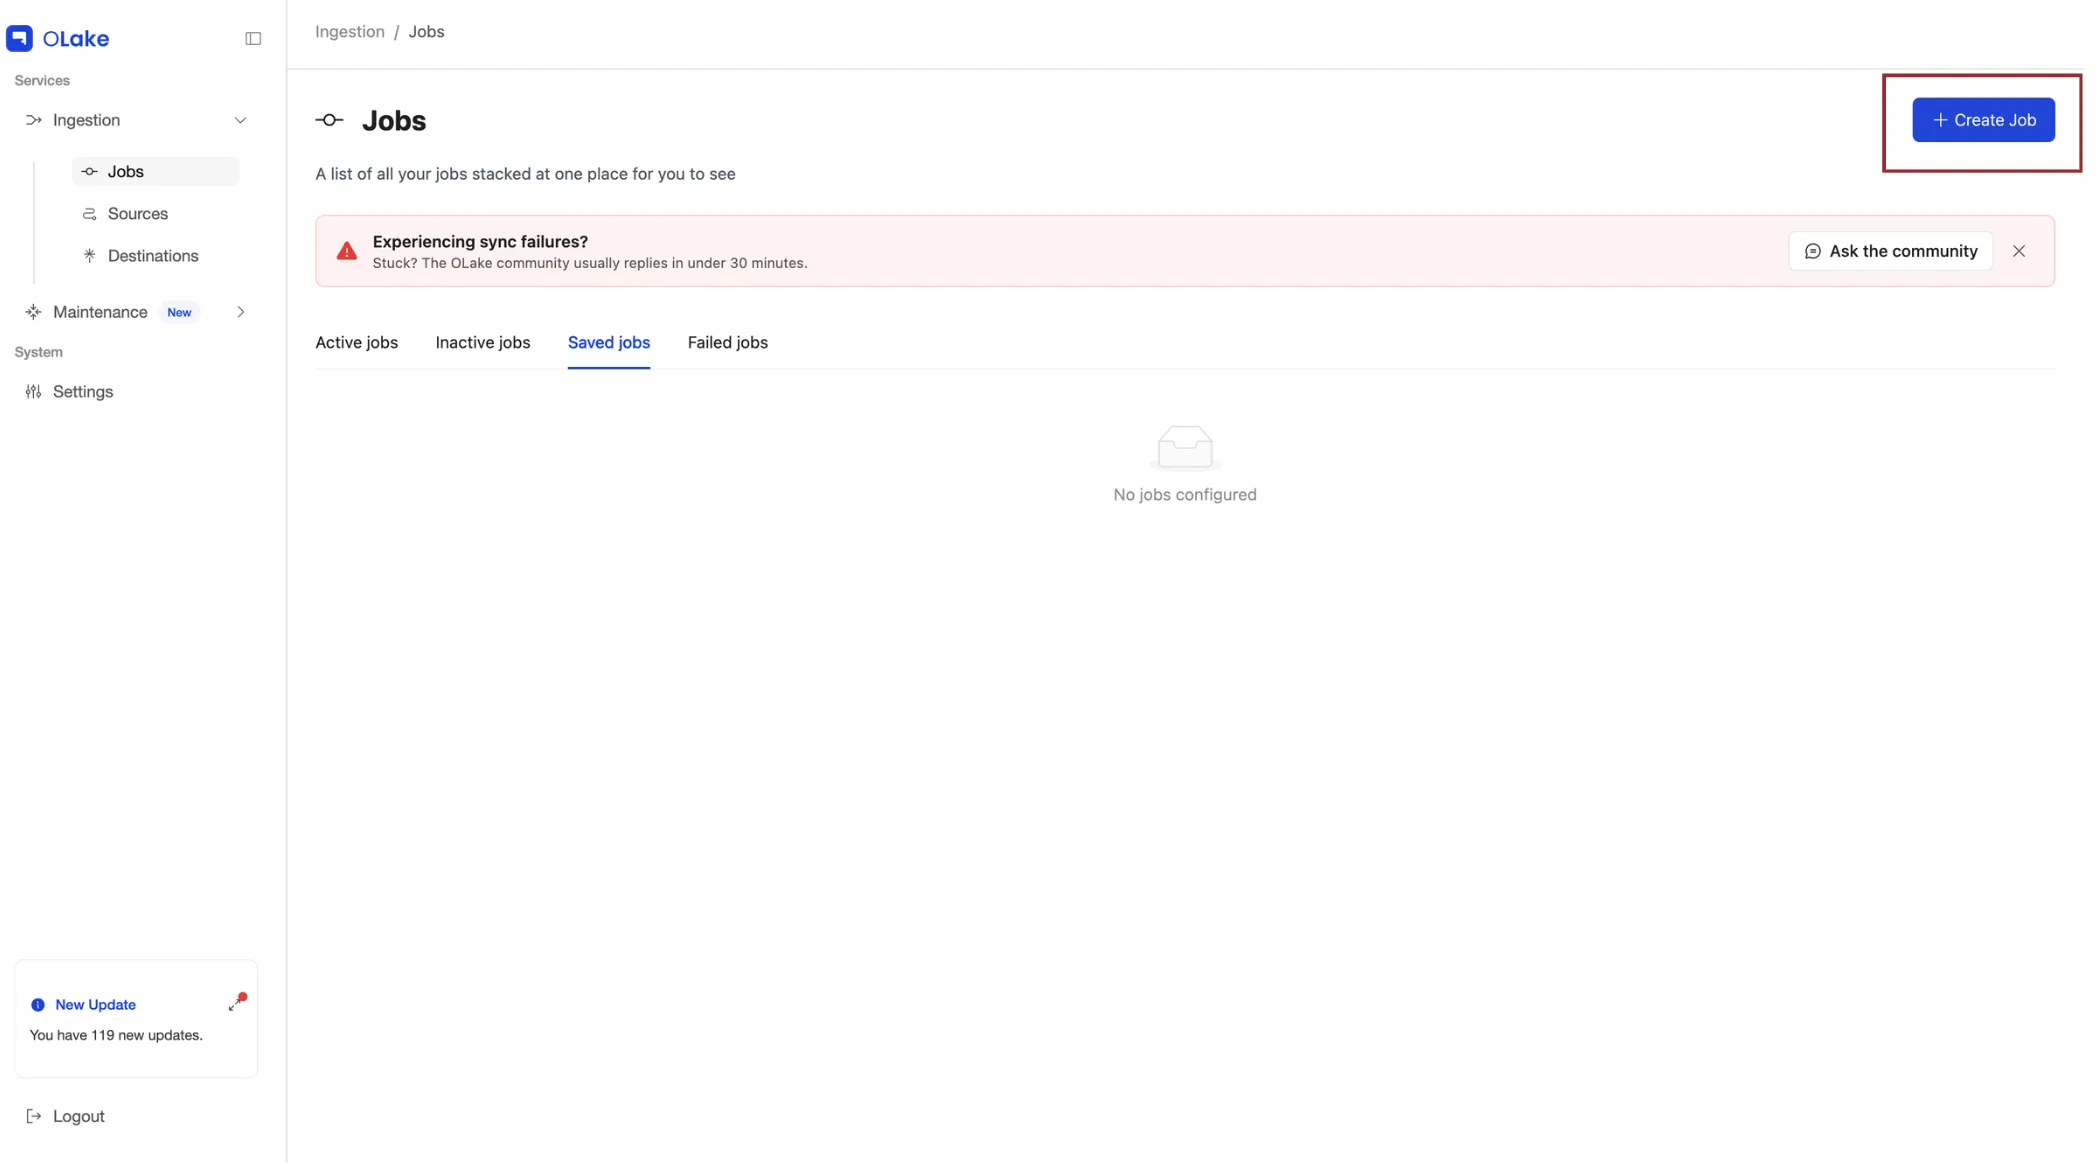
Click + Create Job at the top right.
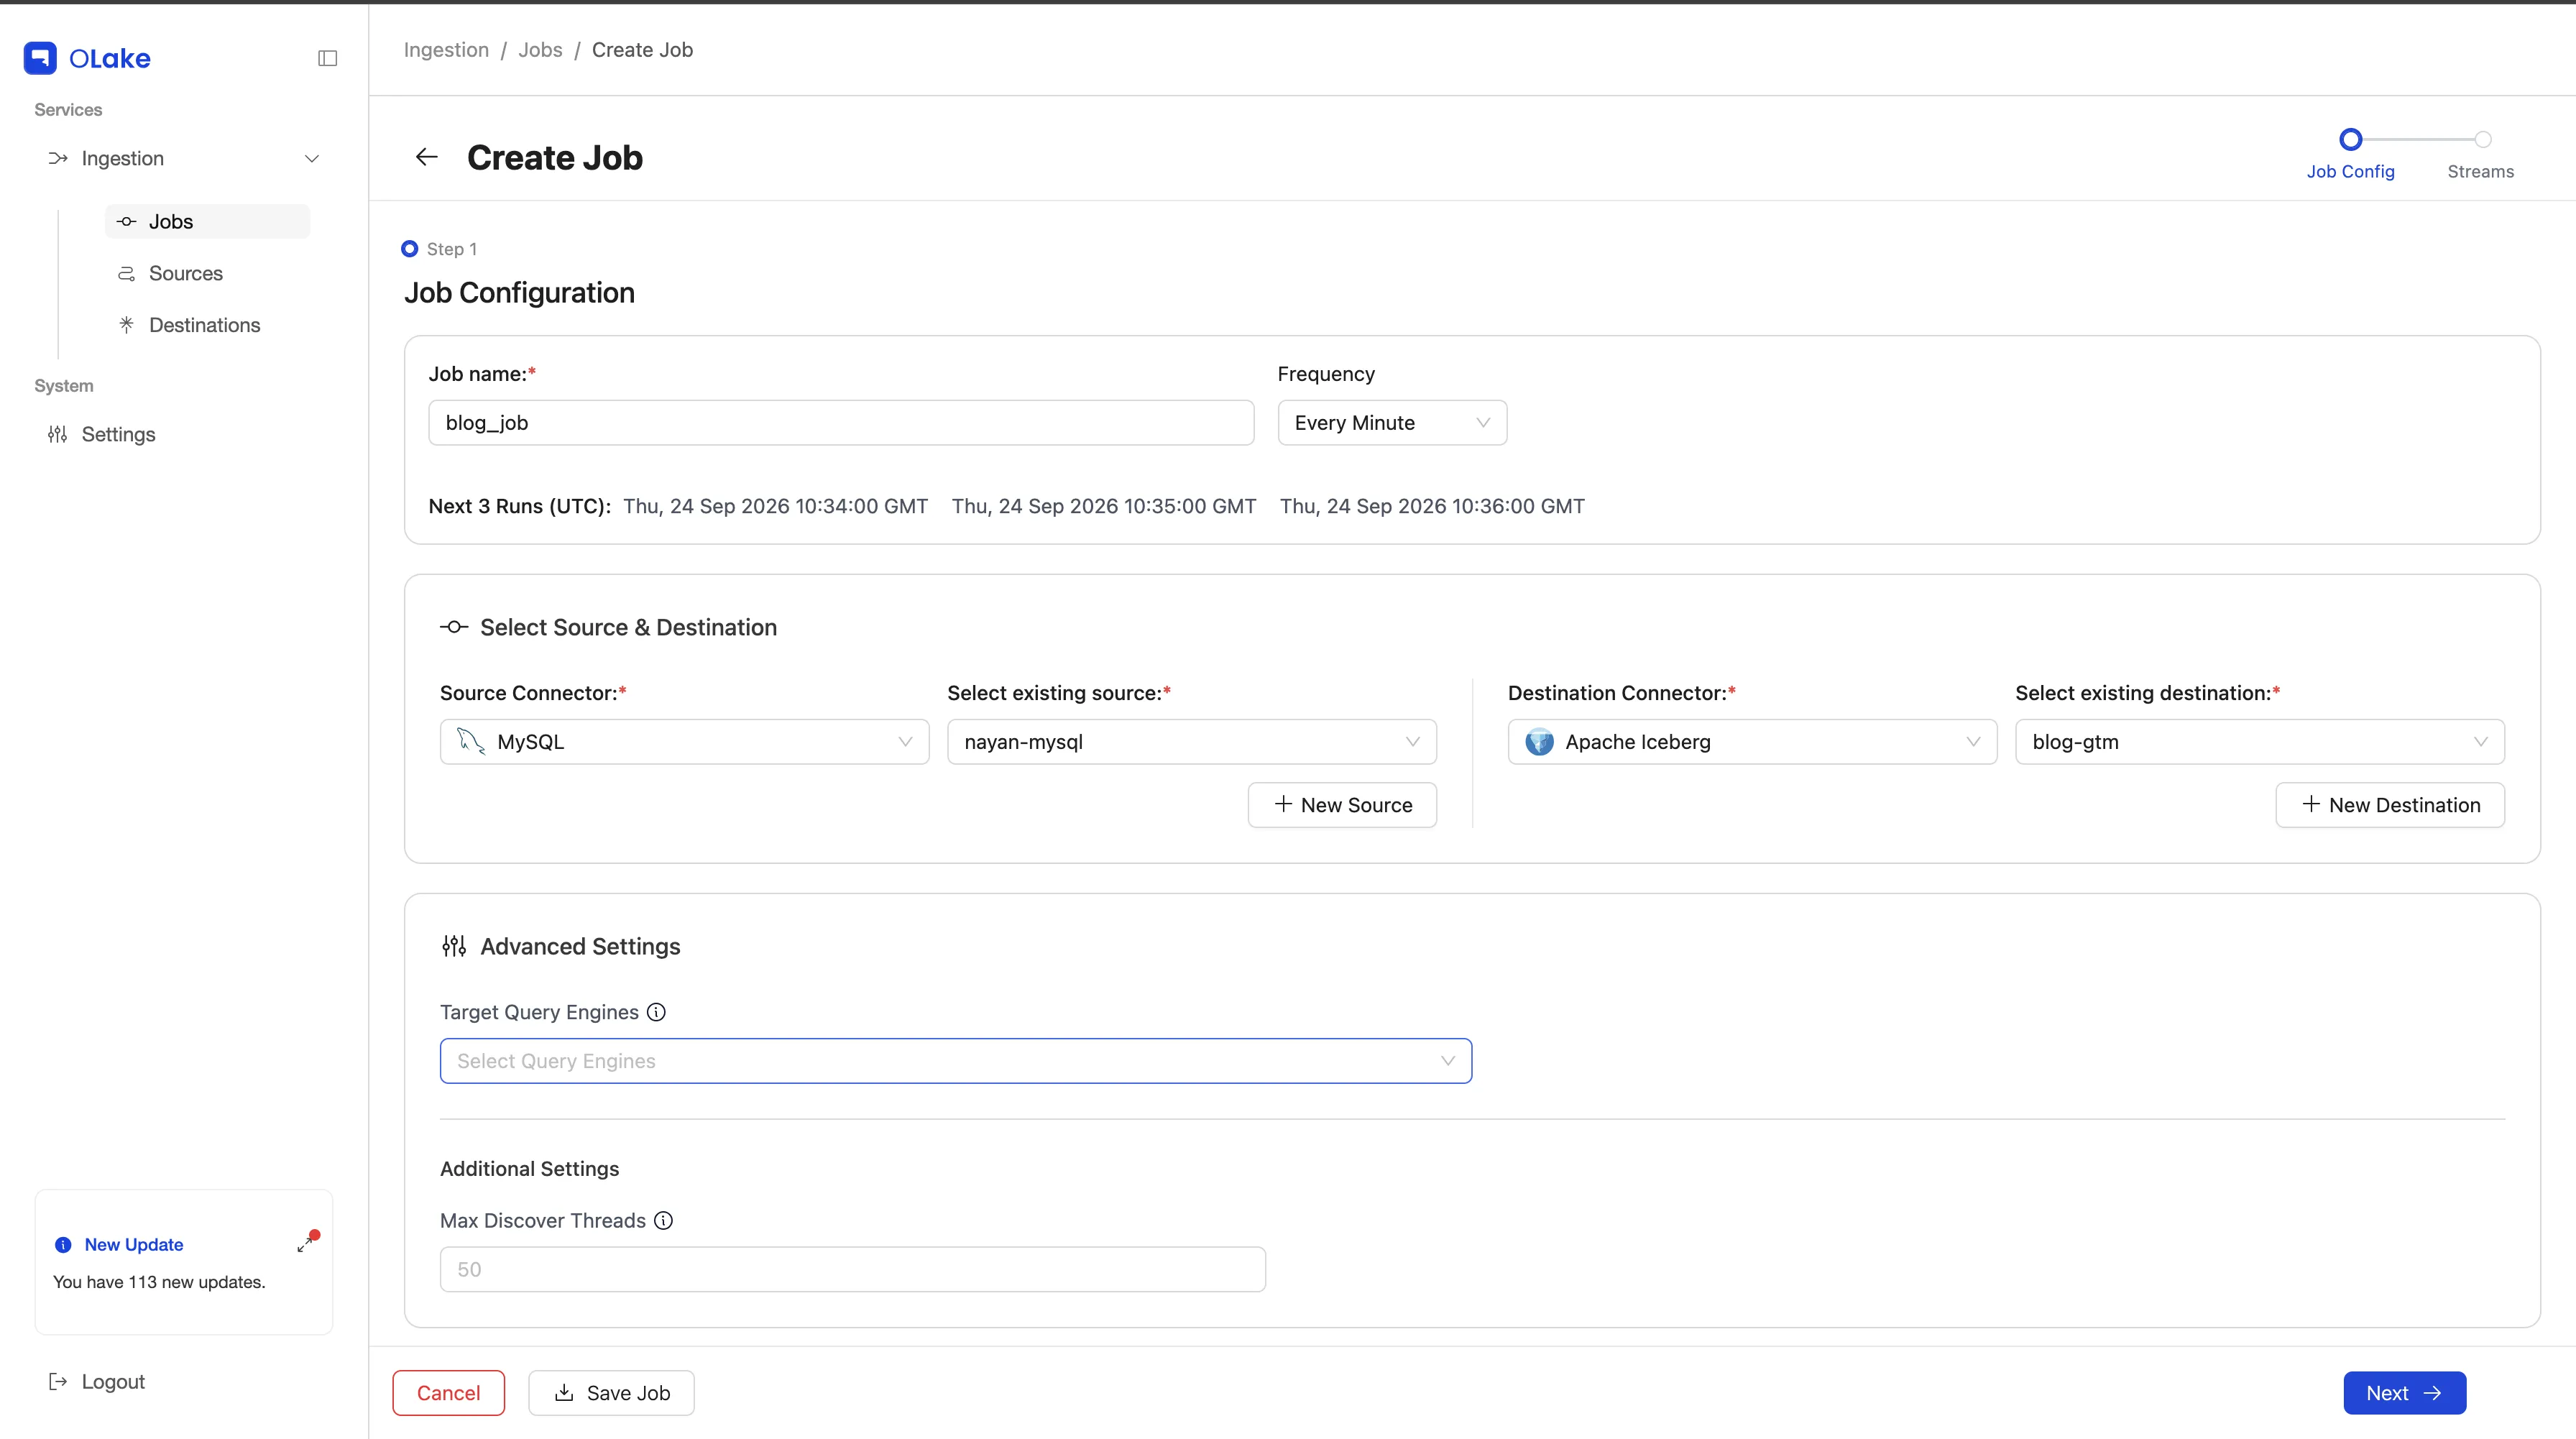
On the Job Configuration page, give your job a name (for example, blog_job) and choose how often it should run from the Frequency dropdown. Then pick MySQL as the source connector and select the source you created in Step 1, and do the same for the Iceberg destination.
Step 2a: Select Query Engine
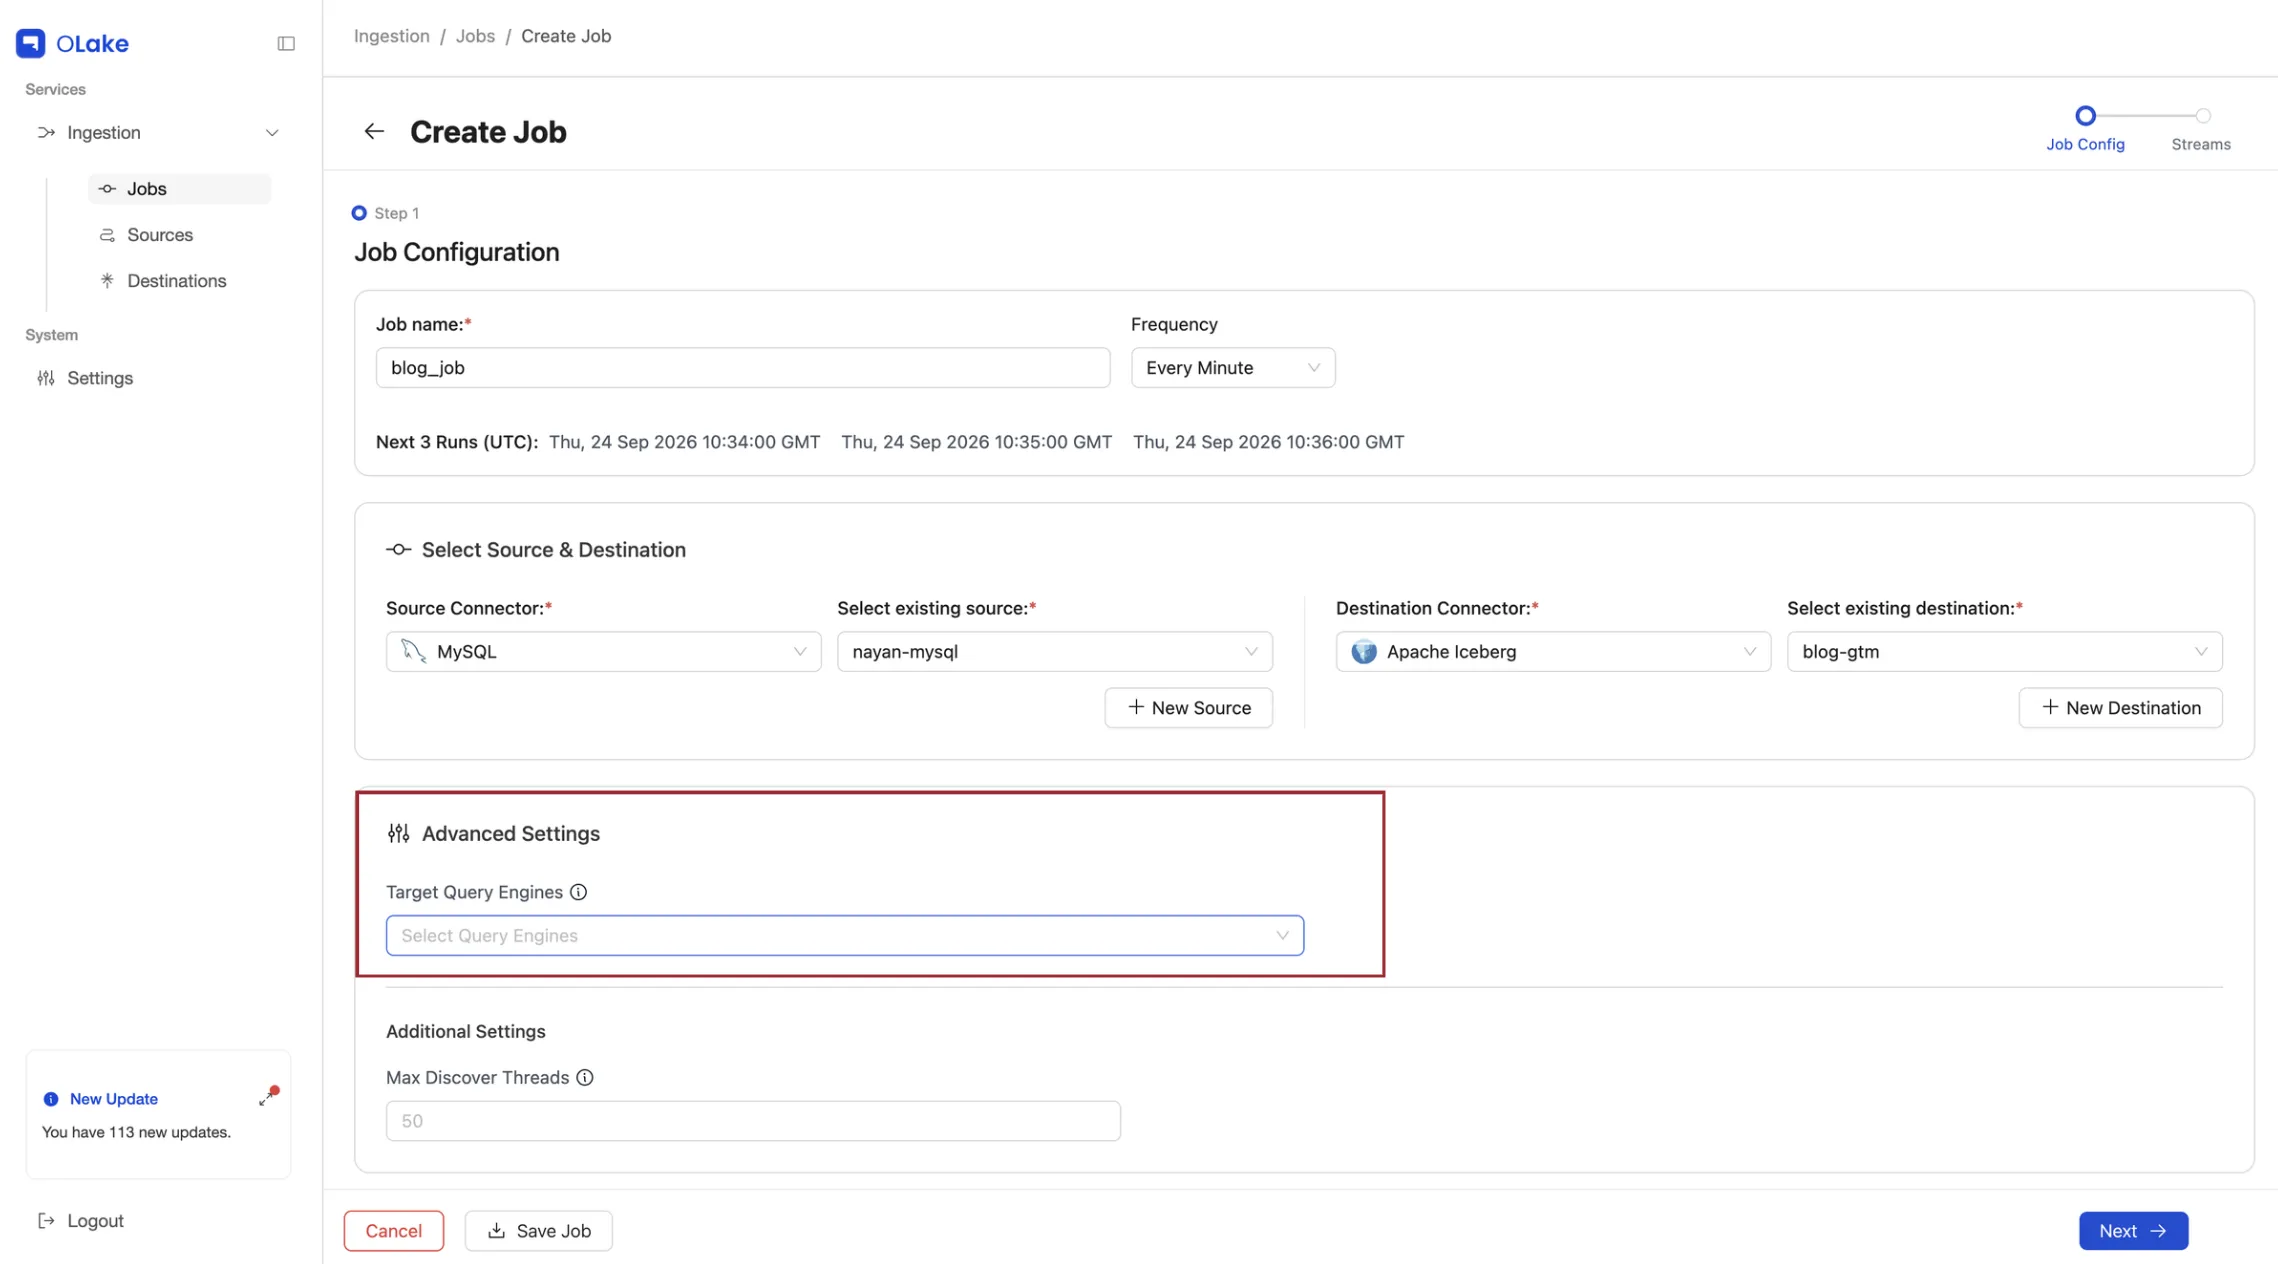
Under Advanced Settings, open the Target Query Engines dropdown and select ClickHouse. You can pick more than one engine, but this guide uses ClickHouse only.
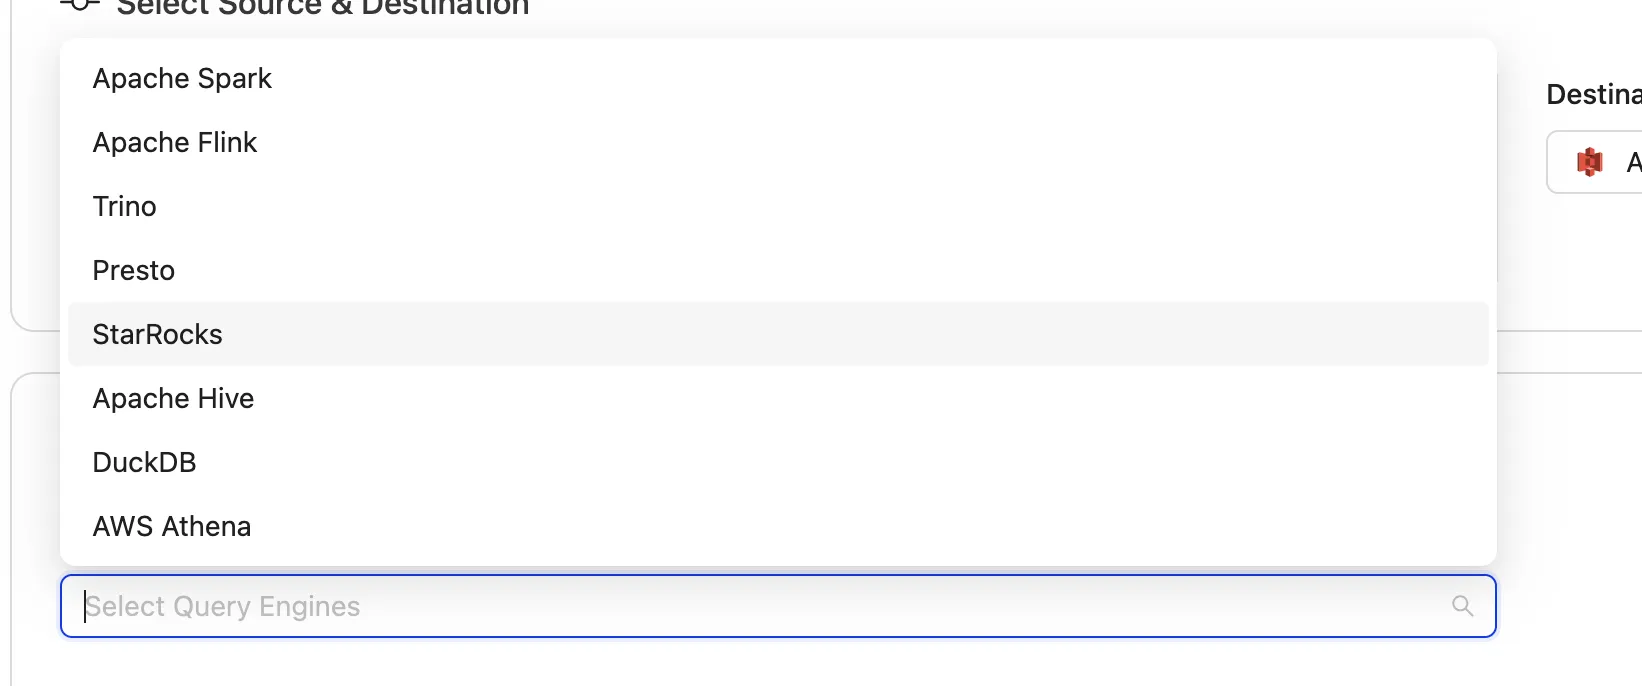
Click Next and you’ll be redirected to the Stream configuration page.
Step 3: Configure Streams
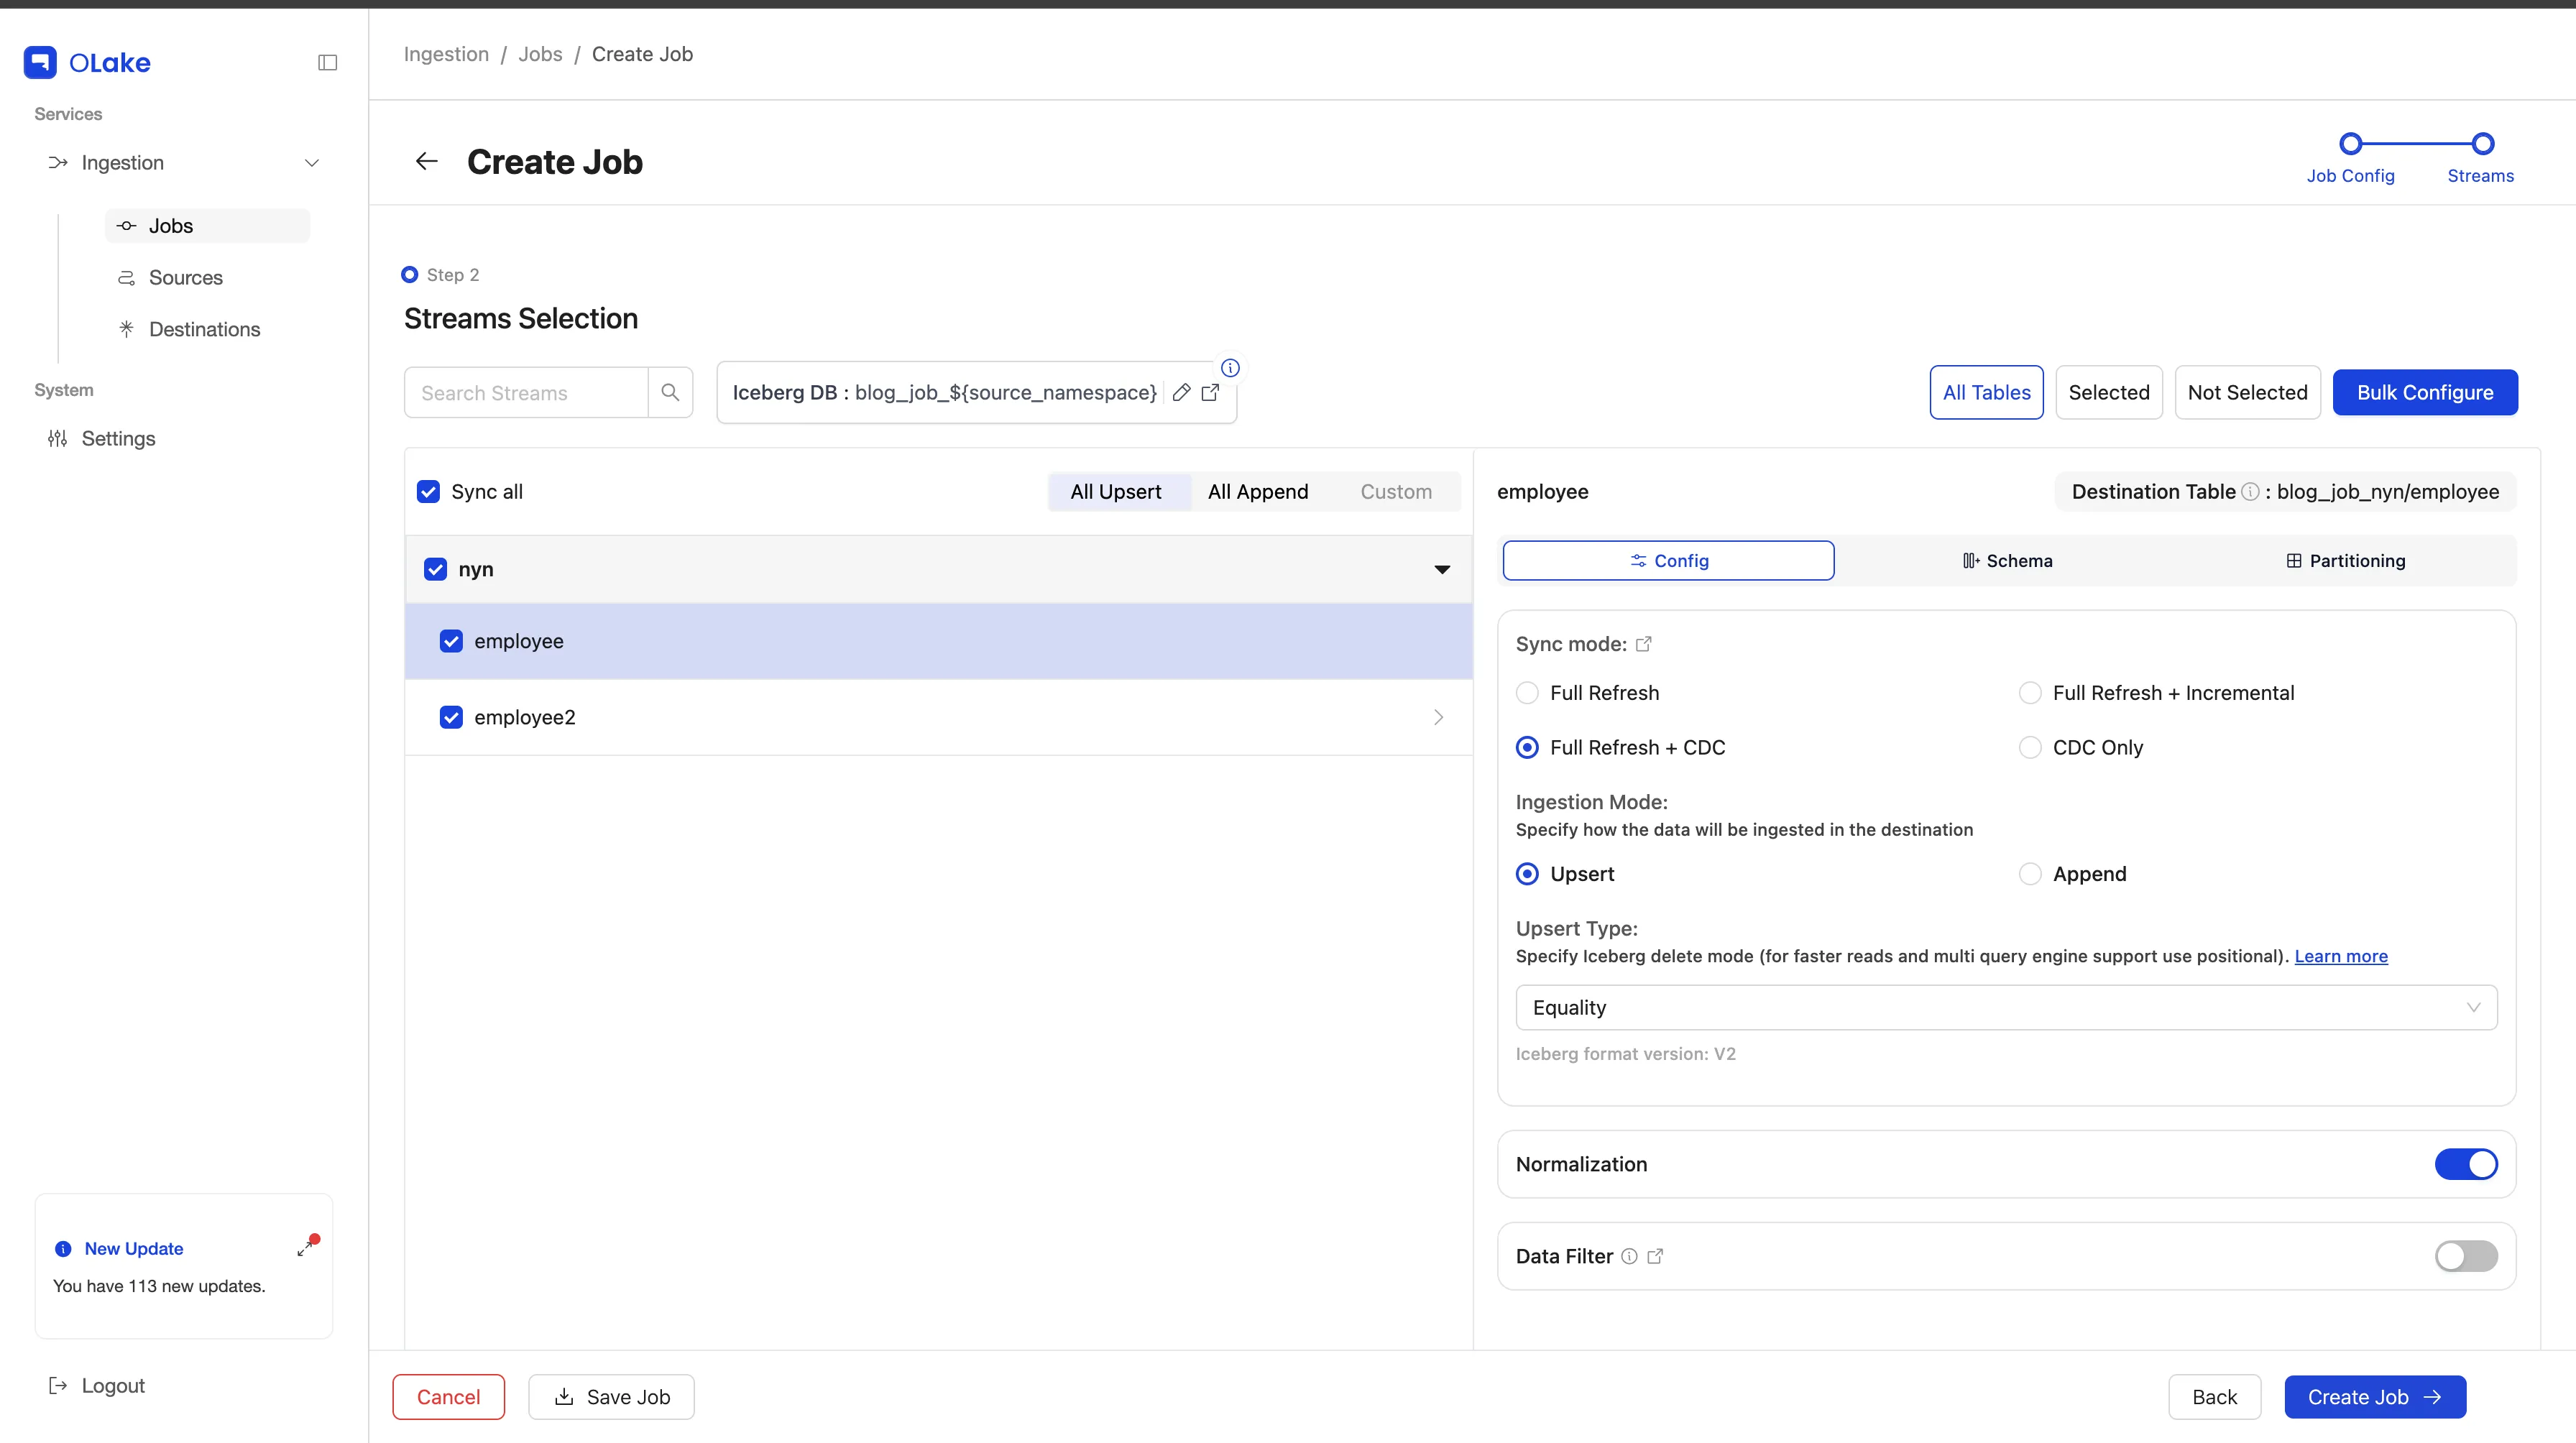
The Streams page lists every table in your MySQL database. Check the box next to each table you want to copy, or use Sync all to select everything. The Iceberg DB field at the top shows the database name your tables will land in, and you can click the edit icon to change it.
Click a table name to open its settings on the right. On the Config tab, you can:
- Pick a sync mode. Full Refresh + CDC copies all current rows first and then keeps copying new changes
- Choose an Ingestion Mode. Upsert updates existing rows when they change, while Append adds every change as a new row
- Turn on Normalization to store nested data as regular columns
The Schema tab shows the table's columns, and the Partitioning tab lets you group data by a column so queries run faster.
Step 3a: Specify Iceberg Delete Mode
When the ingestion mode is Upsert, you can choose which type of delete file OLake Go writes to Iceberg.
Open the Upsert Type dropdown and select the delete type you want: Equality, Positional, or Deletion.
Equality is by default selected for ClickHouse. You can change the delete mode to the one you prefer via the drop-down.

When you're done, click Create Job at the bottom right. A confirmation shows that your job was created, and clicking Jobs takes you back to the main Jobs page.
Step 4: Run the Sync
Your new job appears in the Active jobs tab. The Last Run status column shows whether each run is Running, Completed, or Failed.
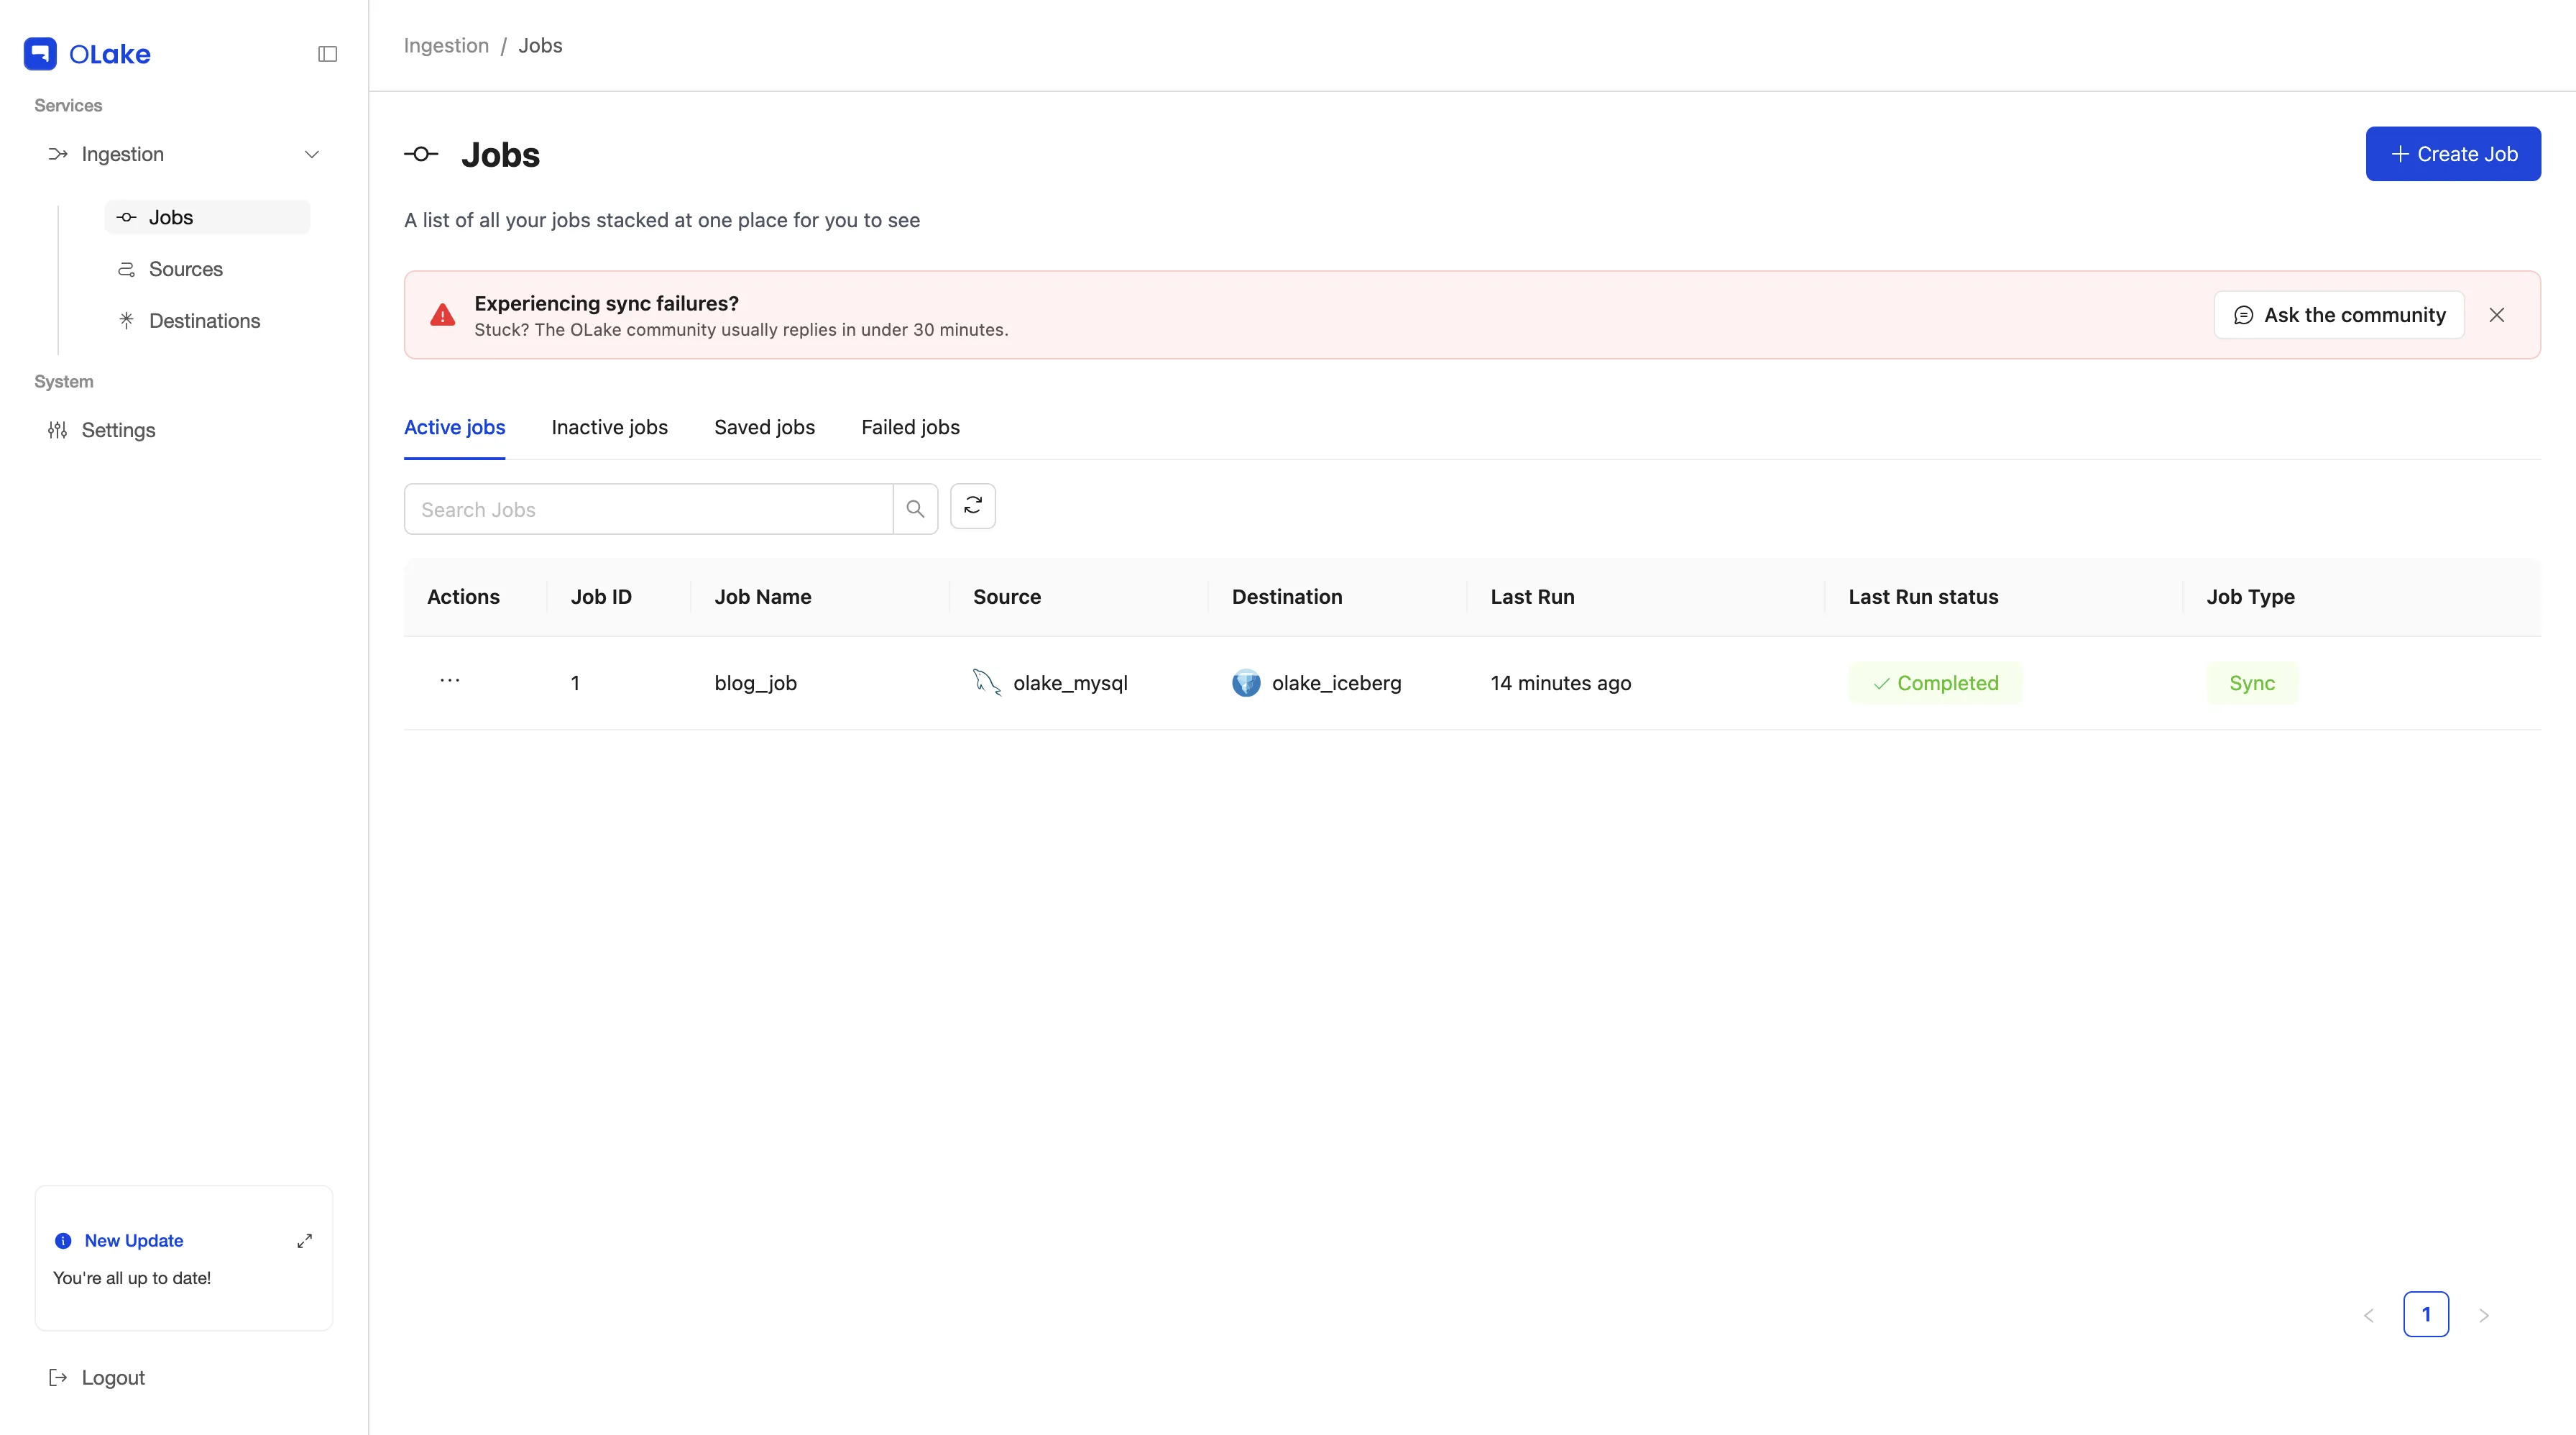
The job will run at its next scheduled time. To start it now, click the three dots in the Actions column next to your job and select Sync now.
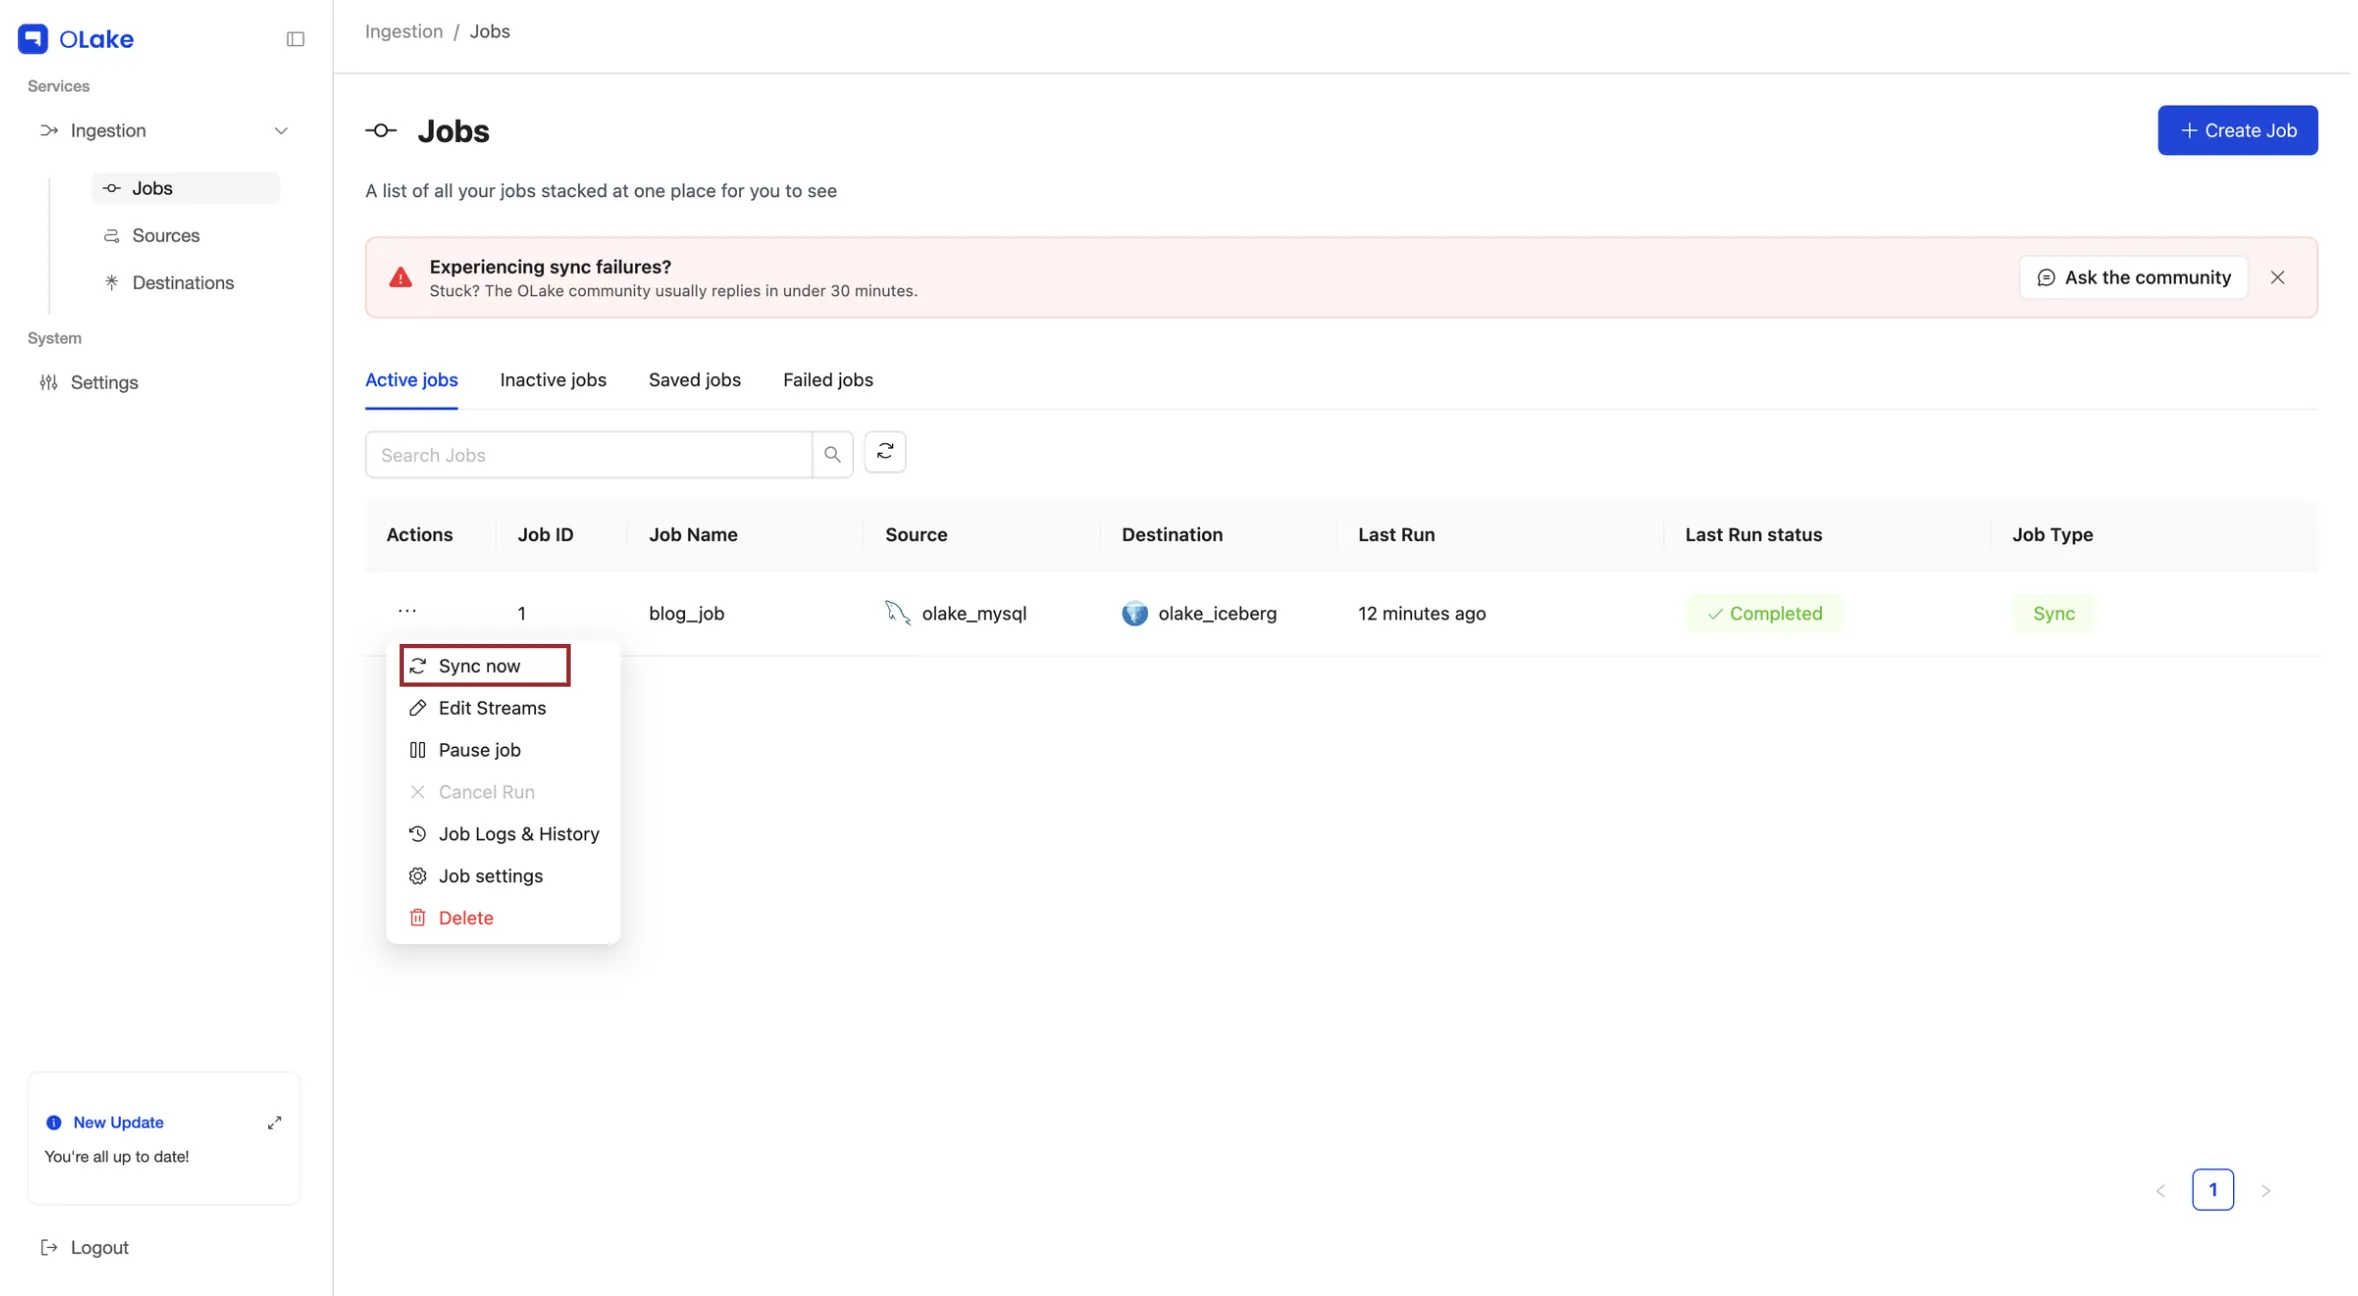
To see how each run went, under Actions, select Job Logs & History. This page lists every run with its start time, runtime, and status.
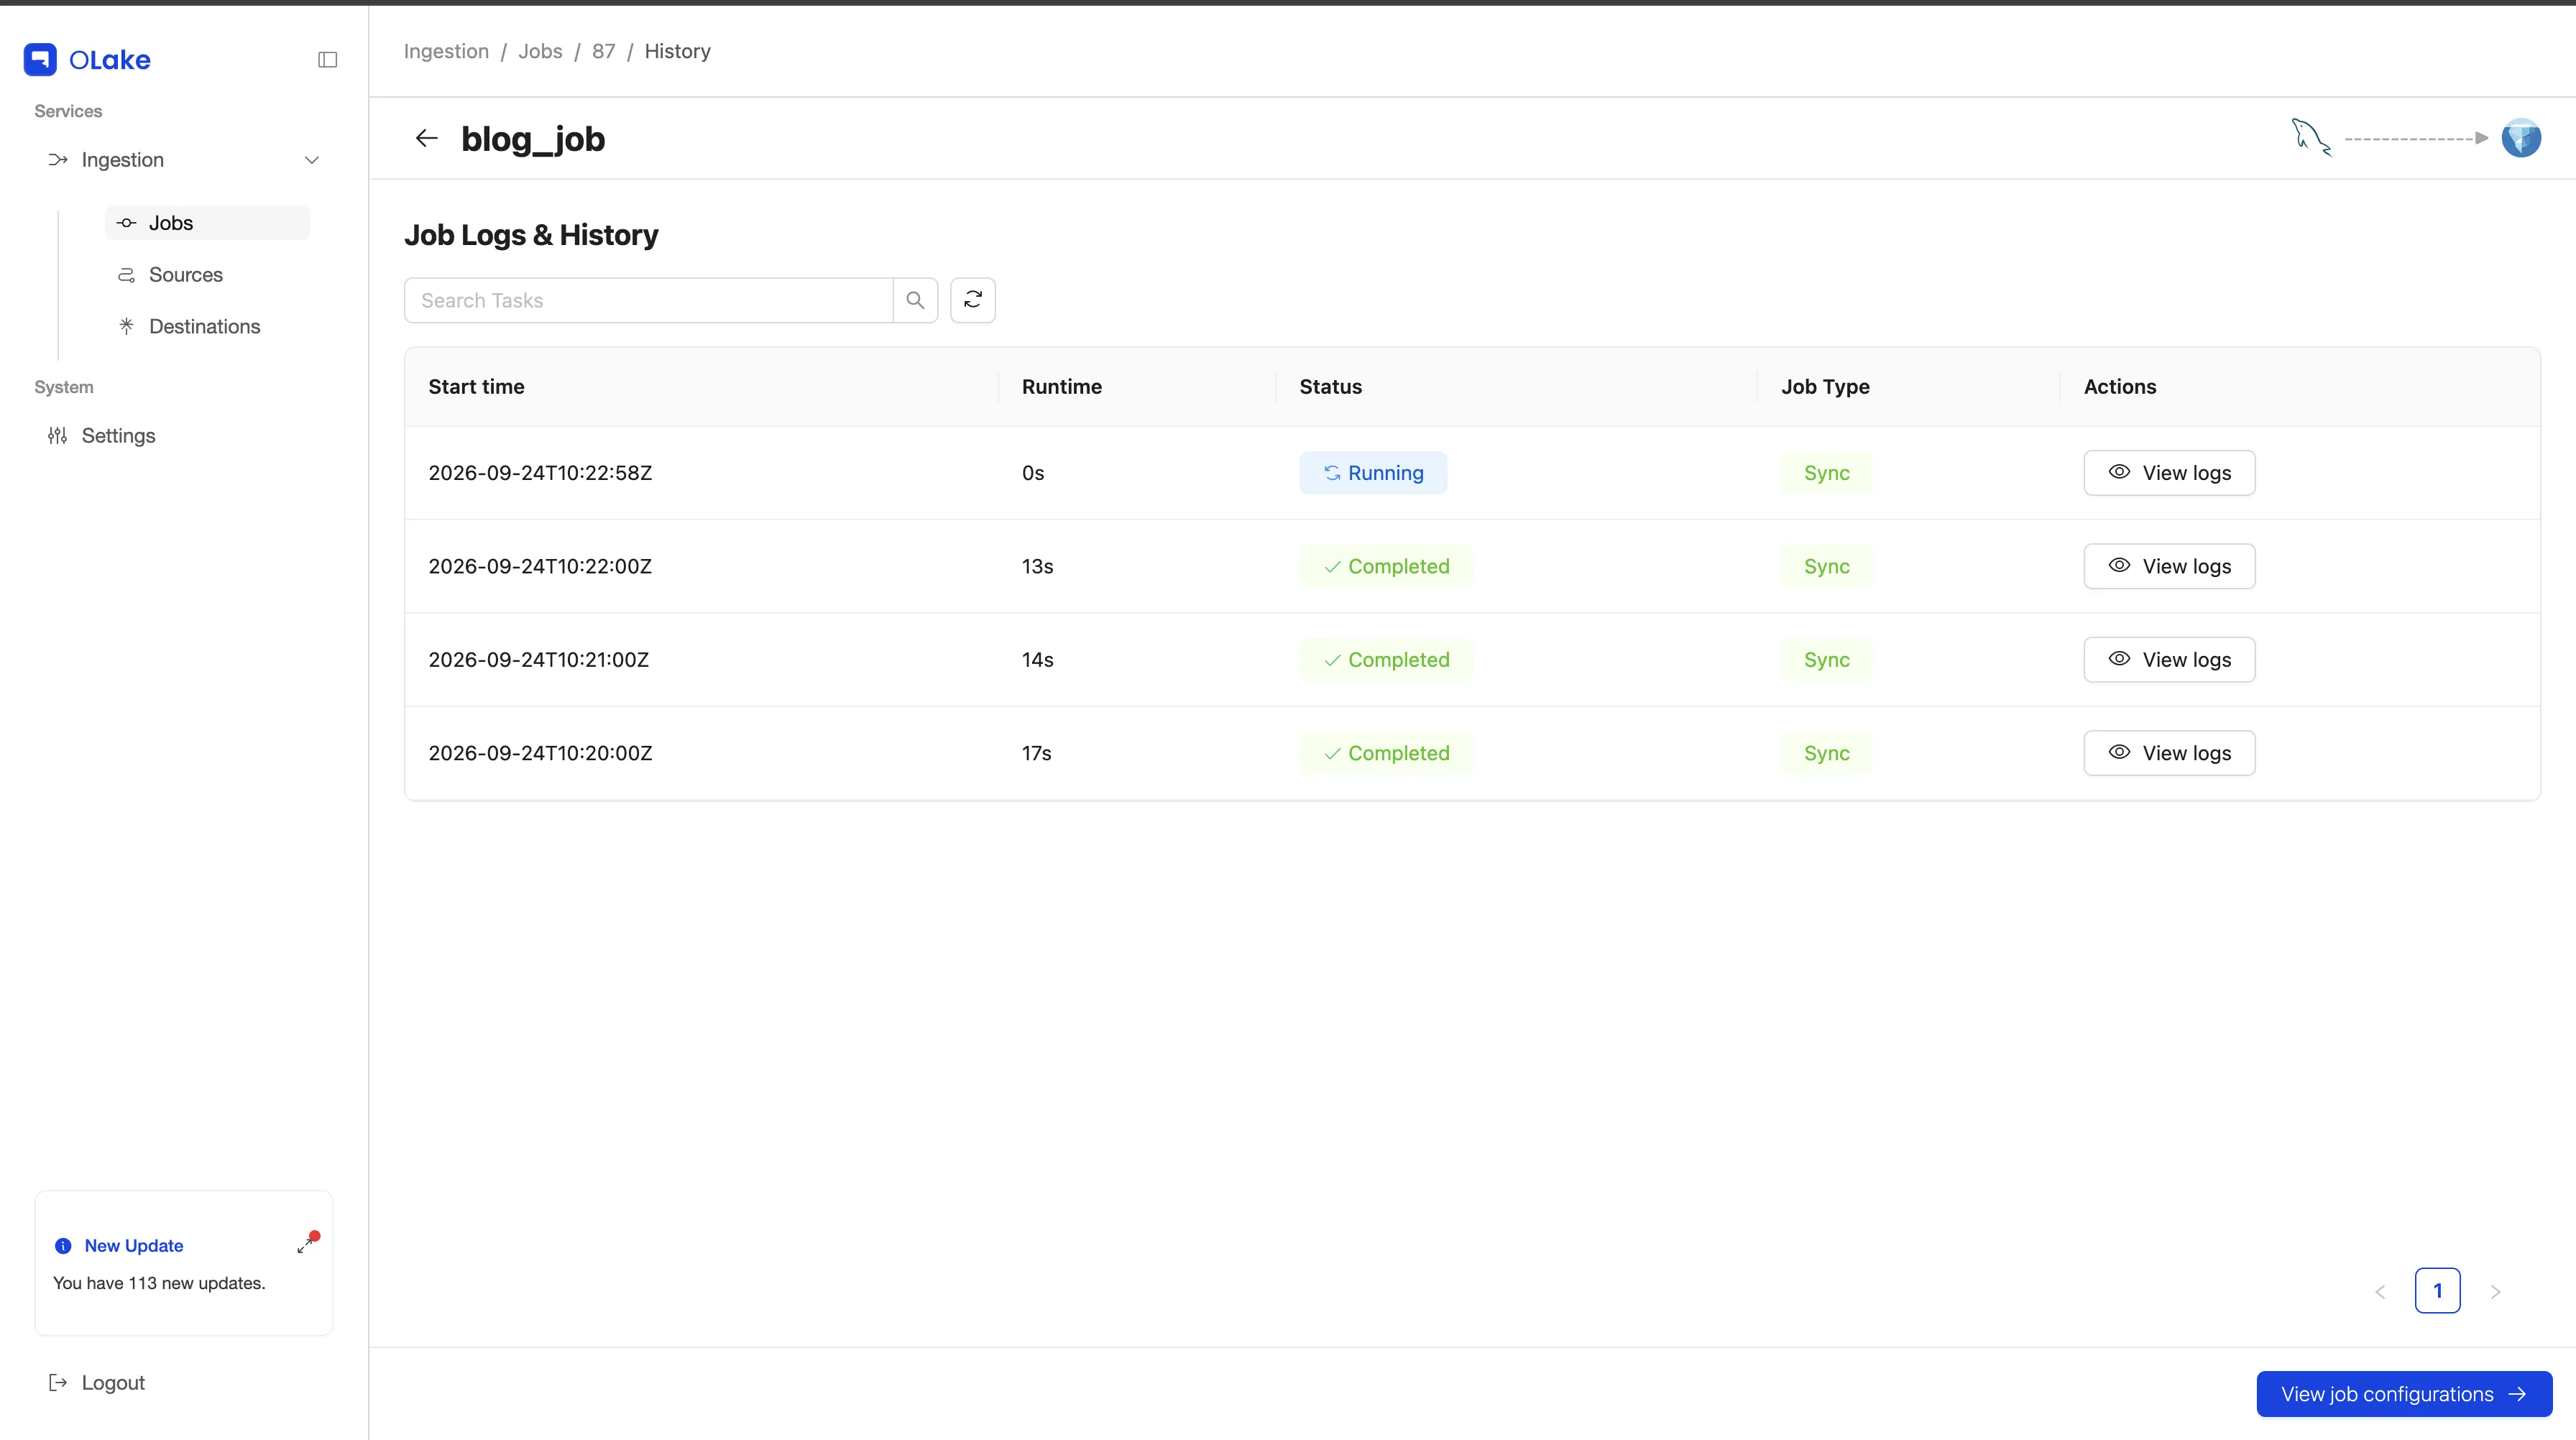
Click View logs next to any run to see its full log, including when MySQL CDC started, the total records read, and when the sync finished.
Once the sync finishes, the new Iceberg tables will be registered in your catalog and the data files will show up in your S3 bucket.
Step 5: Query with ClickHouse
Open the ClickHouse client and connect it to your AWS Glue catalog by creating a database with the DataLakeCatalog engine:
SET allow_experimental_database_glue_catalog = 1;

CREATE DATABASE <database-name>
ENGINE = DataLakeCatalog
SETTINGS
    catalog_type = 'glue',
    region = '<region>',
    aws_access_key_id = '<access-key>',
    aws_secret_access_key = '<secret-key>';
See the tables OLake Go created:
SELECT * FROM <database-name>.`<namespace>.<table>` LIMIT 10;
Conclusion
MySQL keeps serving your application, OLake Go keeps its changes flowing into Iceberg on the schedule you set, and ClickHouse runs fast analytical queries on those tables without touching the production database or keeping a second, ClickHouse-only copy of the data. Since the tables are standard Iceberg, you aren't locked into ClickHouse either: Spark, Trino, DuckDB and other engines can read the same data through the catalog. See the full list in the compatibility guide. Have questions? Join the OLake Slack community.