Get Started With First Job!
This guide is for end-users who want to replicate data between the various sources and destinations that OLake supports. Using the OLake UI, you can configure a source, set up a destination, and create a job to move data between them.
By the end of this tutorial, you’ll have a complete replication workflow running in OLake.
Prerequisites
Follow the Quickstart Setup Guide to ensure the OLake UI is running at localhost:8000
What is a Job?
A job in OLake is a pipeline that defines how data should be synchronized from a source (where your data comes from) to a destination (where your data goes).
Sources and destinations can be:
- New - configured during job creation.
- Existing - already set up and reused across multiple jobs.
Two ways to create a Job
1. Job-first workflow:
Start from the Jobs page and set up everything in one flow.
- Go to Jobs in the left menu and click Create Job.
- Configure job name & schedule
- Configure the source.
- Configure the destination.
- Configure streams and save.
2. Resource-first workflow:
Set up your source and destination first, then link them in a job.
- Create a source from the Sources page.
- Create a destination from the Destinations page.
- Go to Jobs → Create Job, and Configure job name & schedule
- select the existing source and destination.
- Configure streams and save.
The two methods achieve the same result. Choose Job-first if you want a guided setup in one go. Choose Resource-first if your source and destination are already configured, or if you prefer to prepare them in advance.
Tutorial: Creating a Job
In this guide, we'll use the Job-first workflow to set up a job from configuring the source and destination to running it. If you prefer video, check out our video walkthrough.
First things first, every job needs a source and a destination before it can run. For this demonstration, we'll use Postgres as the source and Apache Iceberg with Glue Catalog as the destination.
Let's get started!
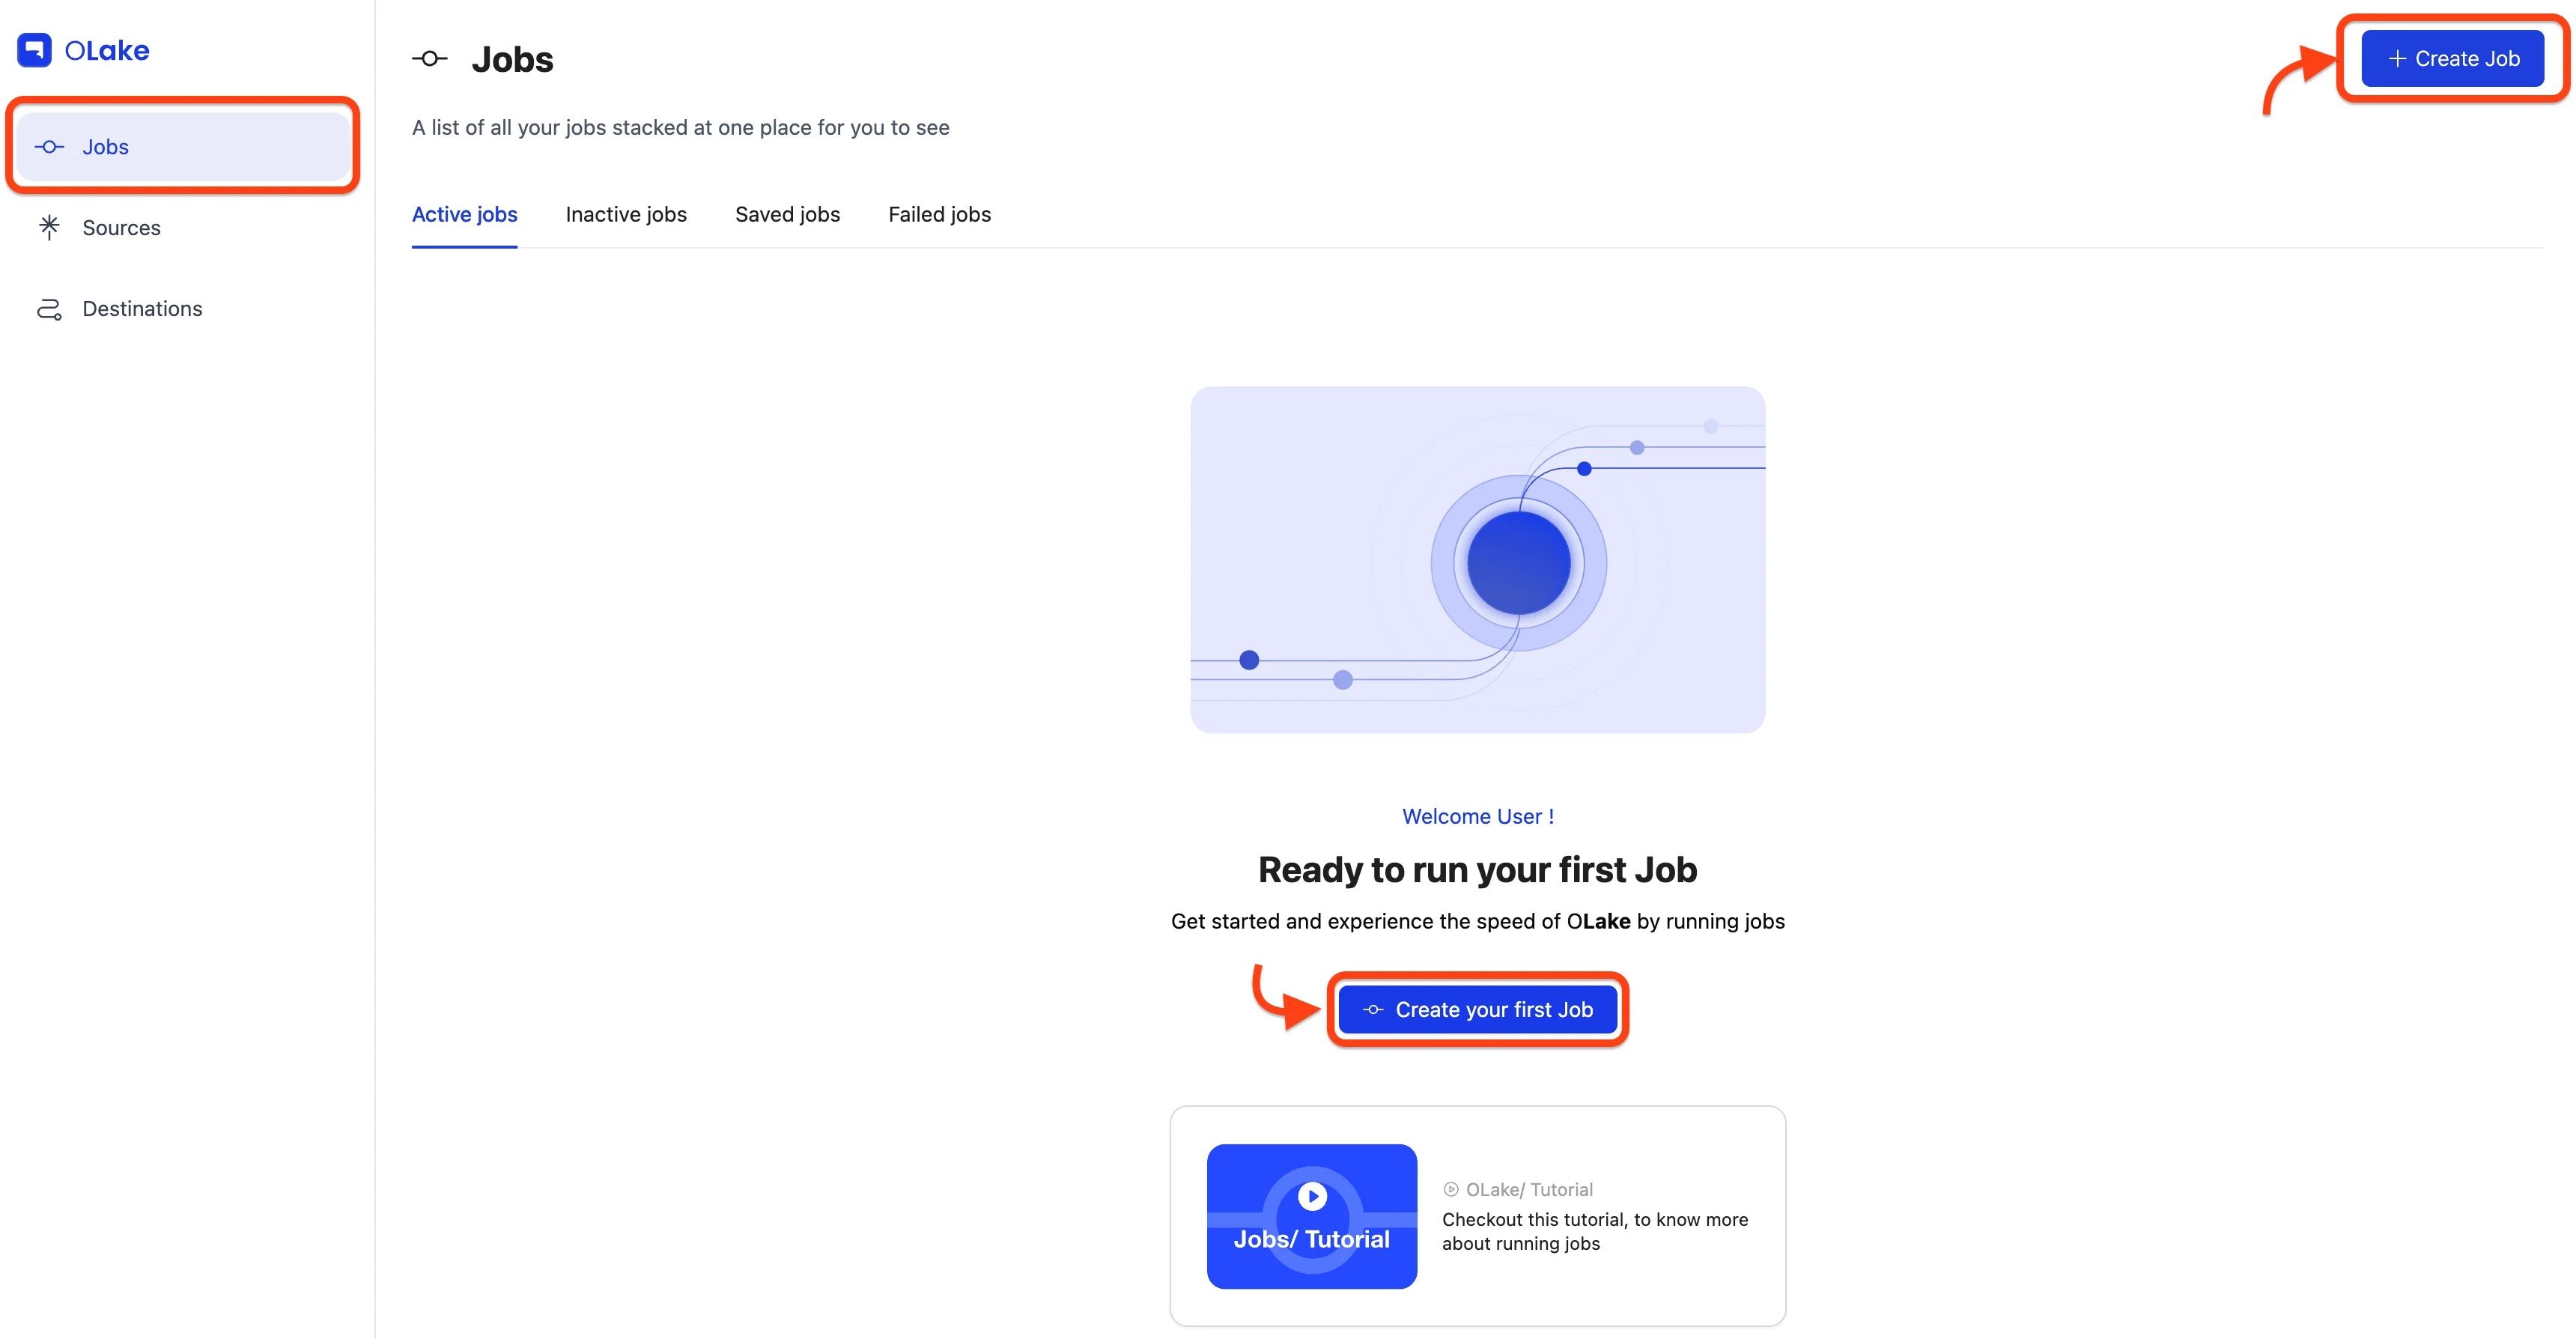
1. Create a New Job
Navigate to Jobs section and select + Create Job button in the top right corner. This opens the Job creation wizard, starting with the Configure Job Name & Schedule step.
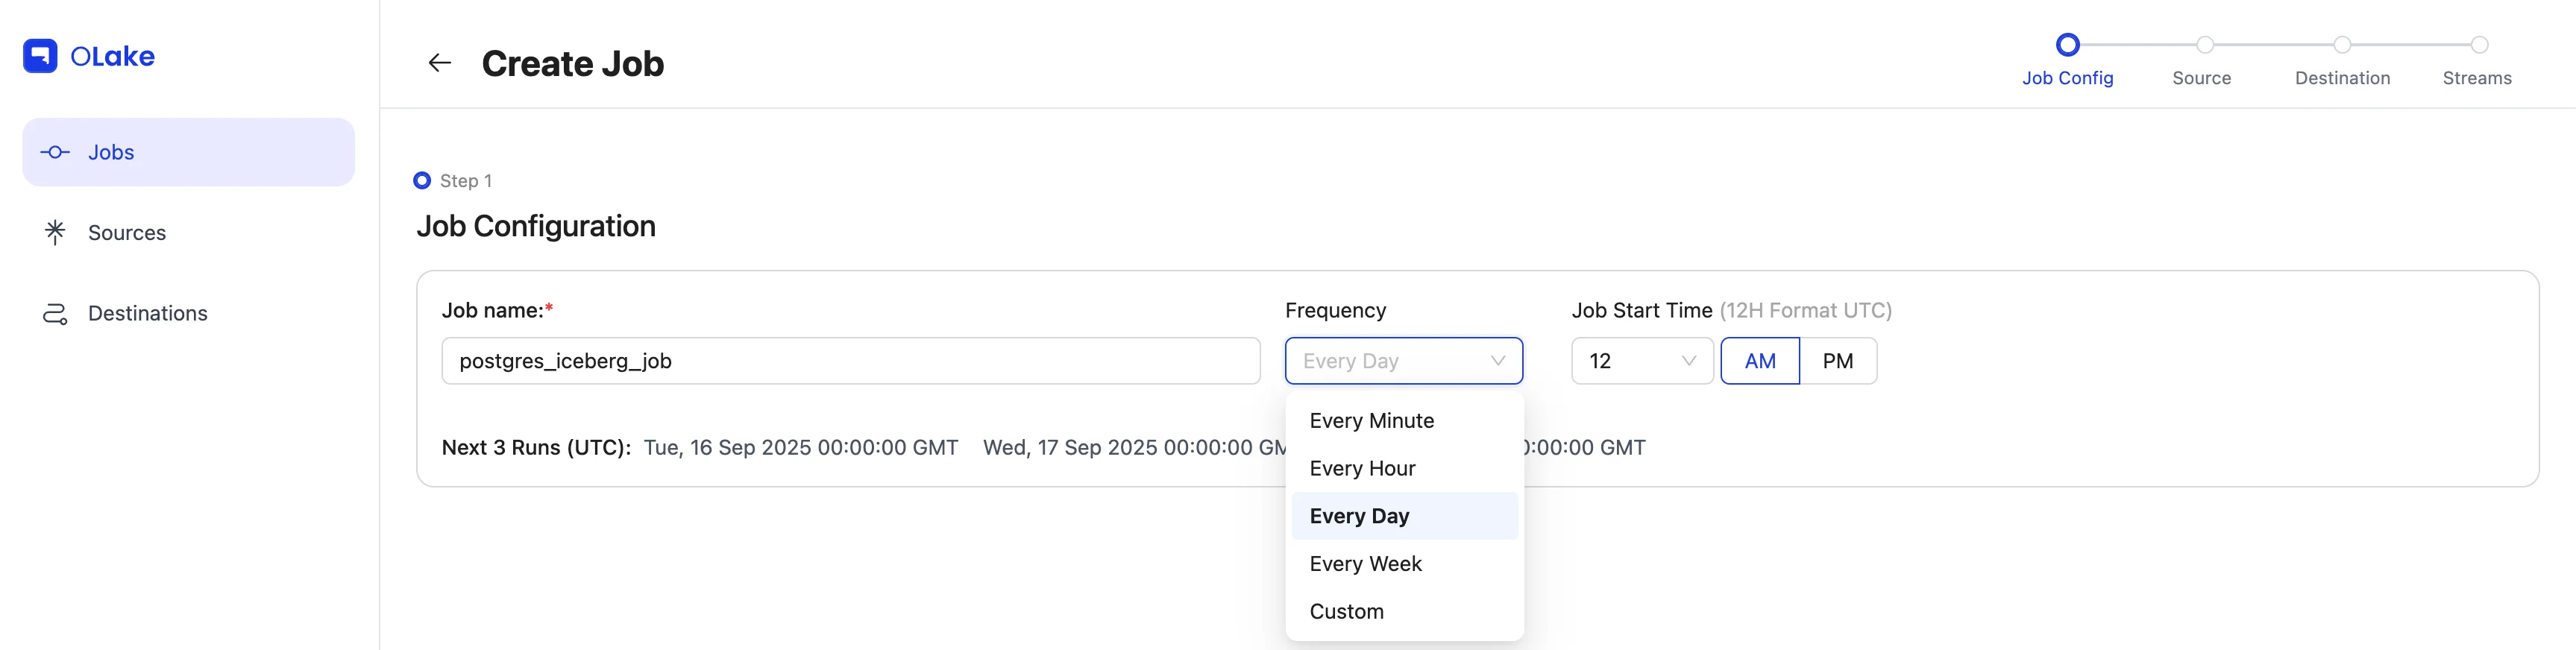
2. Configure Job Name & Schedule
Give your job a descriptive name. For this guide, set the Frequency dropdown to Every Day and choose 12:00 AM as the Time.
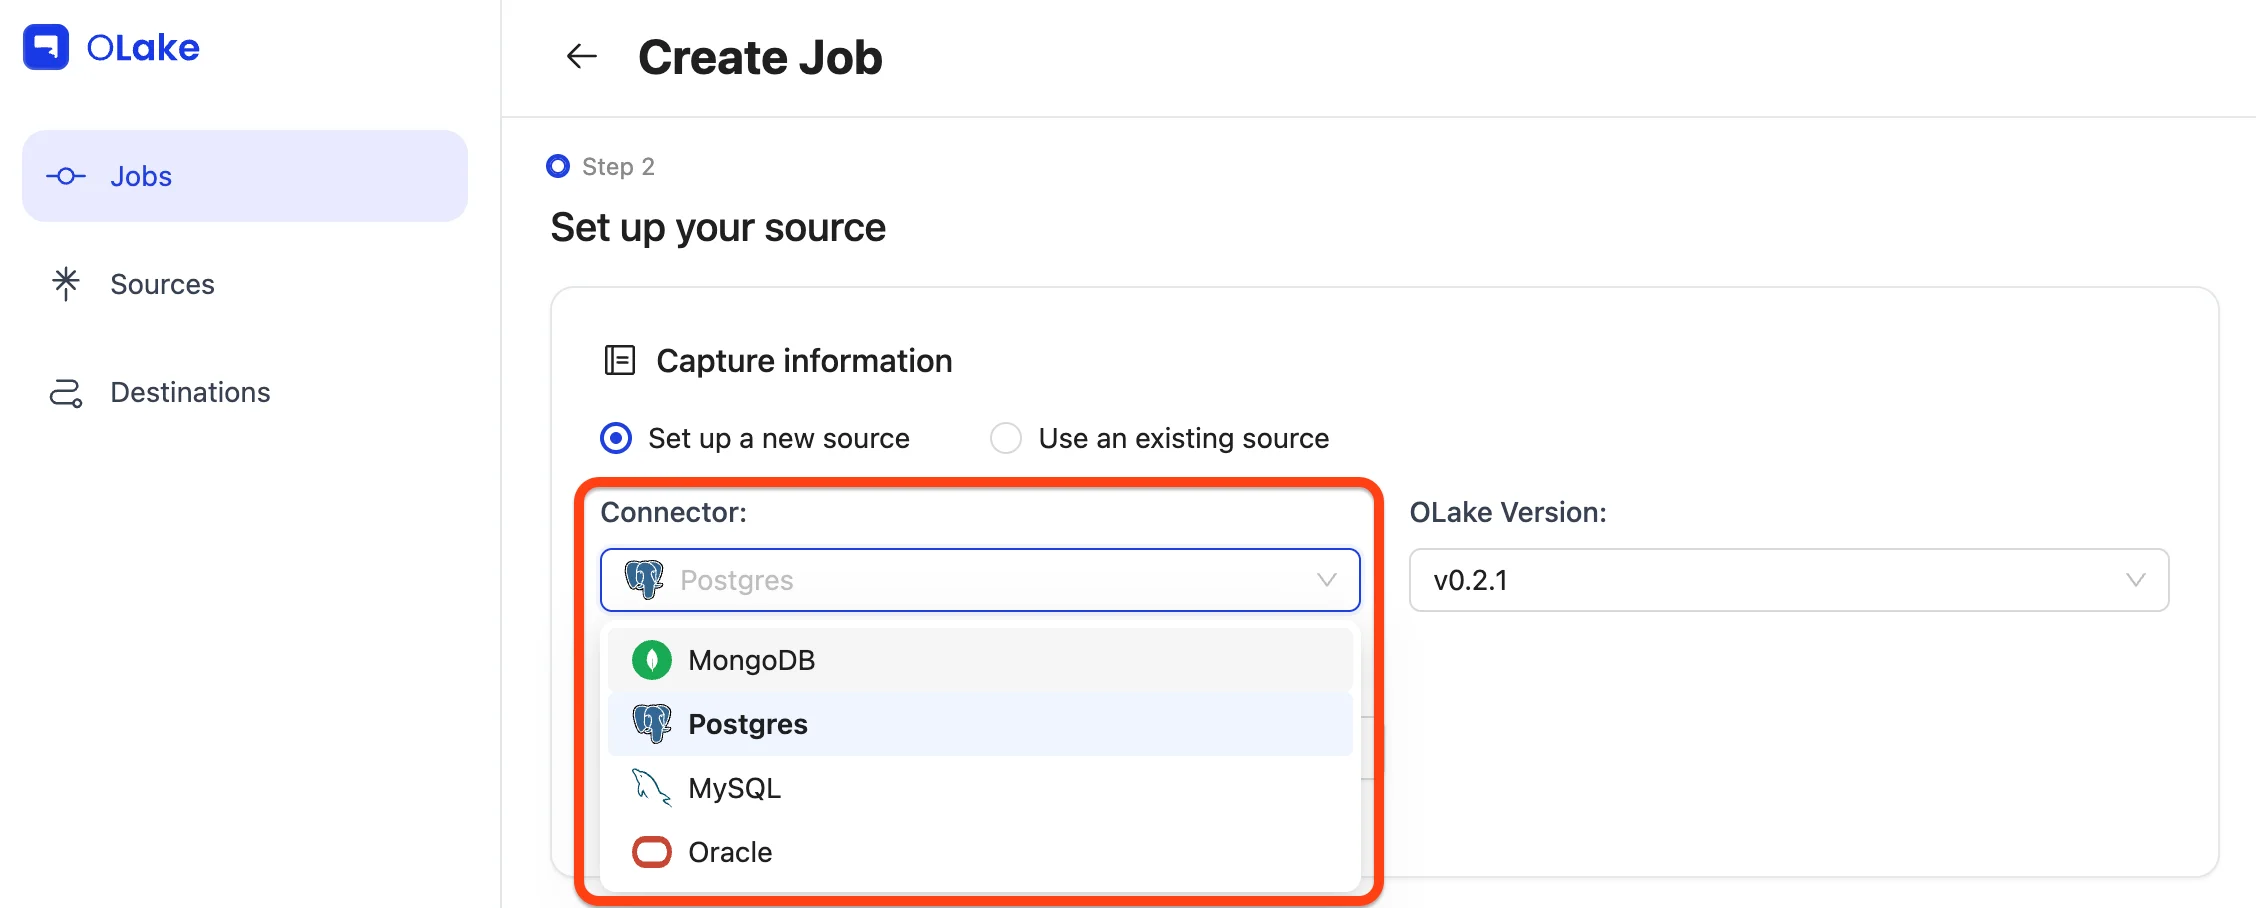
3. Configure Source
Since we're following the Job-first workflow, select the Set up a new source option.
For this guide, choose Postgres from the connector dropdown, and keep the OLake version set to the latest stable version.
Give your source a descriptive name, then fill in the required Postgres connection details in the Endpoint Config form.
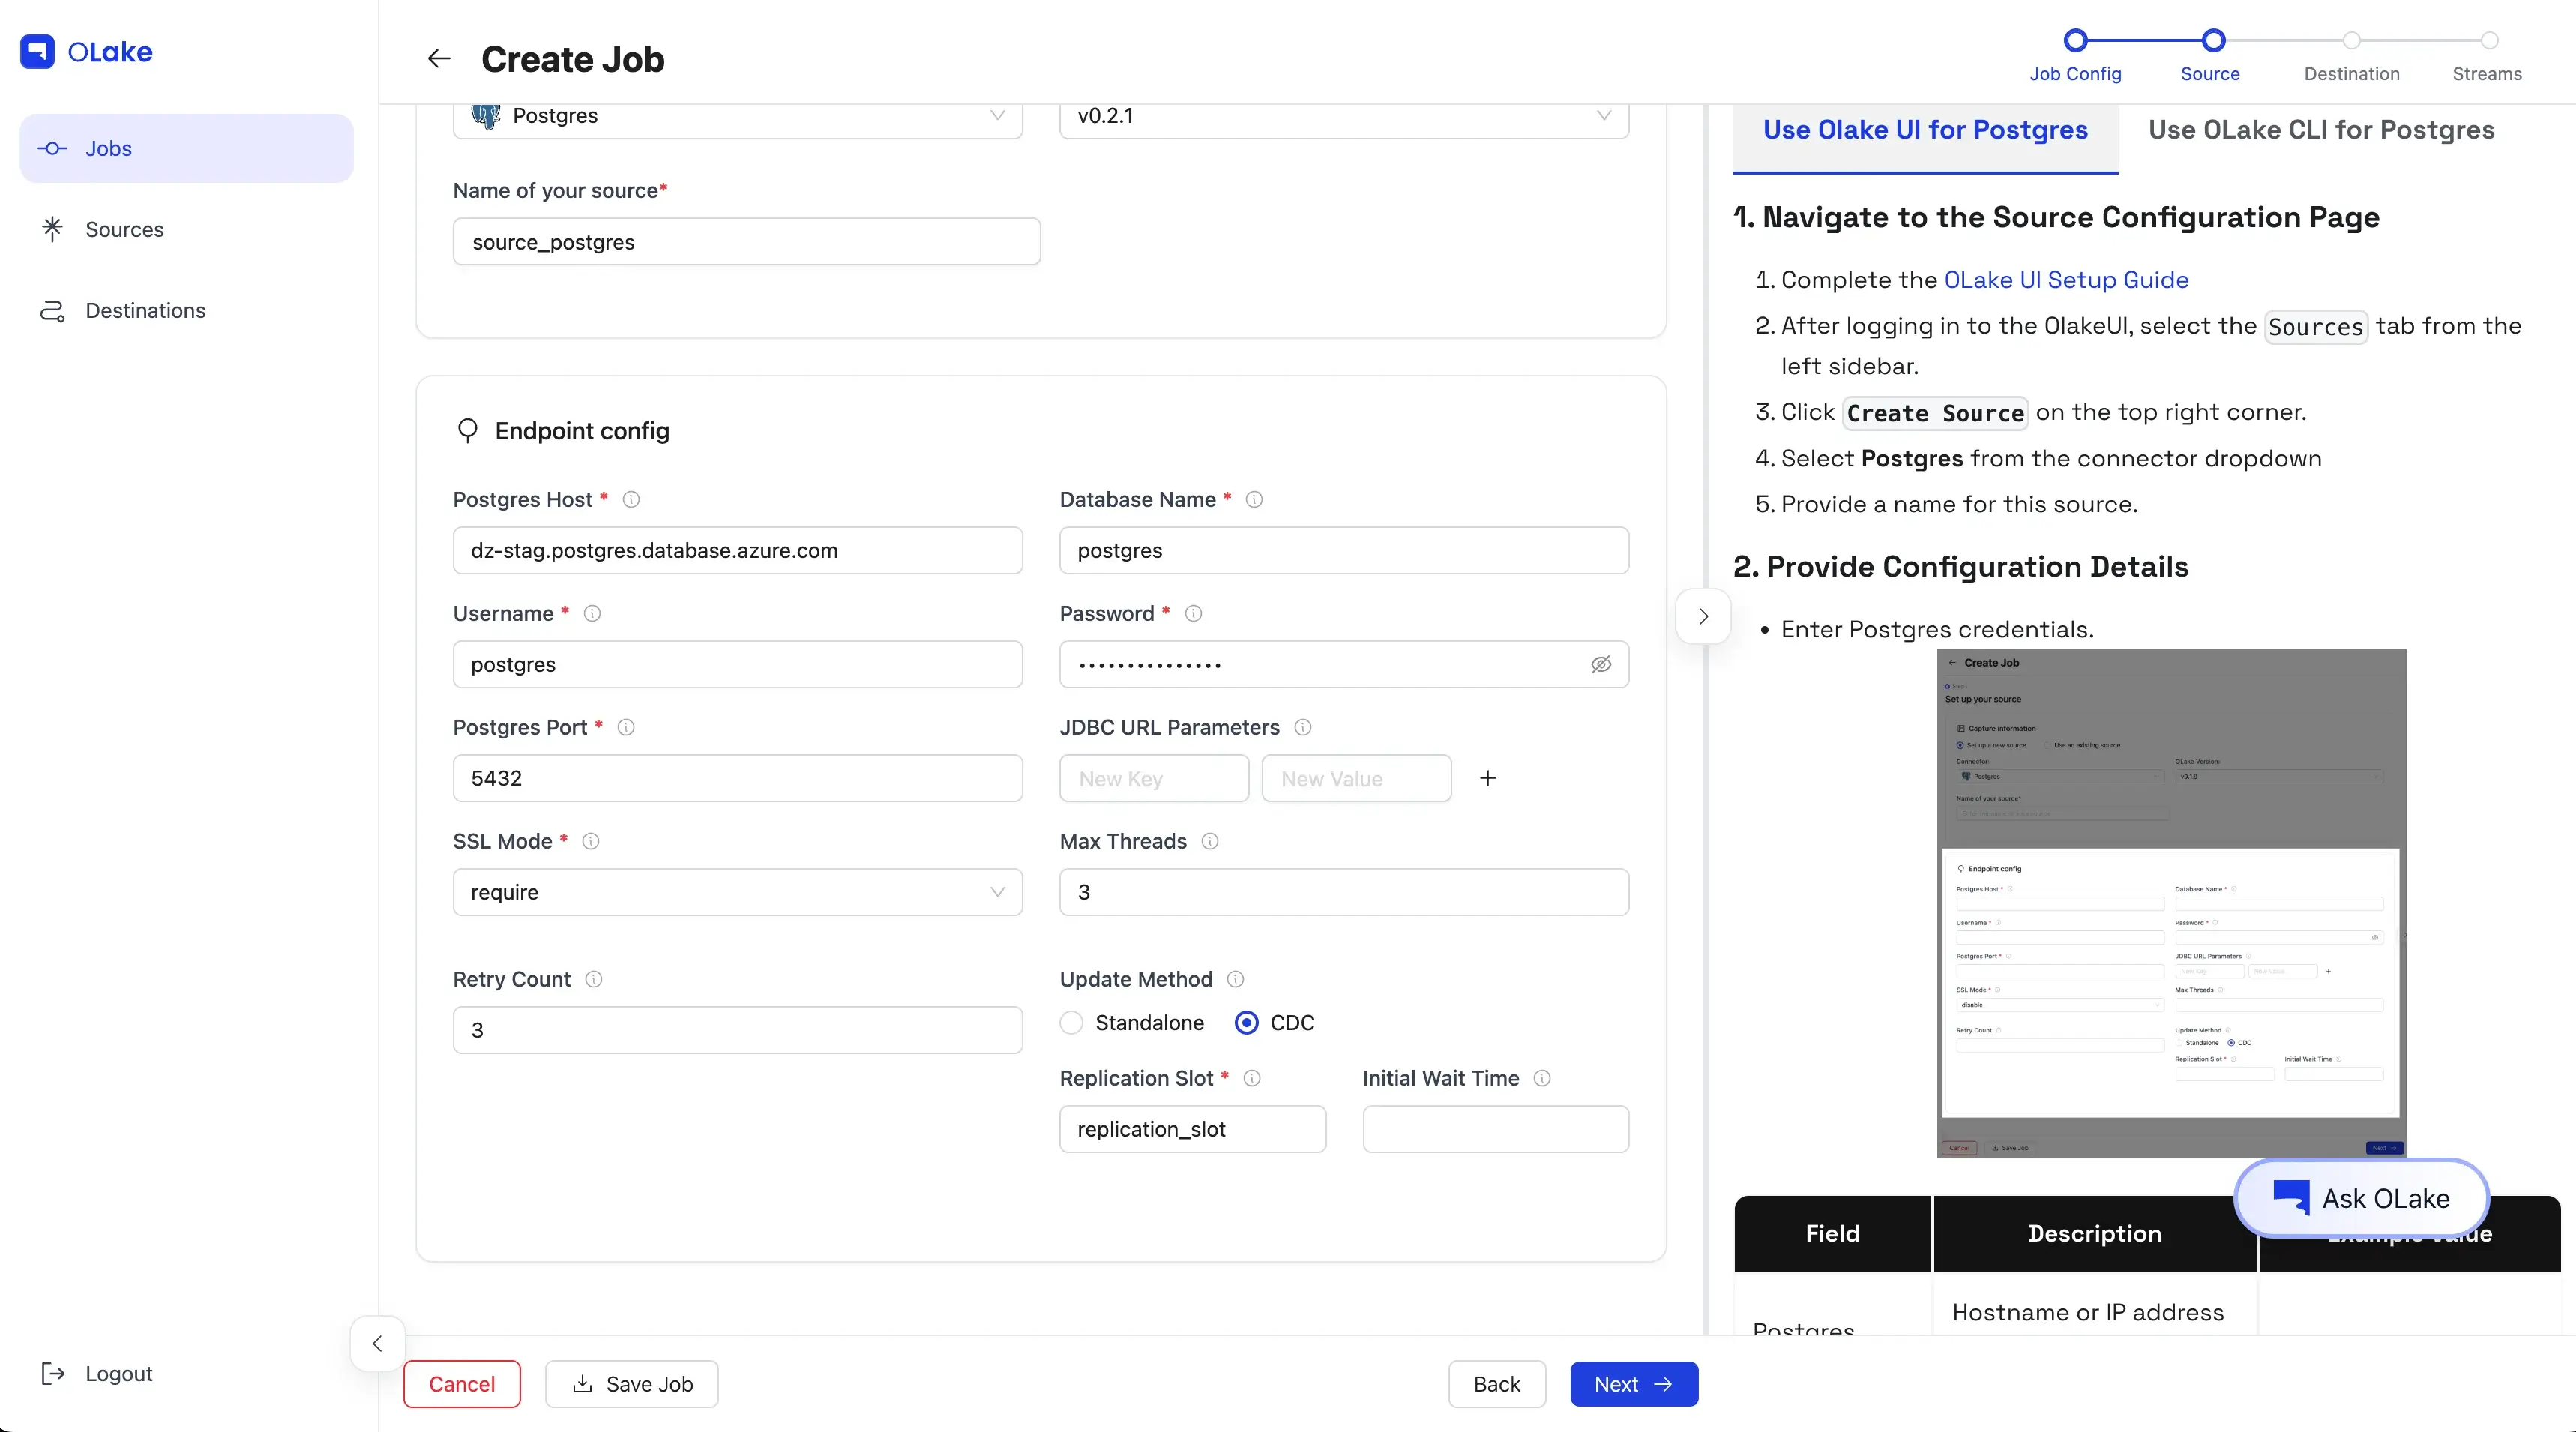
Once the test connection succeeds, OLake shows a success message and takes you to the destination configuration step.
You can find the configuration and troubleshooting guides for all supported source connectors below.
| Sources | Config |
|---|---|
| MySQL | Config |
| Postgres | Config |
| MongoDB | Config |
| Oracle | Config |
If you plan to enable CDC (Change Data Capture), make sure a replication slot already exists on your Postgres database. You can learn how to check or create one in our Replication Slot Guide.
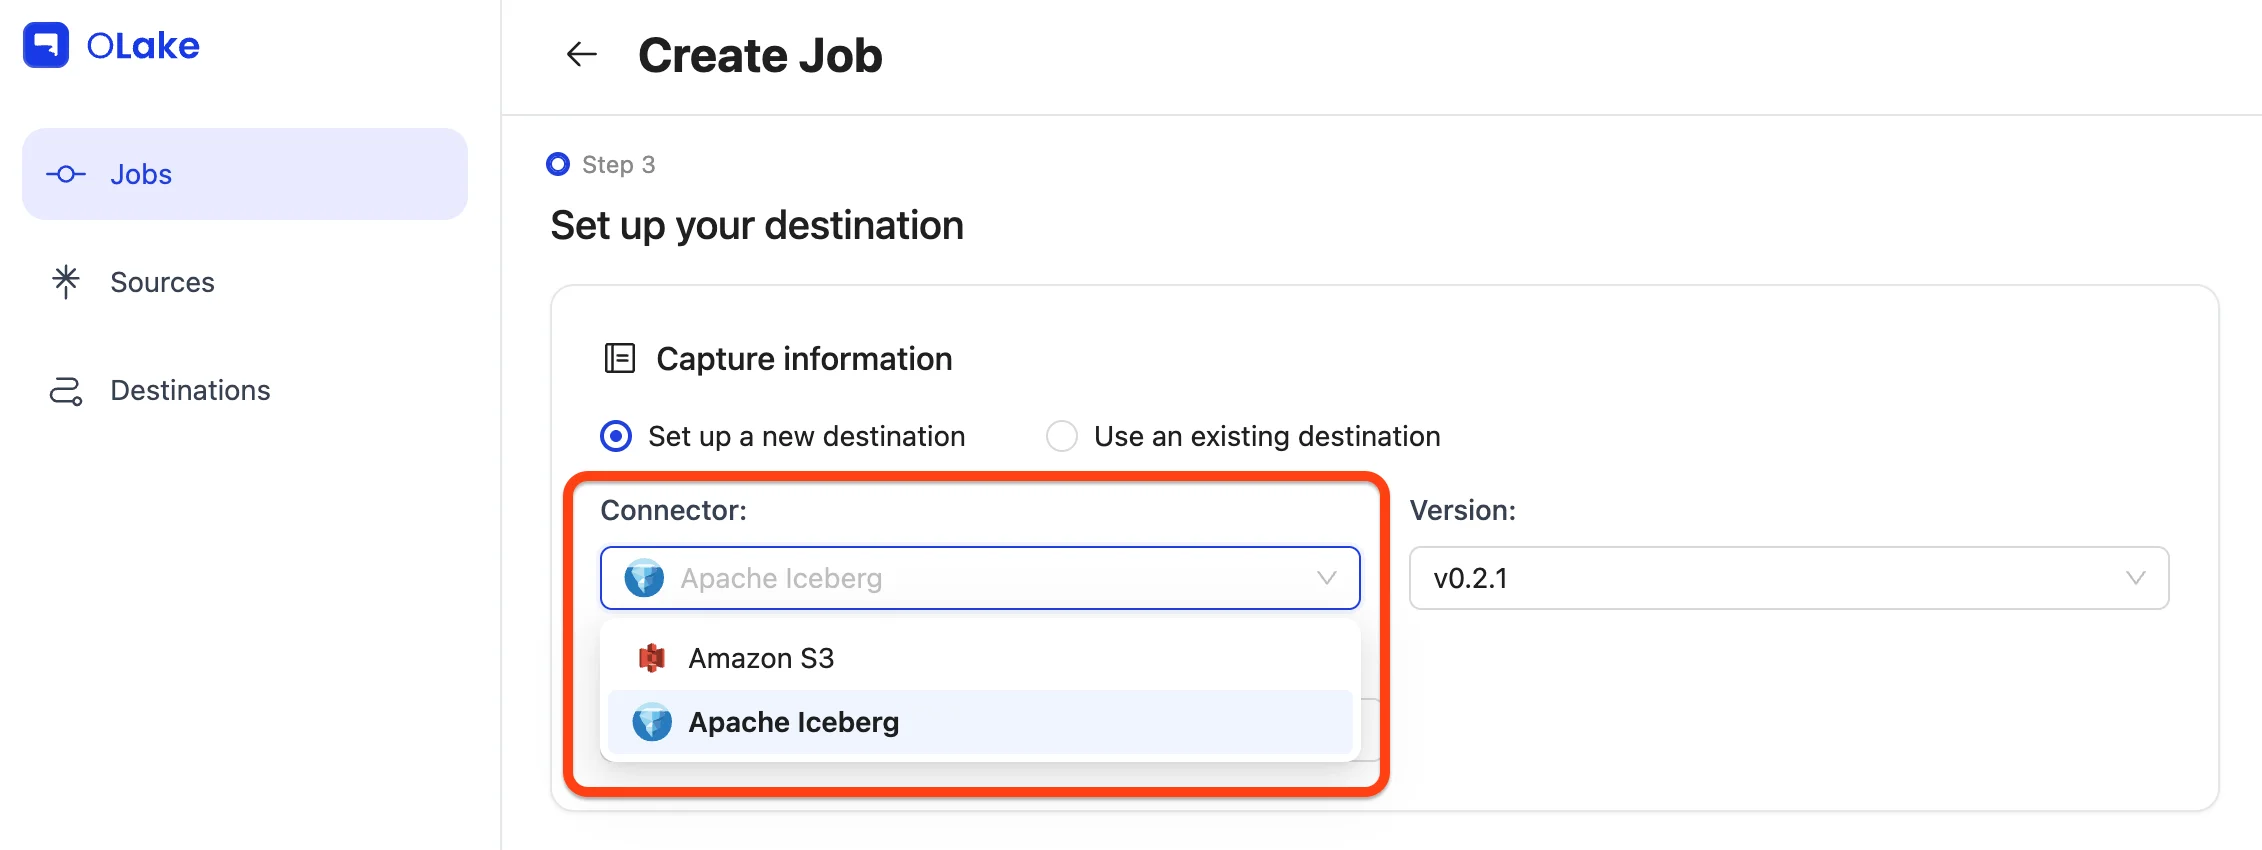
4. Configure Destination
Similarly, here we'll be using Iceberg with AWS Glue Catalog as the destination.
For this guide, select Apache Iceberg from the connector dropdown, and keep the OLake version set to the latest stable version.
Choose the catalog as AWS Glue from the Catalog Type dropdown.
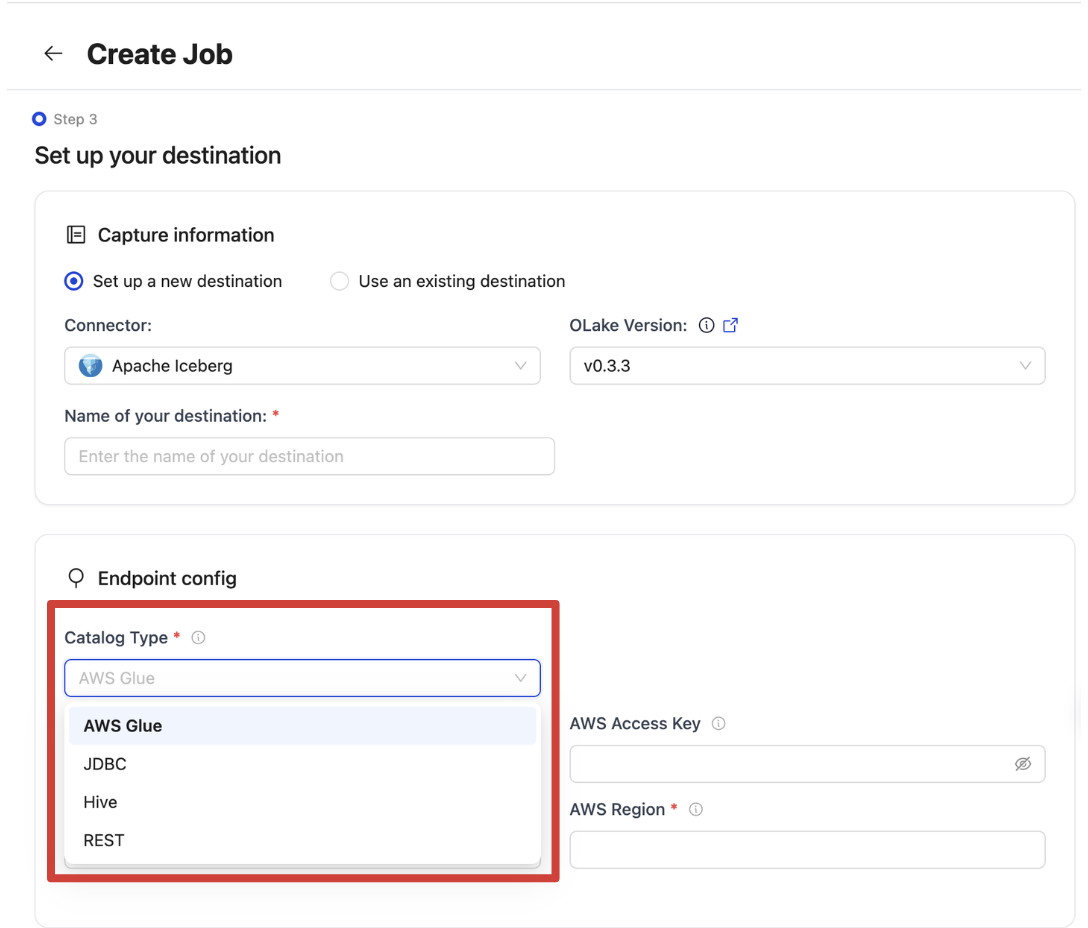
Give your destination a descriptive name, then fill in the required connection details in the Endpoint Config form.
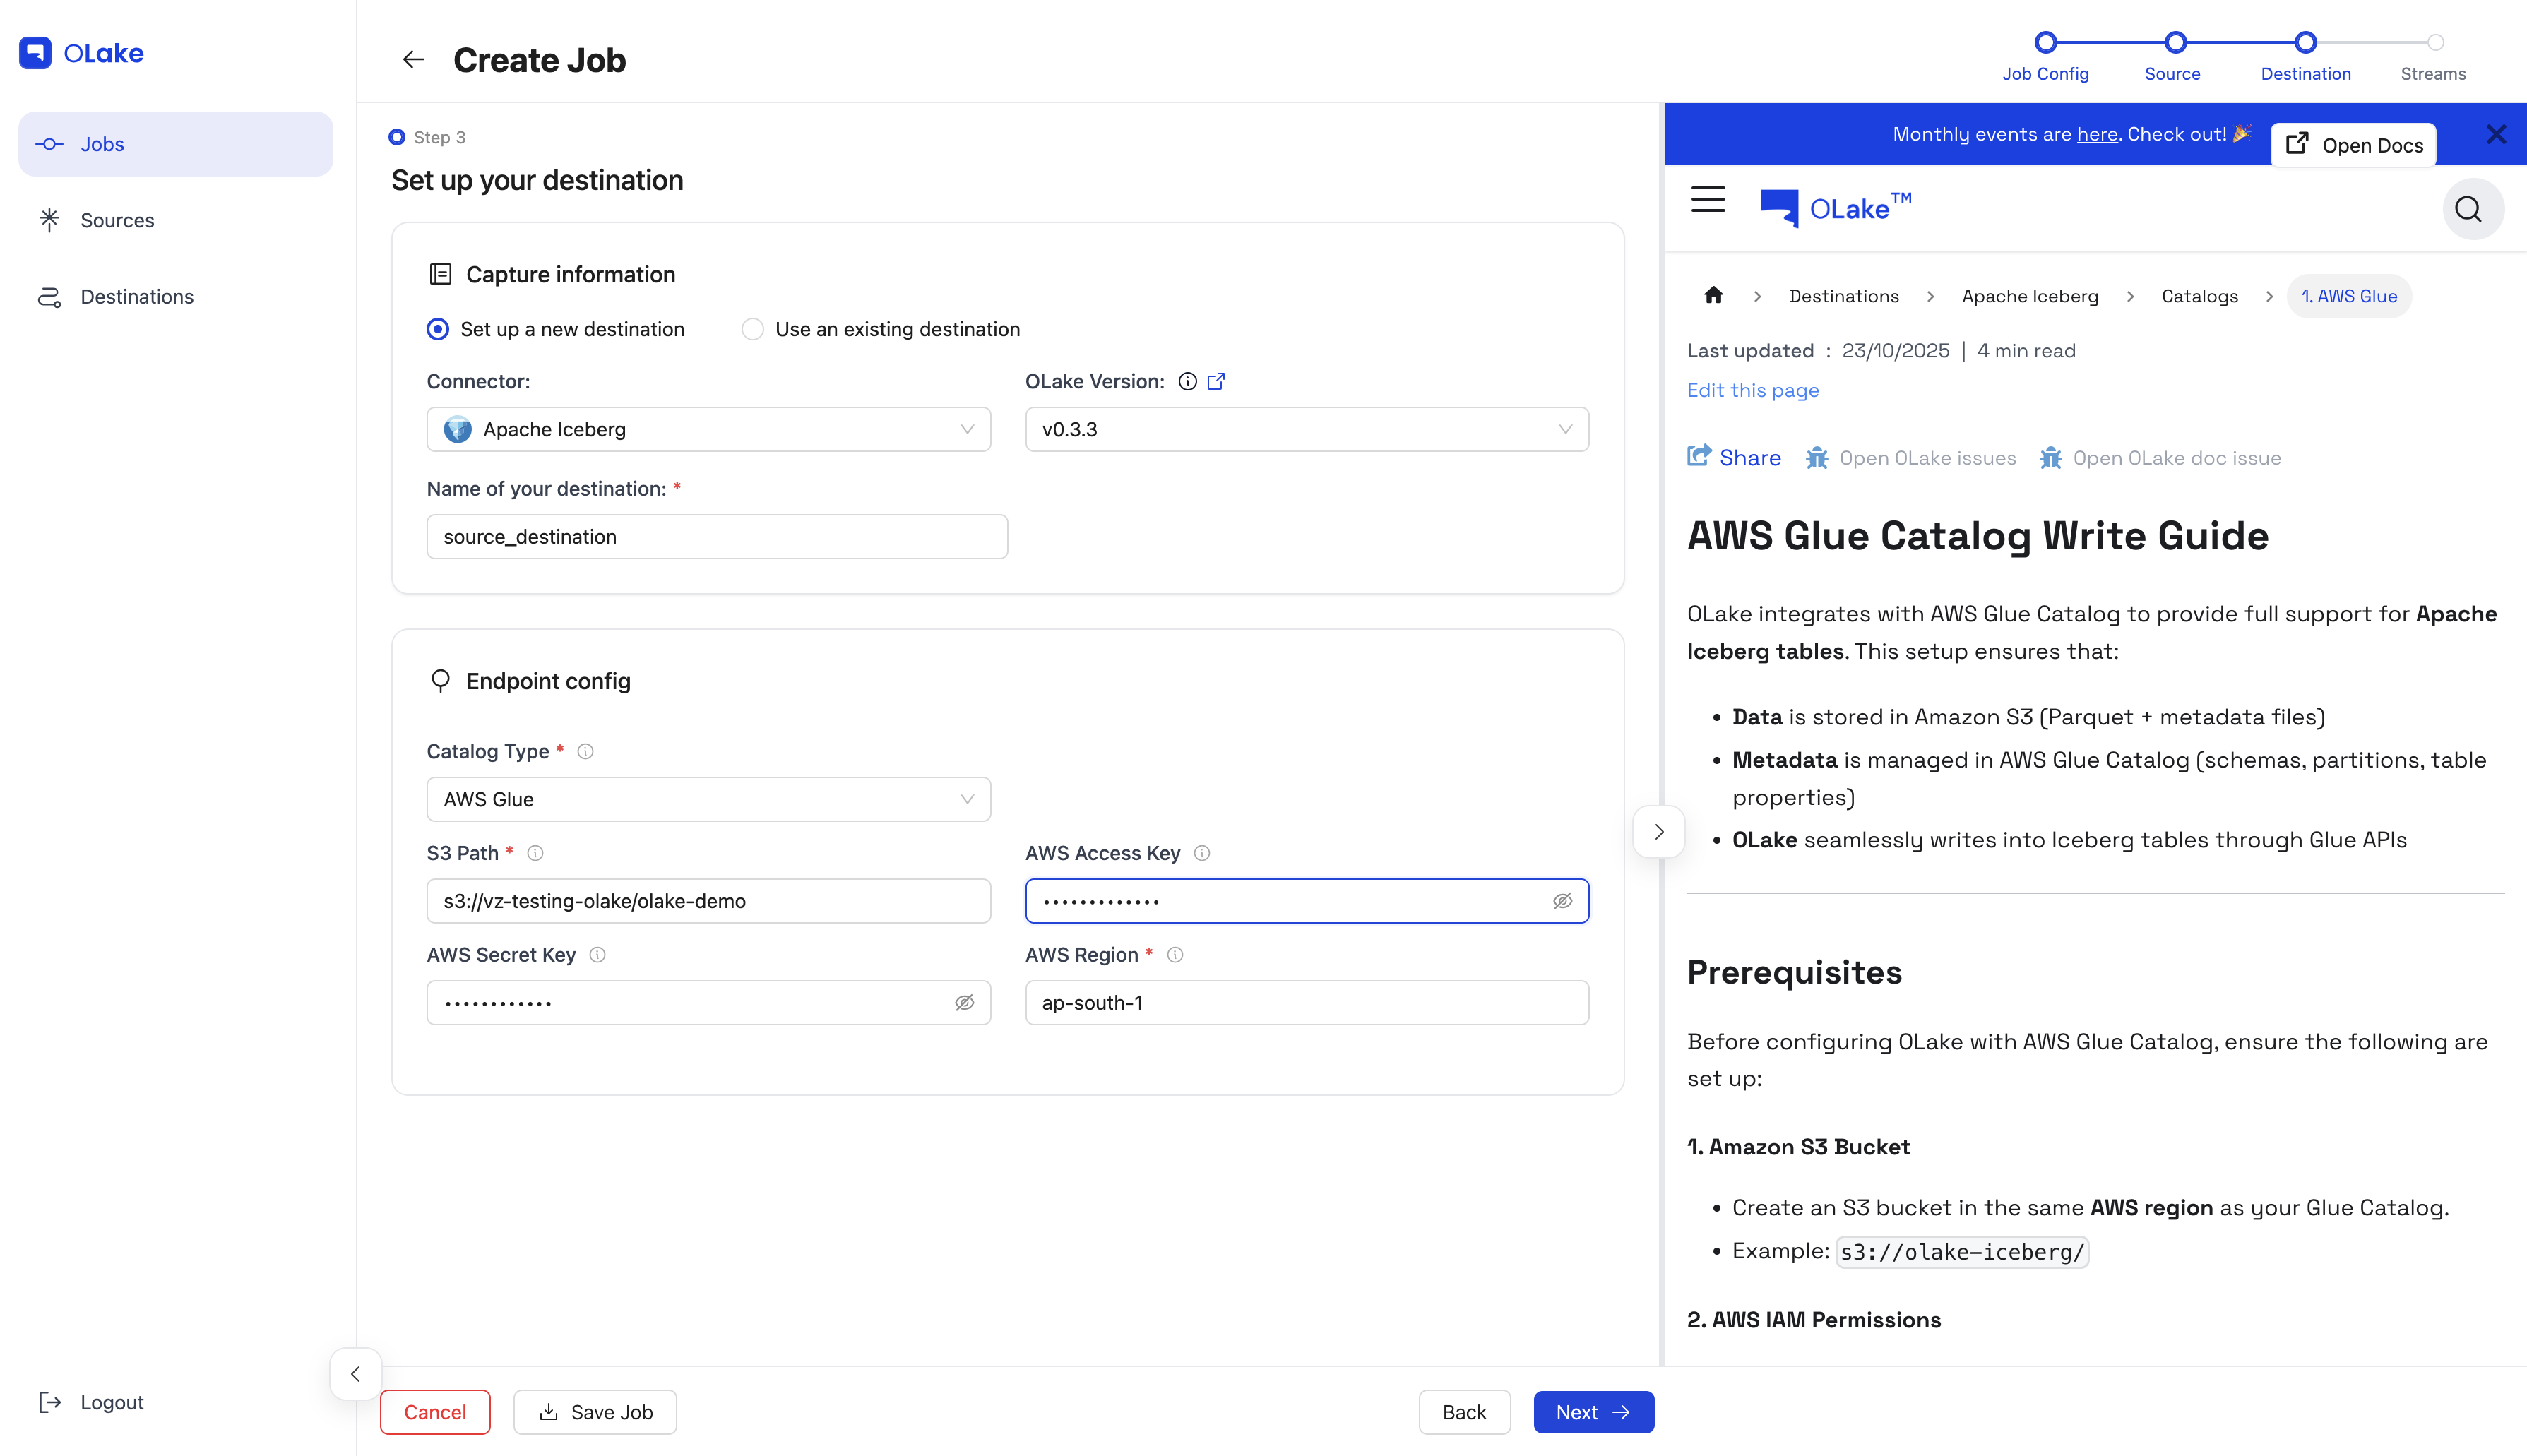
Once the test connection succeeds, OLake shows a success message and takes you to the streams configuration step.
You can find the configuration and troubleshooting guides for all supported destination connectors below.
-
Parquet S3
Destinations Config Parquet Config -
Iceberg
Catalogs Config AWS Glue Catalog Config Hive Catalog Config JDBC Catalog Config REST Catalog Config Nessie Catalog Config LakeKeeper Config S3 Tables Config Polaris Config Unity Config
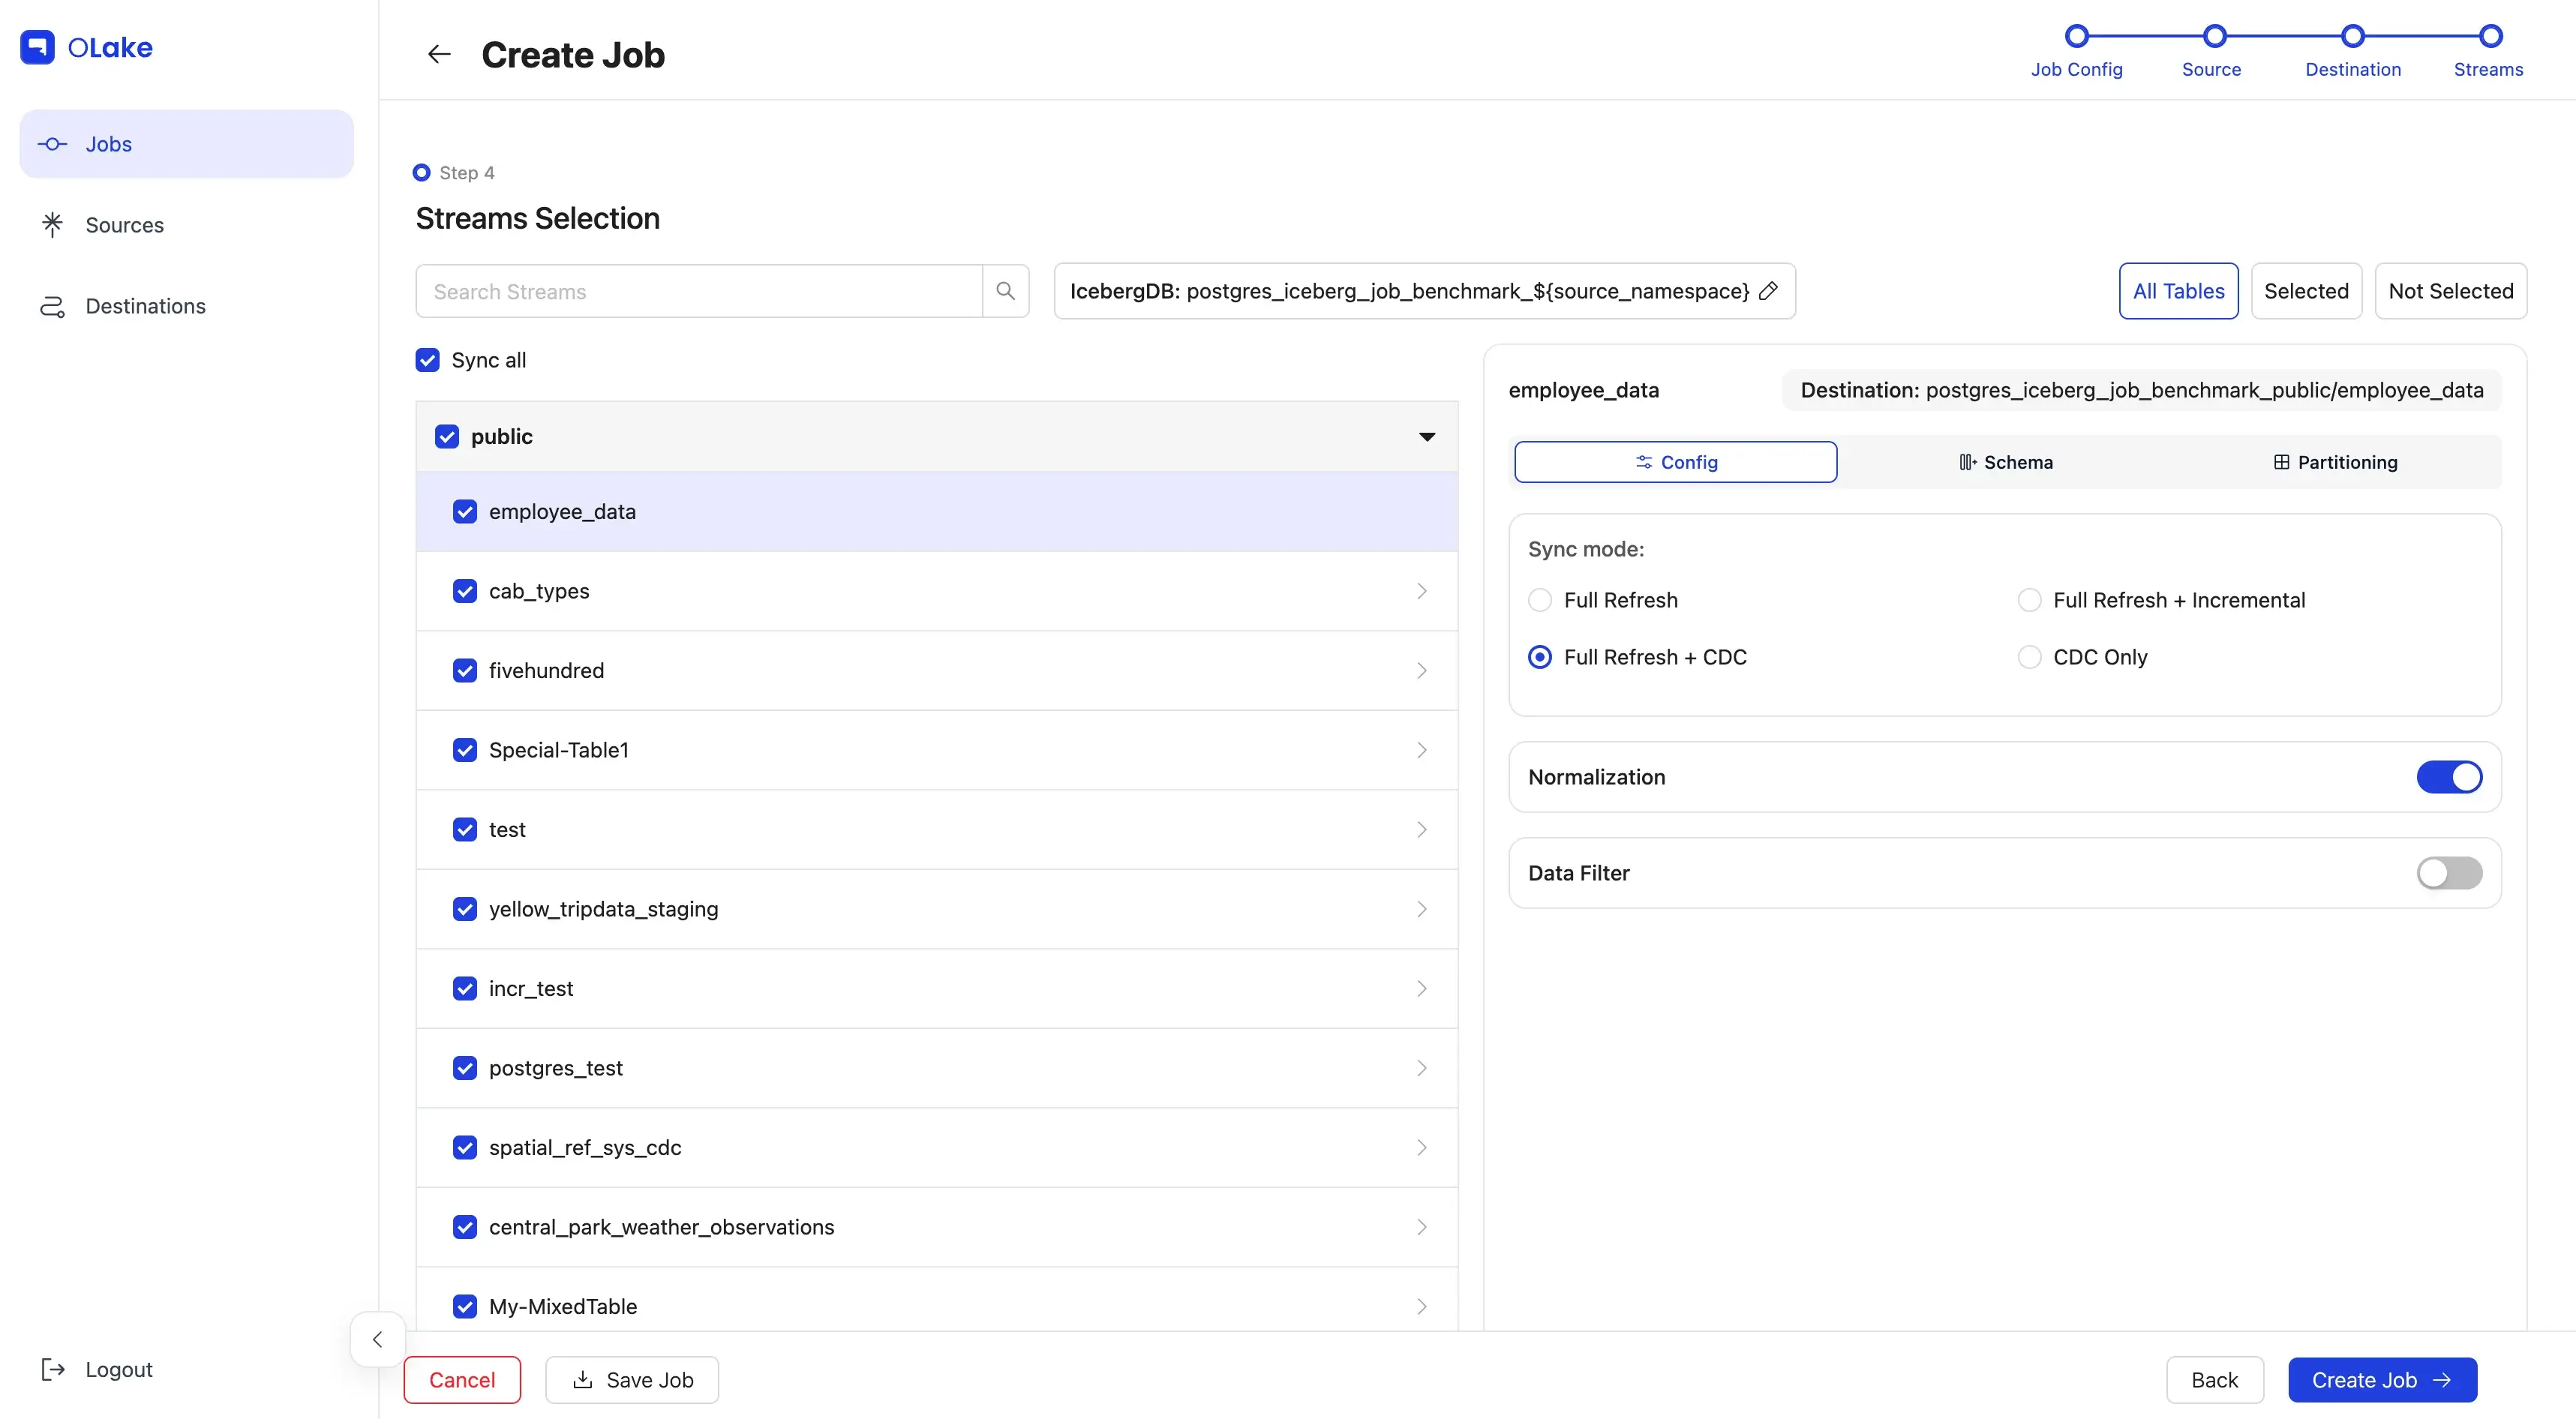
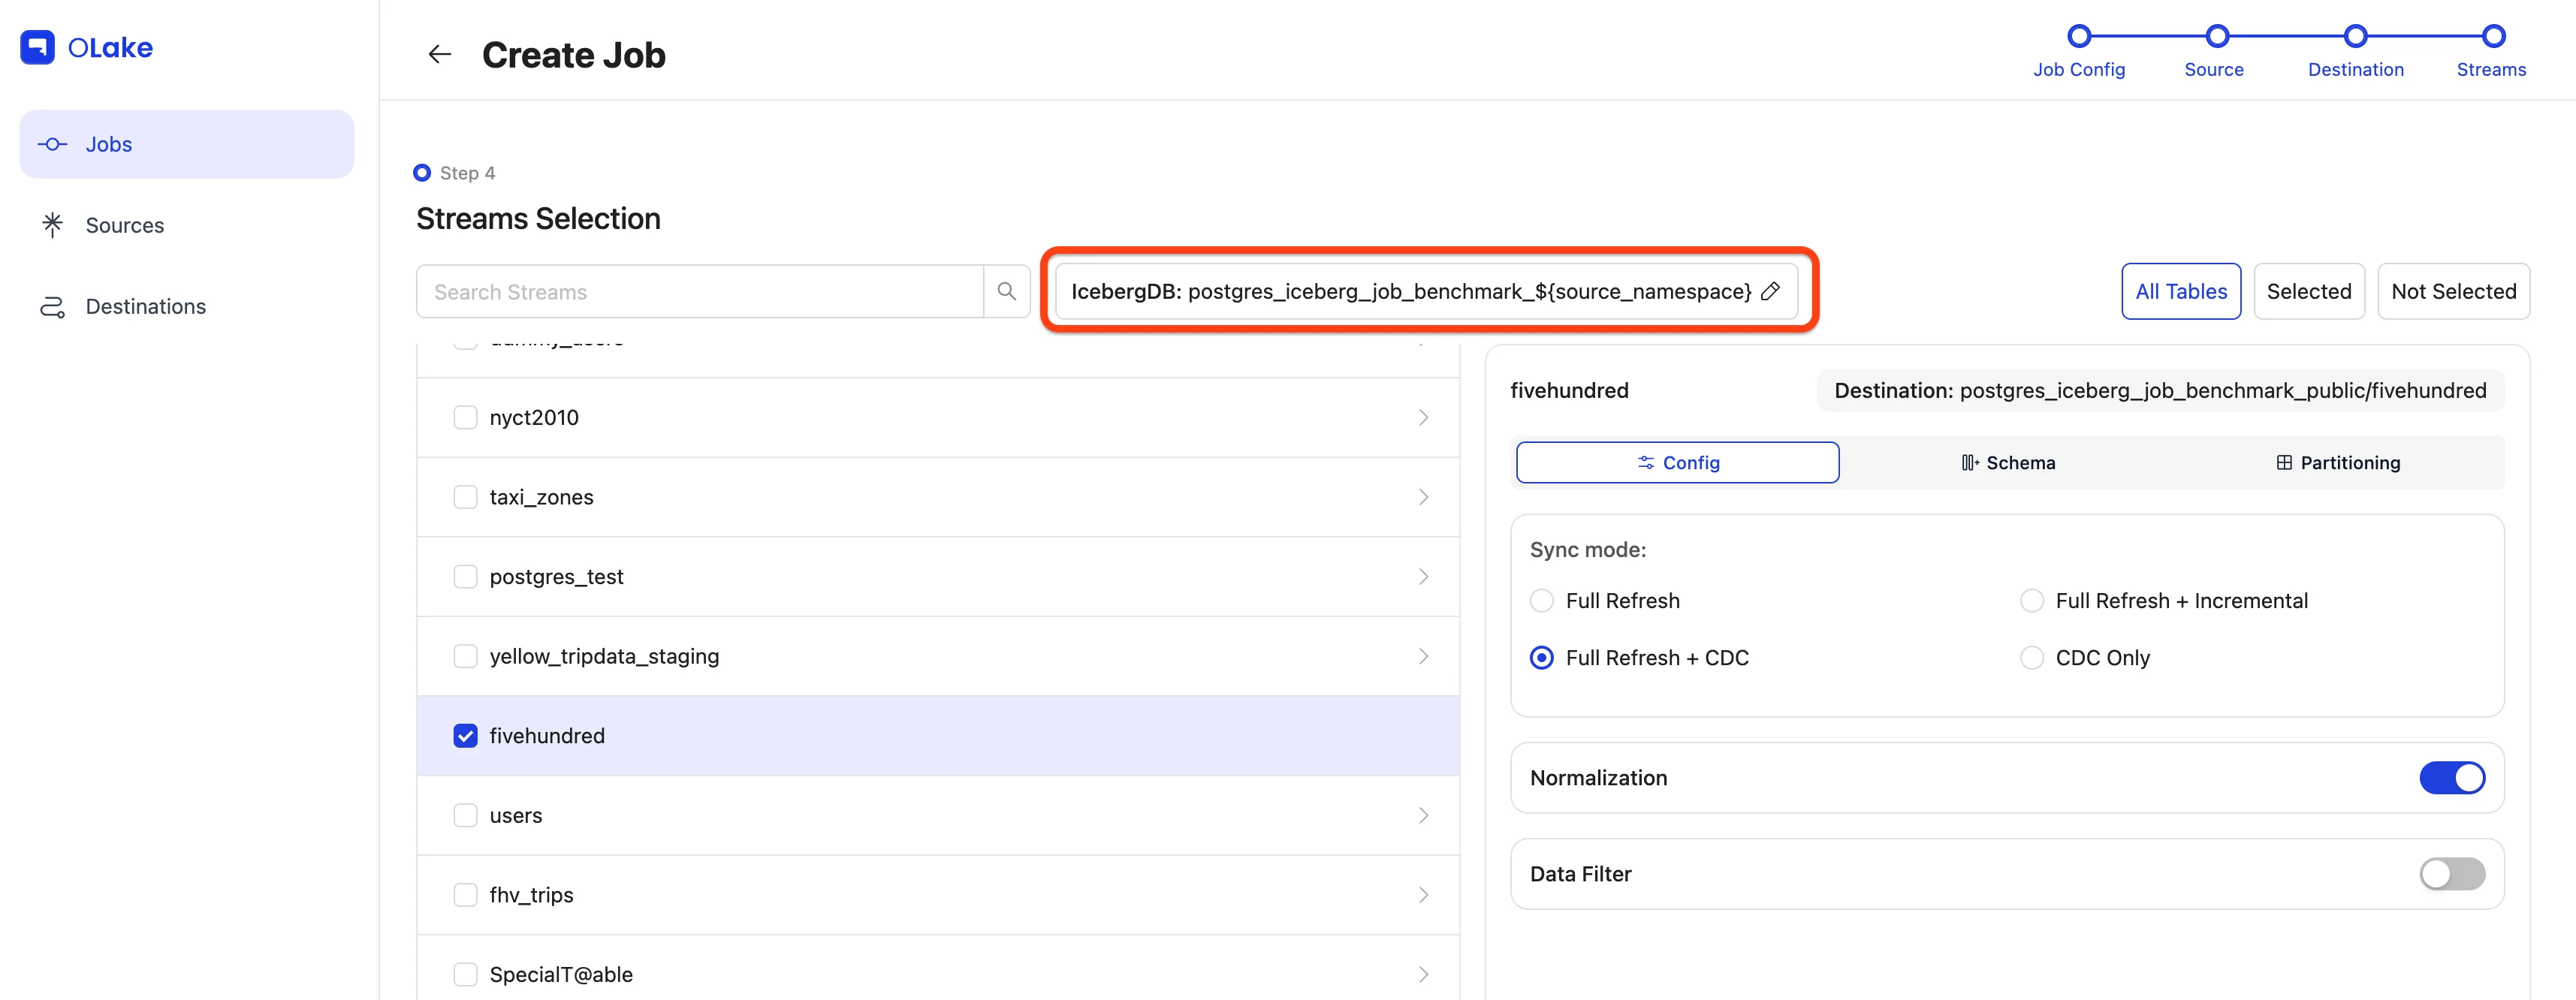
5. Configure Streams
The Streams page is where you select which streams to replicate to the destination. Here, you can choose your preferred sync mode and configure partitioning and Destination Database as well as other stream-level settings here.
For this guide, we'll configure the following:
- Replicate the
fivehundredstream (name of the table). - Use Full Refresh + CDC as the sync mode.
- Enable data Normalization.
- Modify Destination Database name (if required).
- Replicate only data where
dropoff_datetime>=2010-01-01 00:00:00(basically data from 2010 onward). - Partition the data by the year extracted from a timestamp column in the selected stream.
- Run the sync every day at 12:00 AM.
Let's start by selecting the fivehundred stream (or any stream from your source) by checking its checkbox to include it in the replication.
Click the stream name to open the stream-level settings panel on the right side.
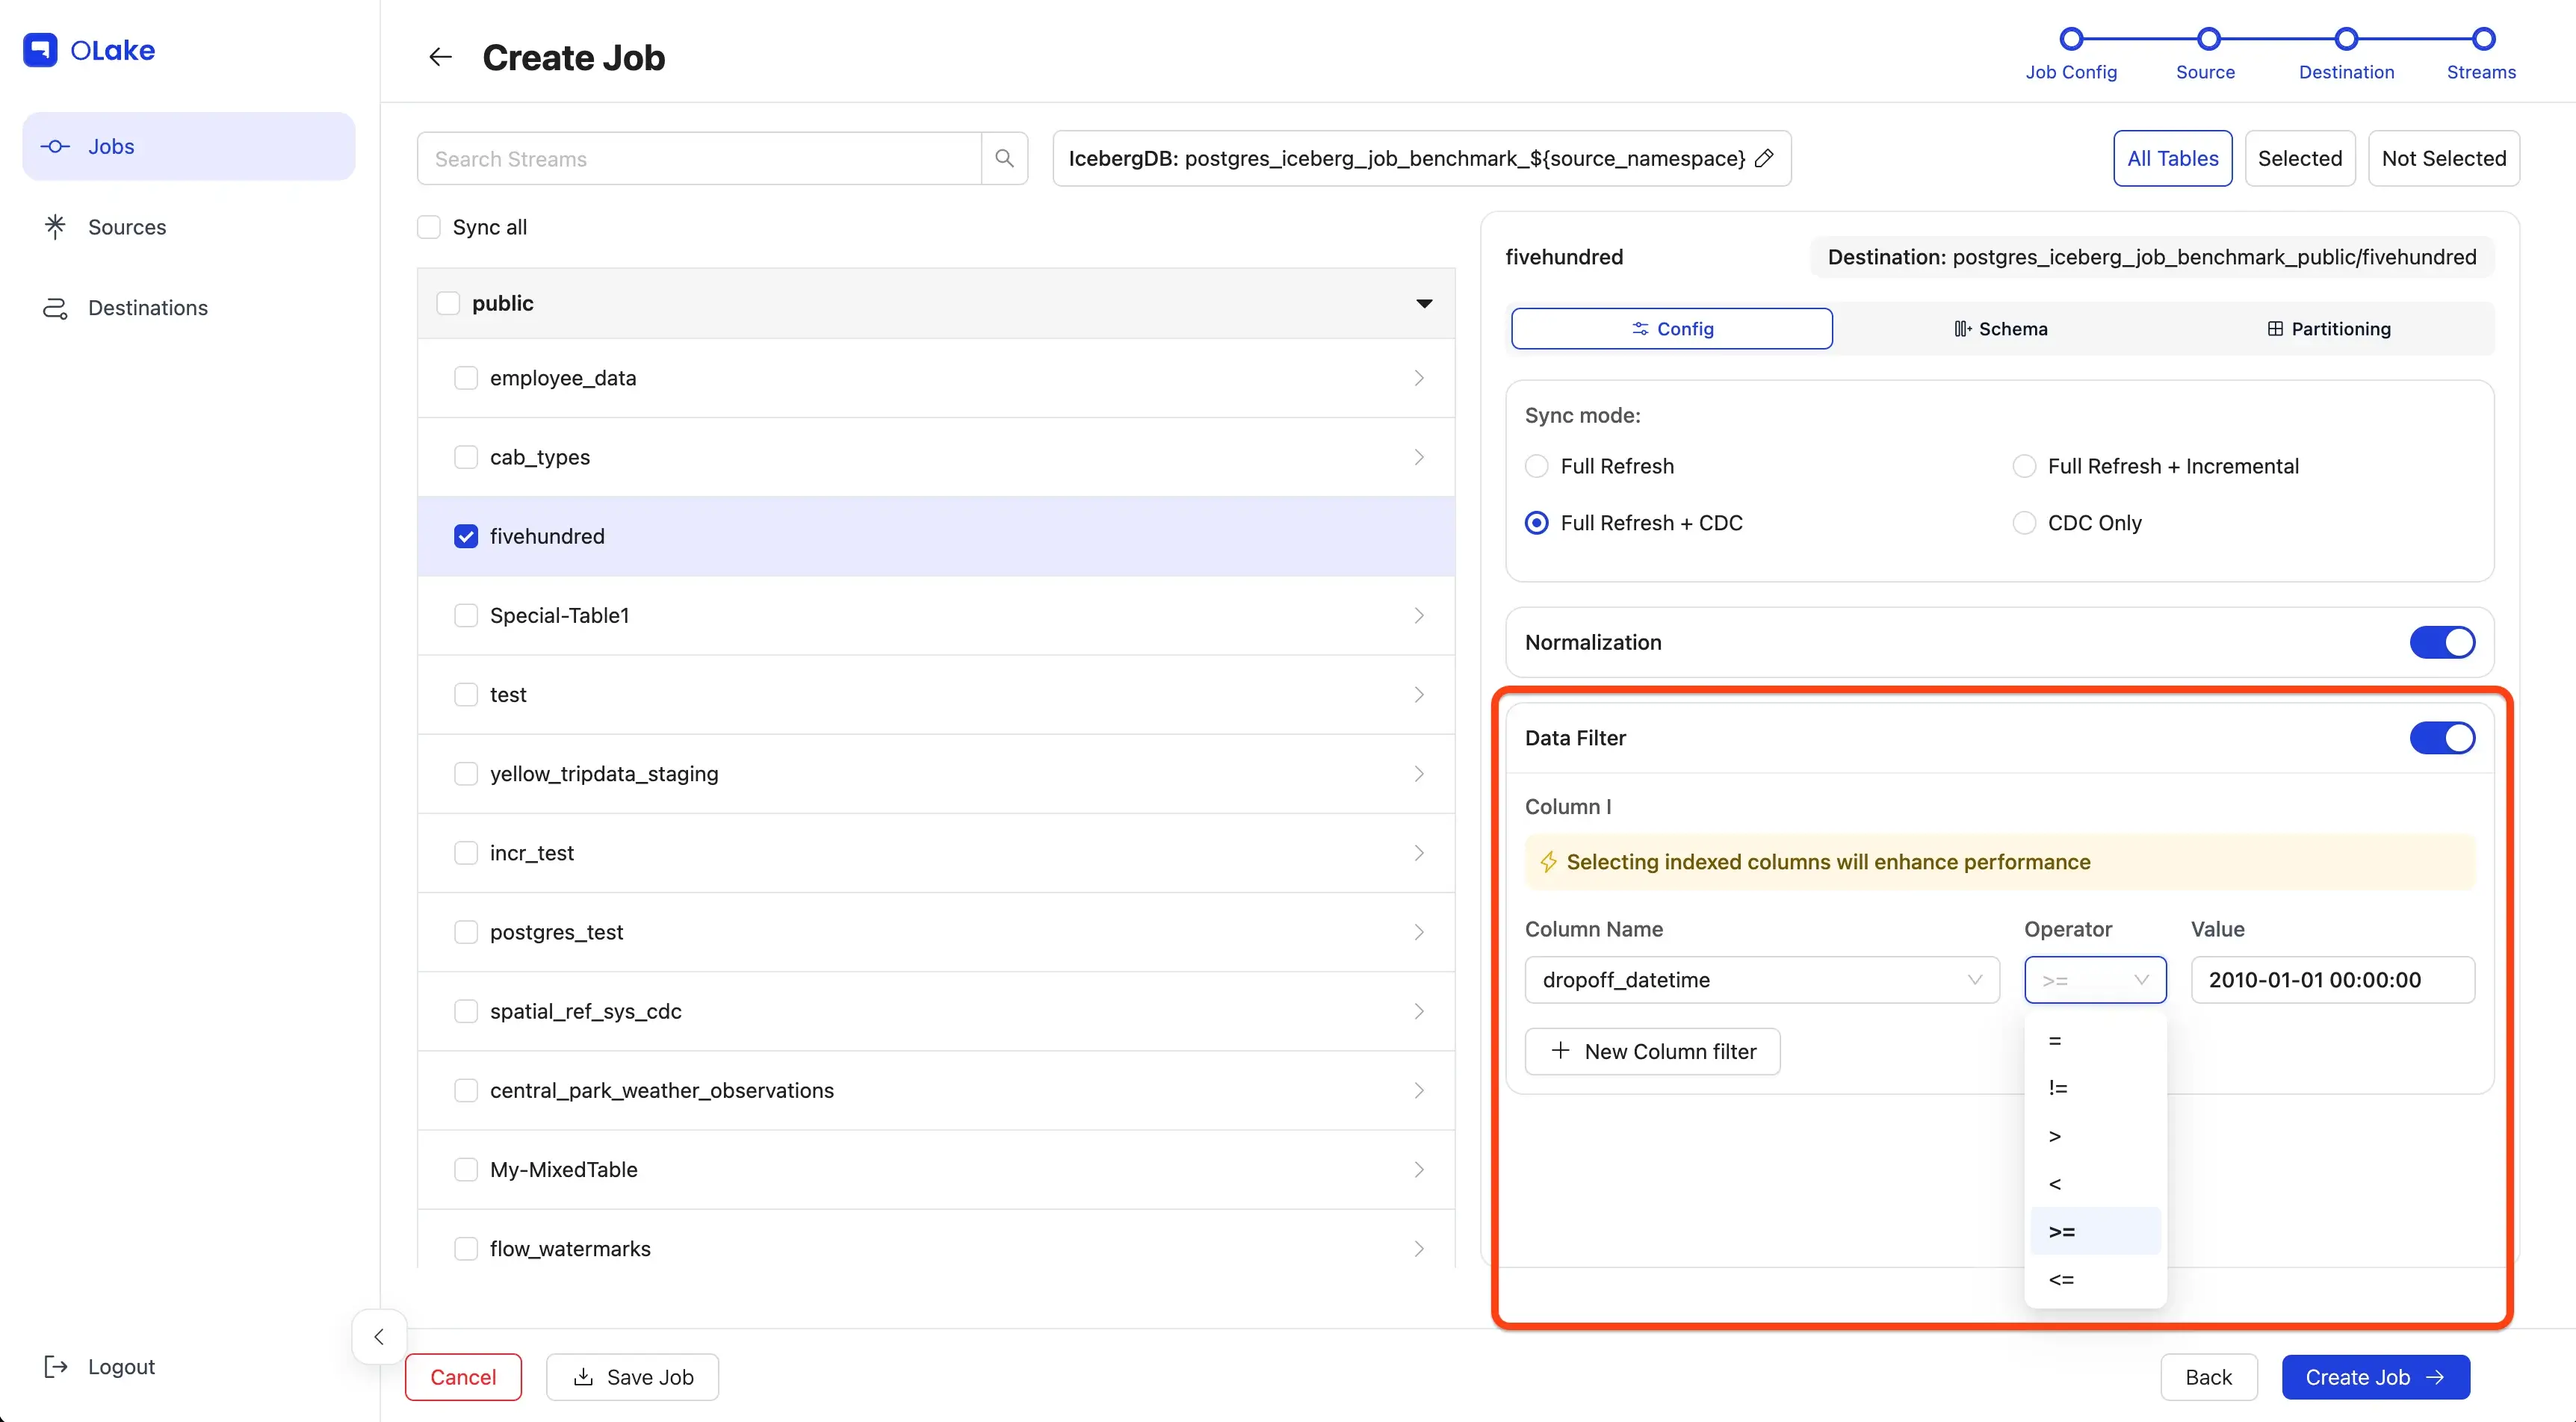
In the panel, set the sync mode to Full Refresh + CDC, and enable Normalization by toggling the switch on.

To learn more about sync modes, refer to our Sync Modes Guide in the documentation.
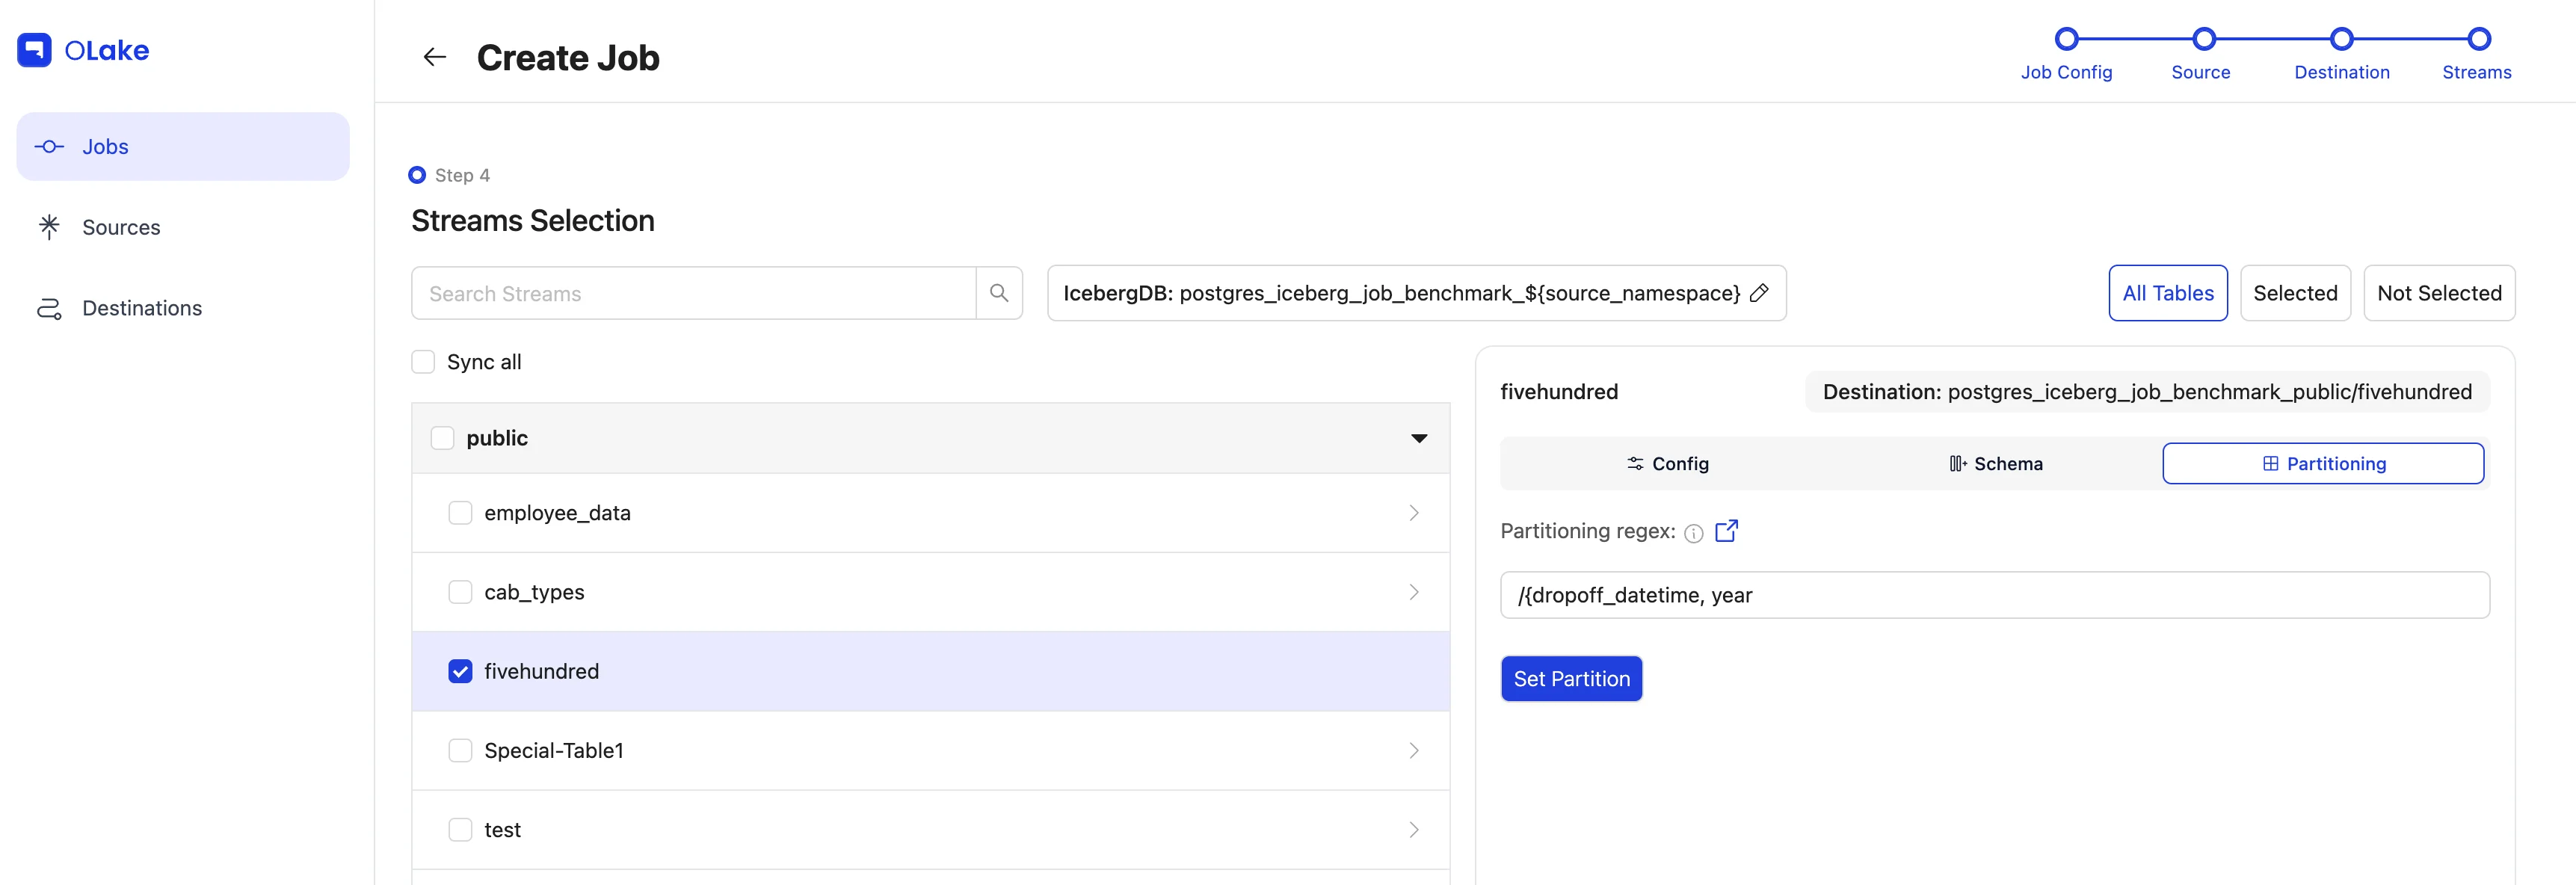
To partition the data, click the Partitioning tab and configure it based on the required details.
In our case, the fivehundred stream has a timestamp column named dropoff_datetime, which we will partition by year. Learn more about partitioning in the Partitioning Guide.
To replicate only data from 2010 onward, we'll use a Data Filter to filter the data based on the dropoff_datetime column.
Make sure the Value provided is in the same format as the column schema.
Introduced support for filtering columns with special characters in CLI. Column names with underscores work normally without any escape sequence. For column names with other special characters, use the following format:
filter = "\"id-with#special!char\" = 1"
To edit the Destination Database name, select the edit icon beside the Destination Database (Iceberg DB or S3 Folder) and make the changes.
Once configured, click Create Job in the bottom-right corner. Tada! you've successfully created your first job!
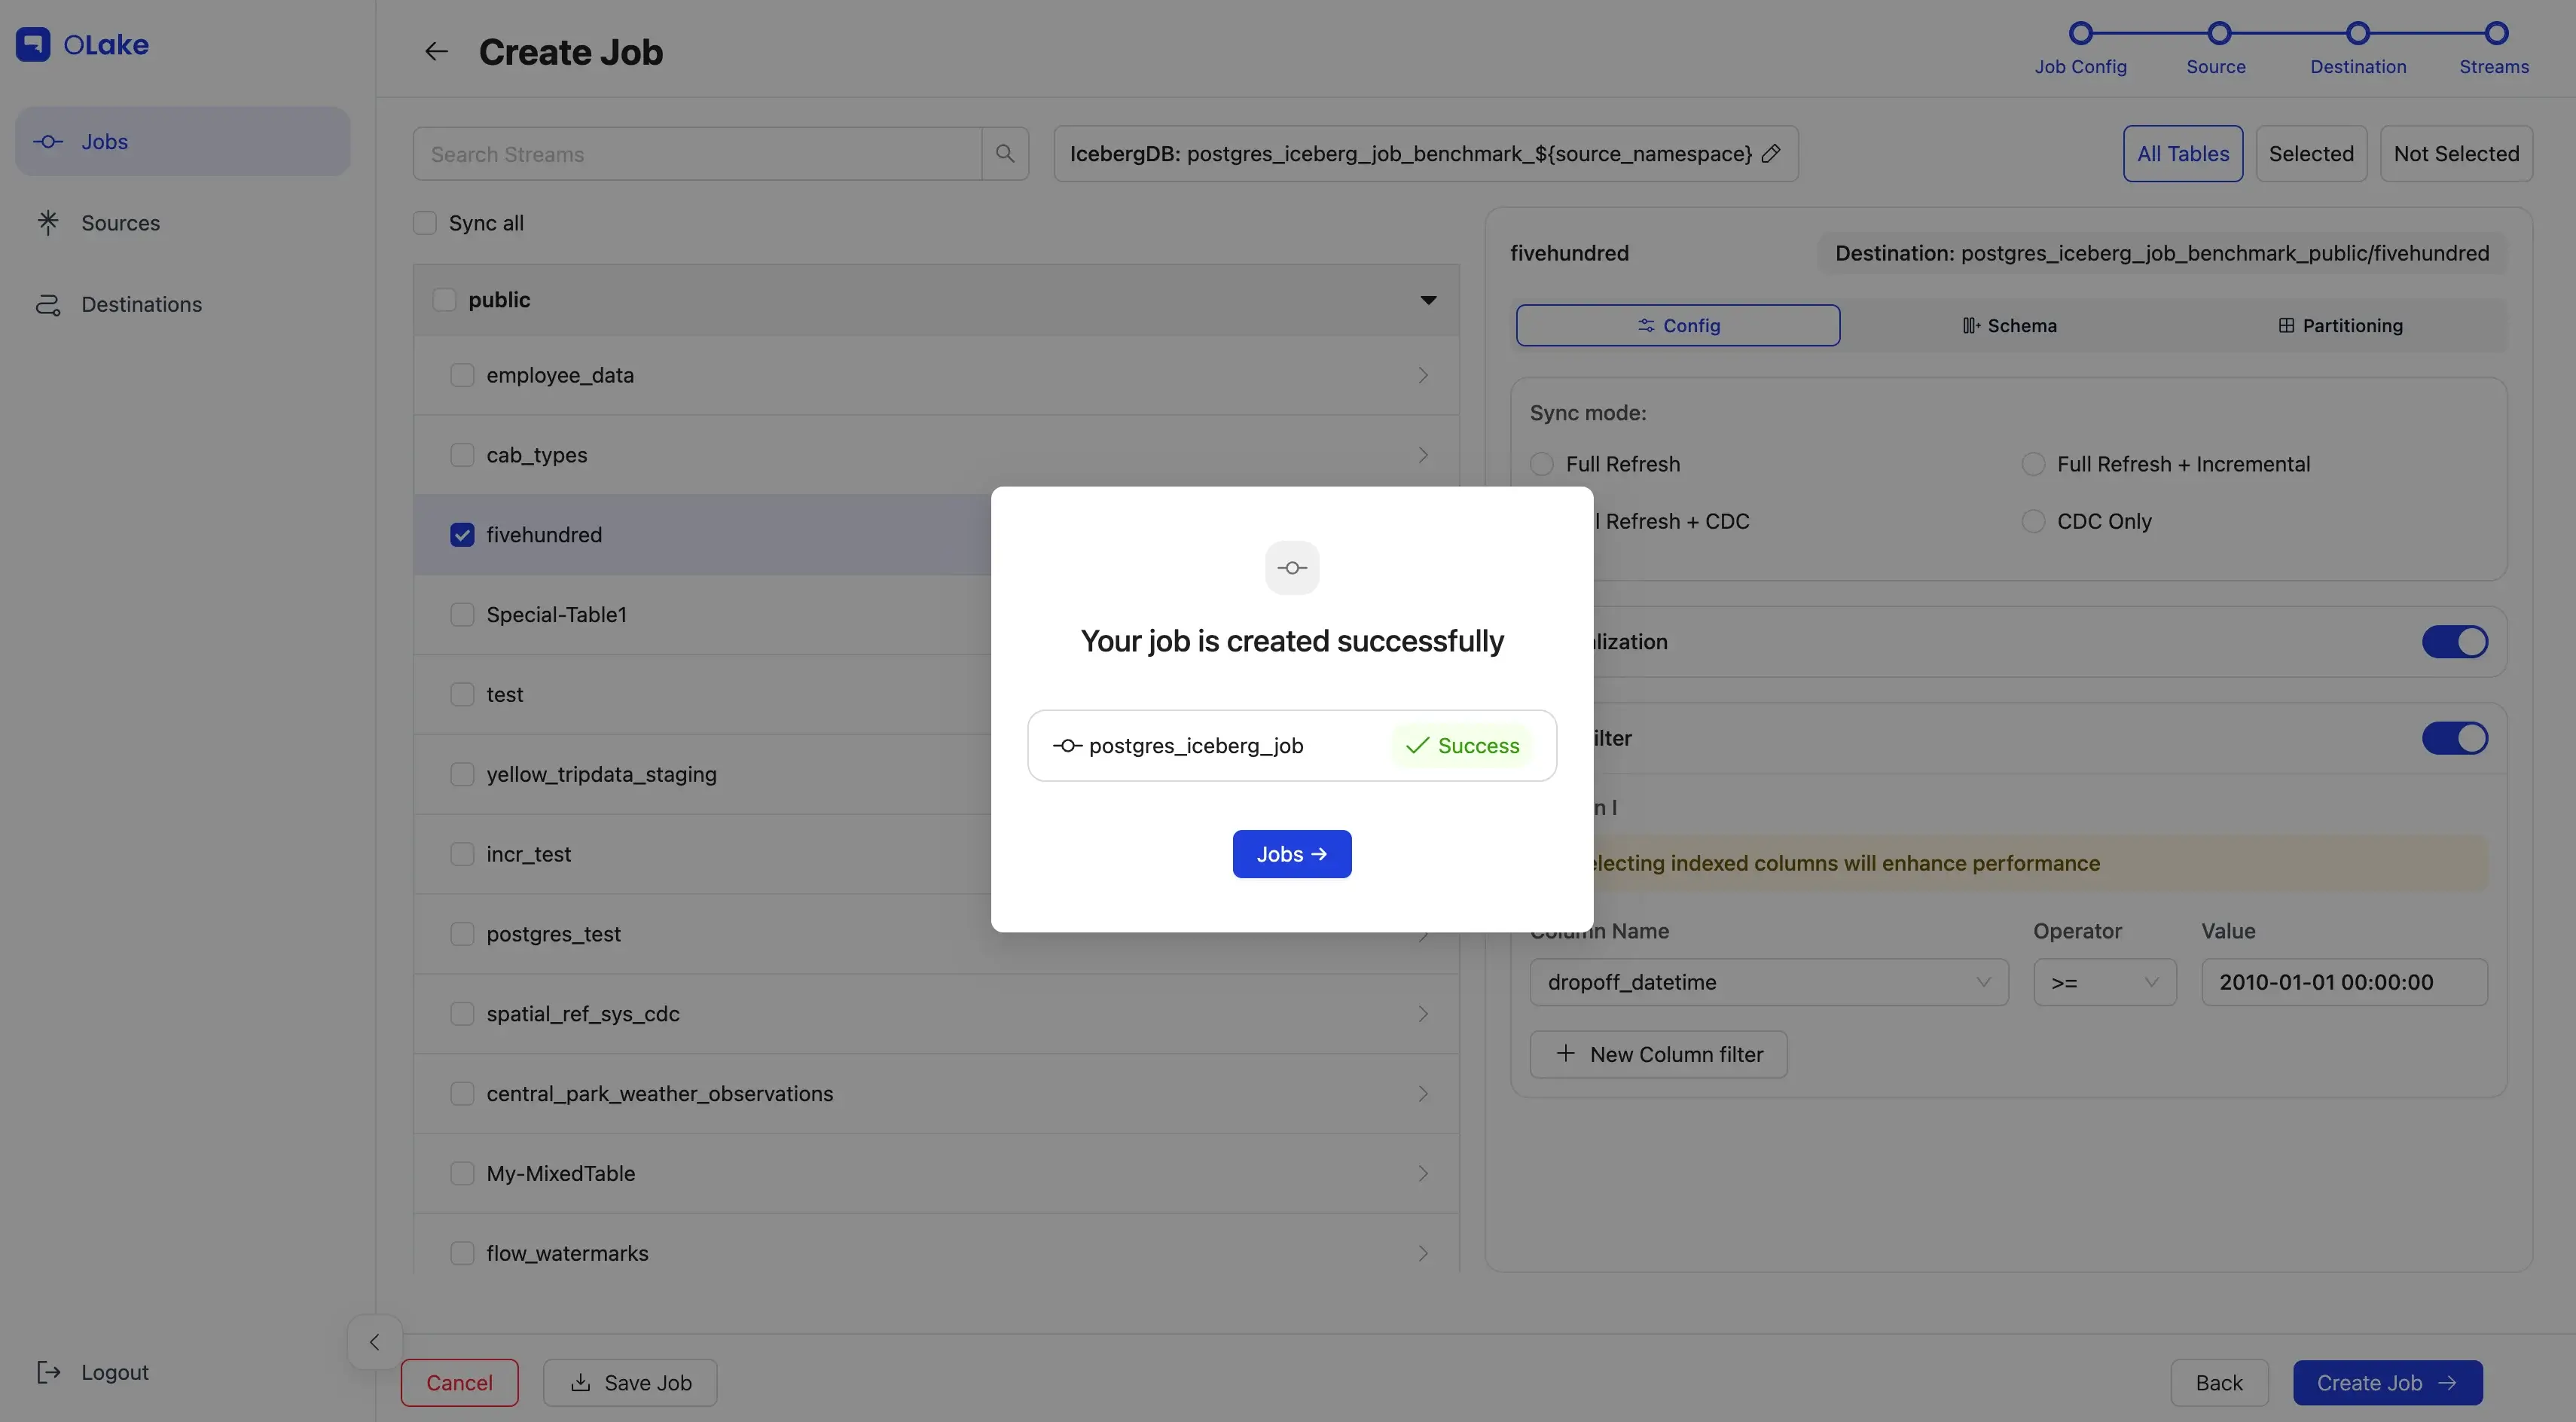
The sync will start at the next scheduled time. You can also start it manually by going to the Jobs section, finding your job, clicking the options menu, and selecting Sync Now.
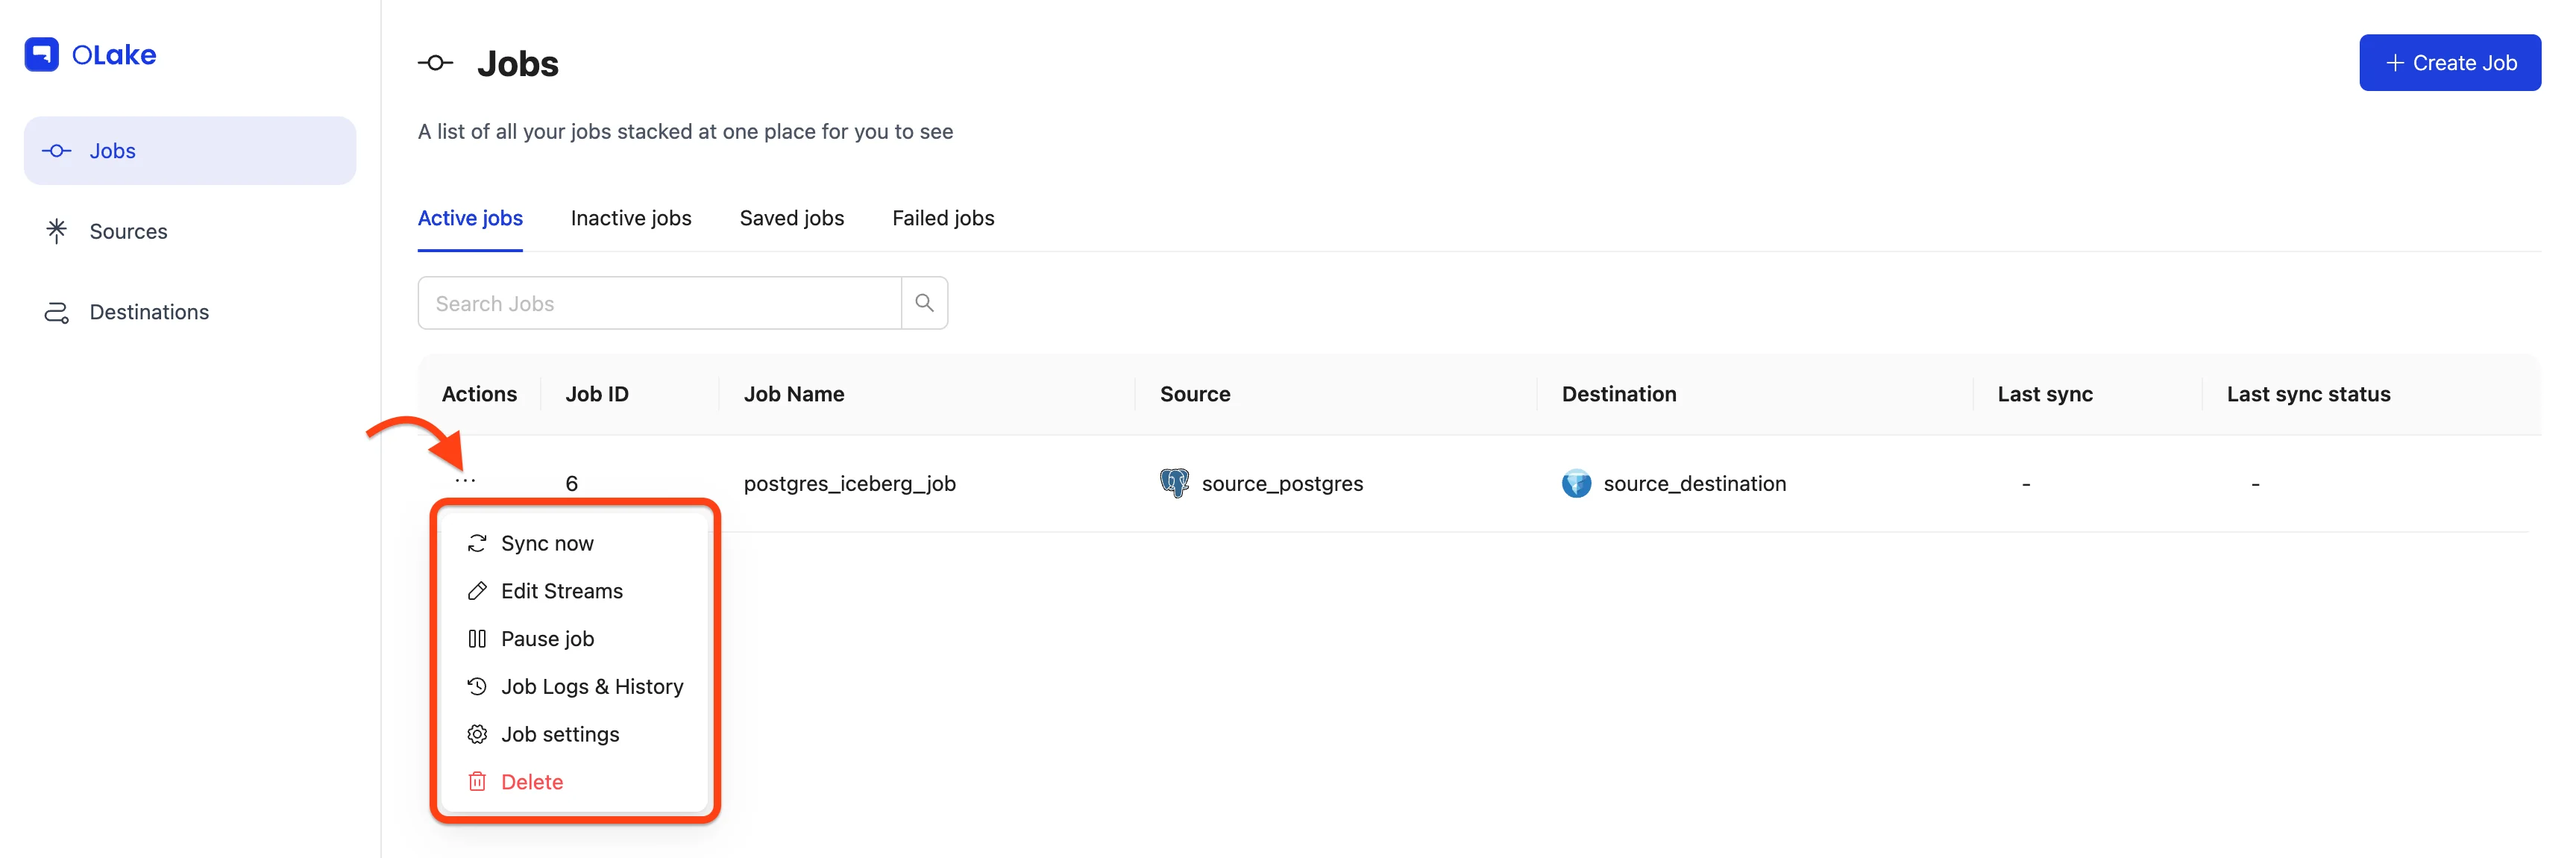
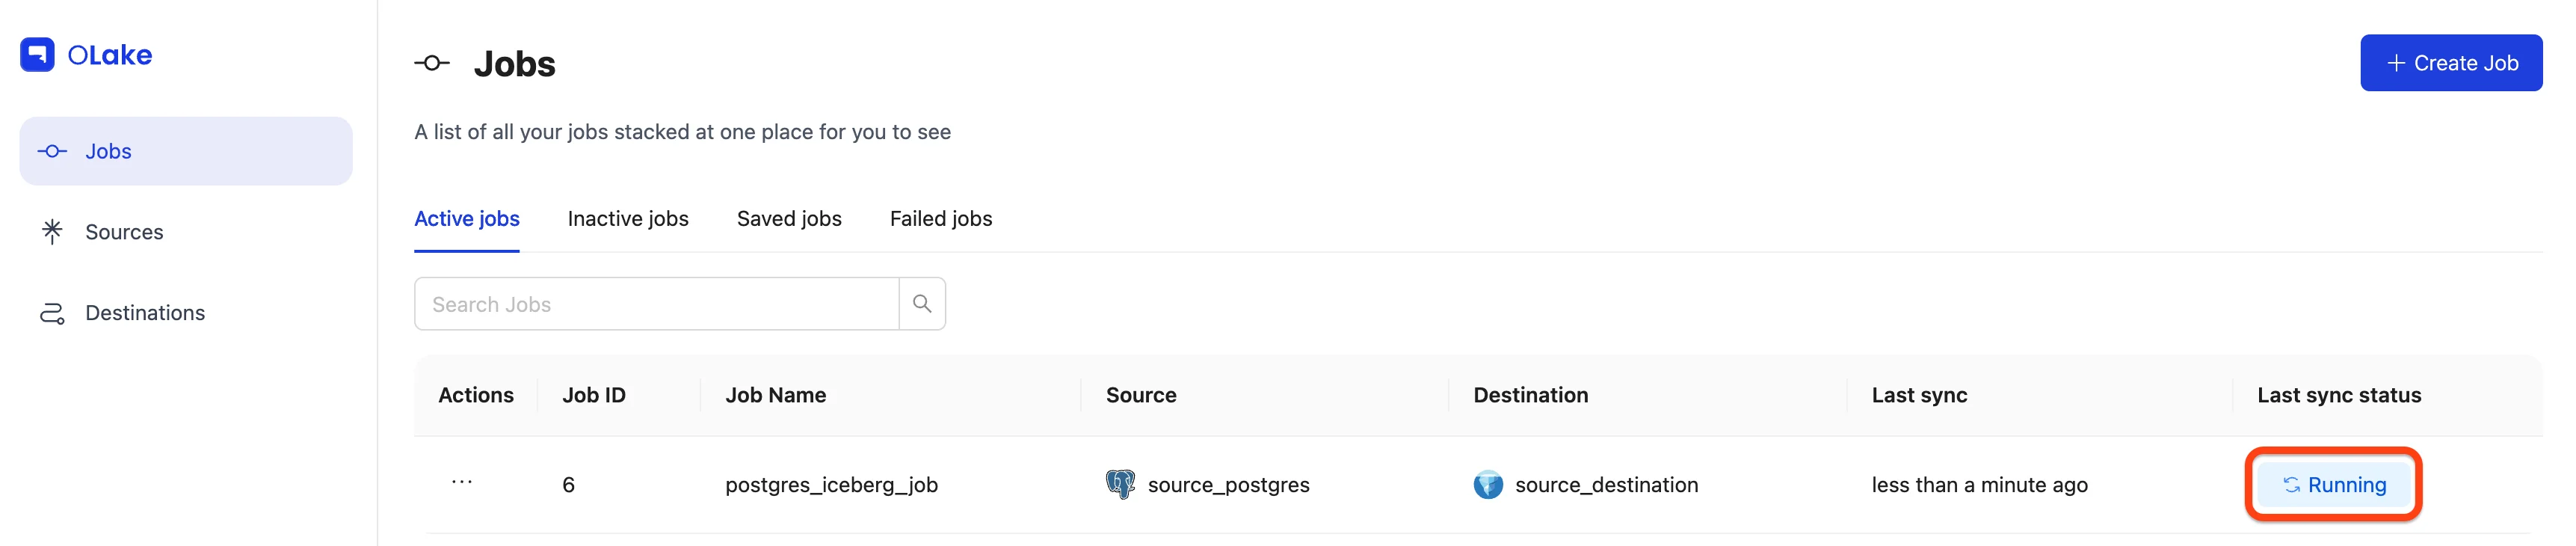
You can verify the sync status by checking the badge at the right end of the job row. Possible statuses include Running, Failed, and Completed. You can also monitor the sync logs by selecting Job Logs and History from the job options menu.
-
Job running:
-
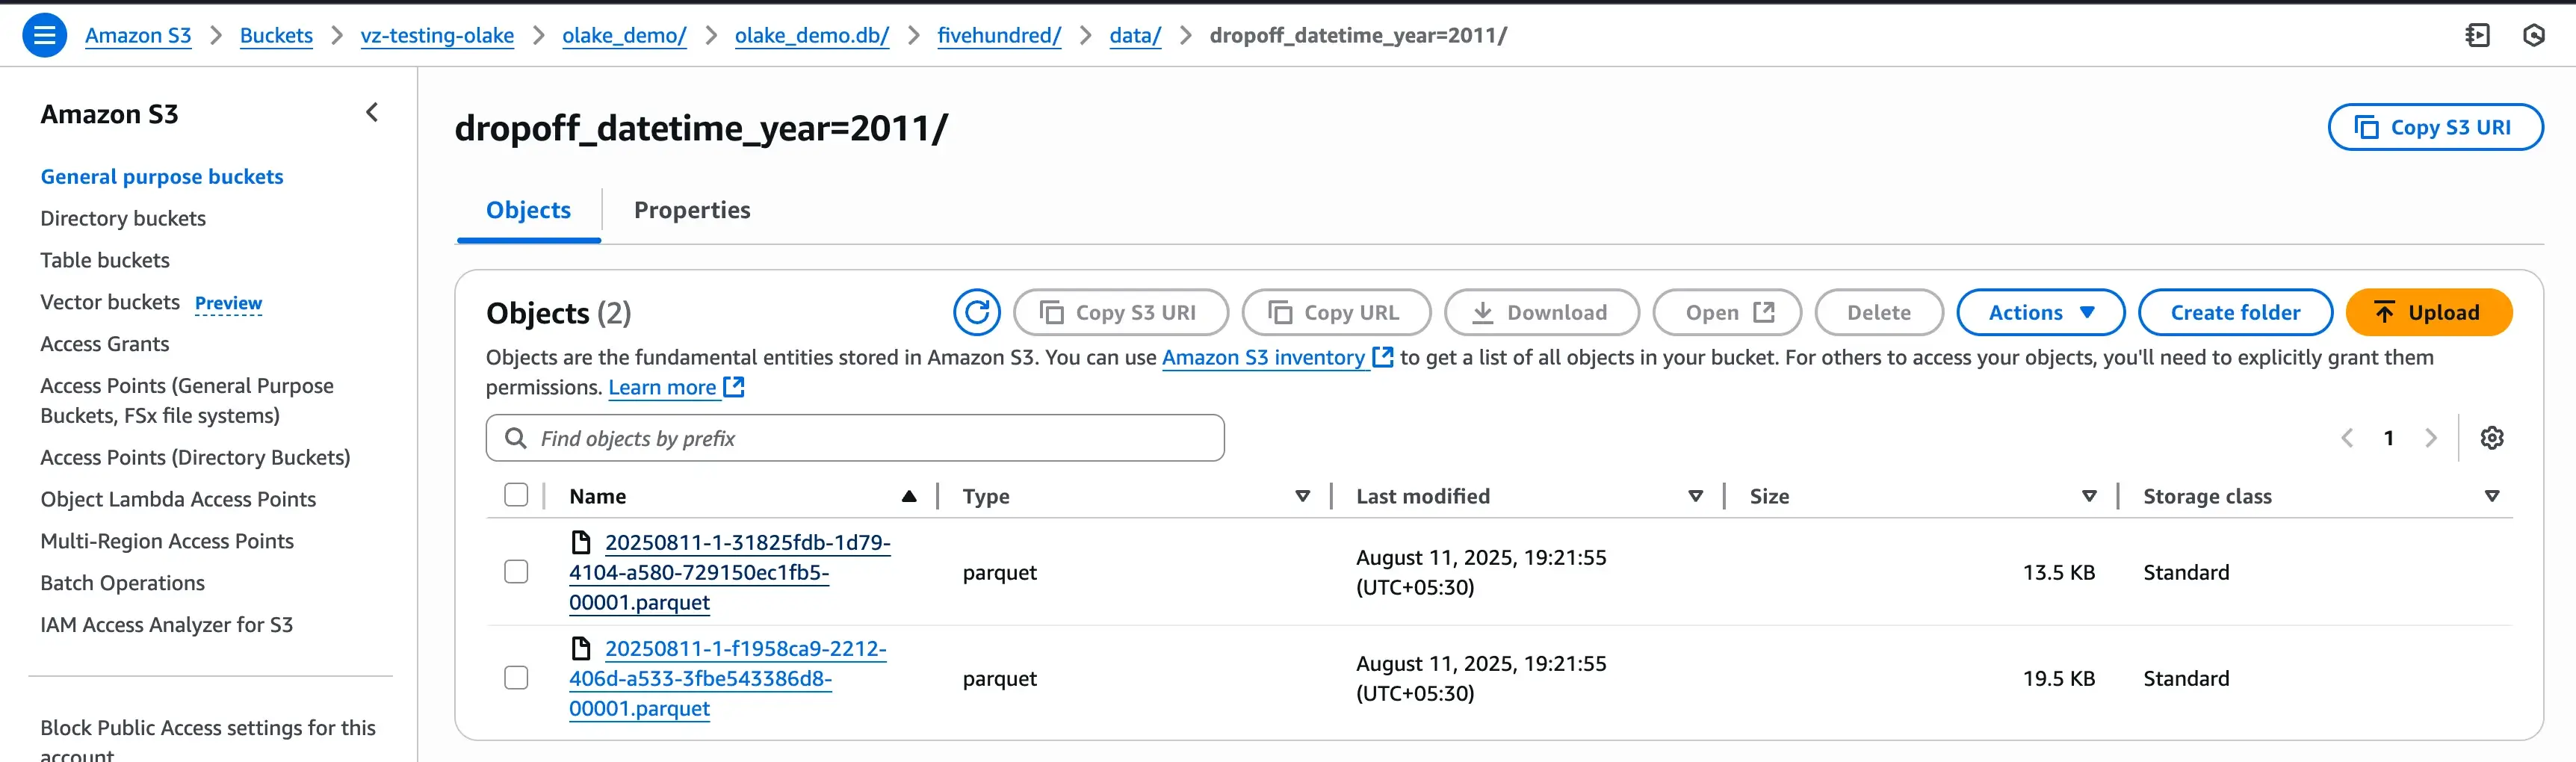
Job completed:

Yay! The sync is complete, and our data has been replicated to Iceberg exactly as we configured it.
6. Manage Your Job
Once your job is created, you can manage it from the Jobs page using the Actions menu (⋮)
To know more about job level features, refer to the Job Level Features guide.