OLake Go Playground
OLake Go Playground is a self-contained environment for exploring lakehouse architecture using Apache Iceberg. It comes preconfigured with all the required components, allowing you to experience the complete workflow without manual setup.
Objective
Enable developers to experiment with an end-to-end, Iceberg-native lakehouse in minutes. Simply run a single Docker Compose docker-compose up command to launch the full stack — no service stitching, no configuration files required.
Included Components
- MySQL – Source database
- OLake Go – Schema discovery and CDC ingestion via an intuitive UI
- MinIO – Object store for data storage
- Temporal – Workflow orchestration for ingestion processes
- Presto – Query engine for Iceberg tables
- Trino – Query engine for Iceberg tables
- Spark – Query engine for Iceberg tables
- Trino
- Presto
- Spark
Trino
Architecture:
┌─────────────┐    ┌─────────────┐    ┌─────────────┐
│    MySQL    │───▶│  OLake Go   │───▶│   MinIO     │
│  (Source)   │    │ (Pipeline)  │    │ (Storage)   │
└─────────────┘    └─────────────┘    └─────────────┘
                    │                  │
                    ▼                  │
            ┌─────────────┐            │
            │ Iceberg     │◀───────────┘
            │ REST Catalog│
            └─────────────┘
                    │
                    ▼
            ┌─────────────┐
            │   Trino     │
            │ (Query UI)  │
            └─────────────┘
Prerequisites
-
Docker: Latest version installed and running
-
Docker Compose: Latest version installed (usually included with Docker Desktop)
-
Resources: Allocate sufficient memory and CPU to Docker (e.g., 8GB+ RAM recommended)
-
Port Availability: The following ports must be available on your system:
- 8000 - OLake UI
- 8088 - Trino query engine UI
- 3000 - SQLPad UI
- 3306 - MySQL database
- 8181 - Iceberg REST catalog API
- 8443 - MinIO console UI
- 9090 - MinIO server API
Note: If any of these ports are in use, stop the conflicting services or modify the port mappings in the docker-compose-v1.yml file.
Configuration & Set Up
1. Start the demo stack
Step 1: Start base OLake Go stack
curl -sSL https://raw.githubusercontent.com/datazip-inc/olake-ui/master/docker-compose-v1.yml | docker compose -f - up -d
Step 2: Clone the repository and navigate to root directory
git clone https://github.com/datazip-inc/olake.git
cd olake
Step 3: Navigate and start services
cd examples/trino-tablurarest-minio-mysql
docker compose up -d
2. Accessing Services
-
Log in to the OLake UI at http://localhost:8000 with credentials
admin/password. -
Verify Source Data:
-
Access the MySQL CLI:
bashdocker exec -it primary_mysql mysql -u root -ppassword -
Select the
weatherdatabase and query the table:sqlUSE weather;SELECT * FROM weather LIMIT 10;This will display the first 10 rows of the
weathertable.
-
Create and Configure a Job:
- Set up the Source:
- Connector:
MySQL - Version: choose the latest available version
- Name of your source:
olake_mysql - Change data capture (CDC) (Enable CDC is on by default):
- Initial Wait Time:
120
- Initial Wait Time:
- Connection details:
- MySQL Host:
host.docker.internal - Database:
weather - Username:
root - Password:
password - Port:
3306 - SSL Configuration:
disable
- MySQL Host:
- Additional configuration:
- Max Threads:
3(default) - Retry Count:
3(default) - SSH Config:
No Tunnel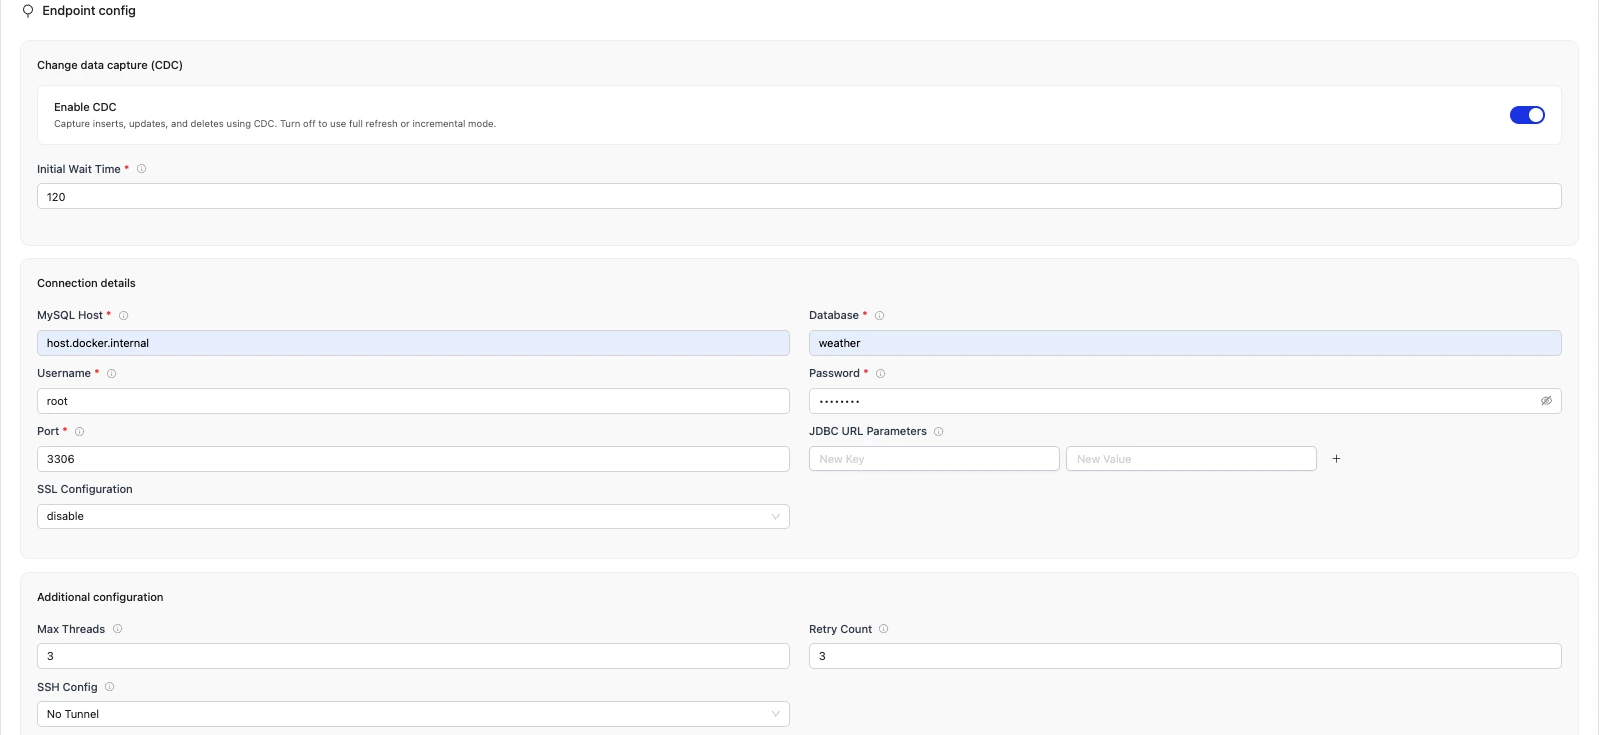
- Max Threads:
- Connector:
- Set up the Destination:
- Connector:
Apache Iceberg - Catalog:
REST Catalog - Name of your destination:
olake_iceberg - Version: choose the latest available version
- Iceberg REST Catalog URL:
http://host.docker.internal:8181 - Iceberg S3 Path:
s3://warehouse/weather/ - S3 Endpoint (for Iceberg data files written by OLake Go workers):
http://host.docker.internal:9090 - AWS Region:
us-east-1 - S3 Access Key:
minio - S3 Secret Key:
minio123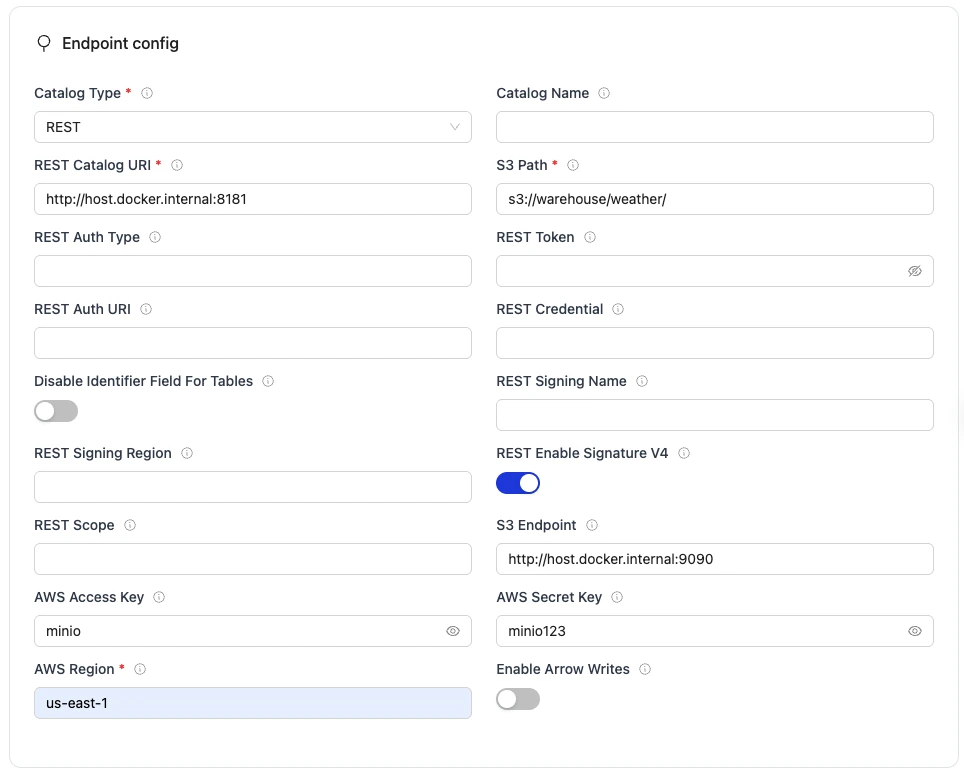
- Connector:
- On the Jobs page, click on the "Create Job" button. Give your job a name and select a replication frequency. Then select the source and destination configurations that you created in the previous steps. Once done click on the Next button.
- Select Streams to sync:
- Make sure that the weather table has been selected for the sync.
- Click on the weather table and make sure that the Normalisation is set to
trueusing the toggle button.
- Save and Run the Job:
- Save the job configuration.
- Run the job manually from the UI to initiate the data pipeline from MySQL to Iceberg by clicking Sync now.
- Set up the Source:
3. Query in Trino
Run Queries via Trino CLI:
Replace {job_name} with the name of the job you set when creating the job in OLake Go.
docker exec -it olake-trino-coordinator trino \
  --catalog iceberg --schema {job_name}_weather \
  --execute "SELECT * from weather LIMIT 10;"
Service Validation
1. View Logs
# All services
docker compose logs -f

# Specific service
docker compose logs -f trino
2. Check Service Status
# Make sure all services are running
docker compose ps
3. Verify Data Load
# Connect to MySQL
docker exec -it primary_mysql mysql -u root -ppassword weather

# Check weather table
SELECT COUNT(*) FROM weather;
SELECT * FROM weather LIMIT 5;
4. Test Trino Connection
# Check if Trino can see Iceberg tables
docker exec -it olake-trino-coordinator trino \
  --catalog iceberg --schema job_weather \
  --execute "SHOW TABLES;"
Troubleshooting
1. Trino can't connect to Iceberg:
- Ensure the data pipeline in OLake Go has run successfully
- Check that MinIO bucket contains data:
http://localhost:8443 - Verify Iceberg REST catalog is responding:
http://localhost:8181/v1/namespaces
2. MySQL connection issues:
- Wait for
init-mysql-tasksto complete data loading - Check MySQL logs:
docker compose logs primary_mysql
3. MinIO access issues:
- Check MinIO credentials in docker-compose-v1.yml match OLake Go destination config
- Verify bucket permissions in MinIO console
Cleanup
Step 1: Stop this example
docker compose down
Step 2: Stop base OLake Go stack
curl -sSL https://raw.githubusercontent.com/datazip-inc/olake-ui/master/docker-compose-v1.yml | docker compose -f - down
Presto
Architecture:
┌─────────────┐    ┌─────────────┐    ┌─────────────┐
│    MySQL    │───▶│  OLake Go   │───▶│   MinIO     │
│  (Source)   │    │ (Pipeline)  │    │ (Storage)   │
└─────────────┘    └─────────────┘    └─────────────┘
                    │                  │
                    ▼                  │
            ┌─────────────┐            │
            │ Iceberg     │◀───────────┘
            │ REST Catalog│
            └─────────────┘
                    │
                    ▼
            ┌─────────────┐
            │   Presto    │
            │ (Query UI)  │
            └─────────────┘
Prerequisites
-
Docker: Latest version installed and running
-
Docker Compose: Latest version installed (usually included with Docker Desktop)
-
Resources: Allocate sufficient memory and CPU to Docker (e.g., 8GB+ RAM recommended)
-
Port Availability: The following ports must be available on your system:
- 8000 - OLake UI
- 8088 - Presto query engine UI
- 3306 - MySQL database
- 8181 - Iceberg REST catalog API
- 8443 - MinIO console UI
- 9090 - MinIO server API
Note: If any of these ports are in use, stop the conflicting services or modify the port mappings in the docker-compose-v1.yml file.
Configuration & Set Up
1. Start the demo stack
Step 1: Start base OLake Go stack
curl -sSL https://raw.githubusercontent.com/datazip-inc/olake-ui/master/docker-compose-v1.yml | docker compose -f - up -d
Step 2: Clone the repository and navigate to root directory
git clone https://github.com/datazip-inc/olake.git
cd olake
Step 3: Navigate and start services
cd examples/presto-tabularest-minio-mysql
docker compose up -d
2. Accessing Services
-
Log in to the OLake UI at http://localhost:8000 with credentials
admin/password. -
Verify Source Data:
-
Access the MySQL CLI:
bashdocker exec -it primary_mysql mysql -u root -ppassword -
Select the
weatherdatabase and query the table:sqlUSE weather;SELECT * FROM weather LIMIT 10;This will display the first 10 rows of the
weathertable.
-
Create and Configure a Job:
- Set up the Source:
- Connector:
MySQL - Version: choose the latest available version
- Name of your source:
olake_mysql - Change data capture (CDC) (Enable CDC is on by default):
- Initial Wait Time:
120
- Initial Wait Time:
- Connection details:
- MySQL Host:
host.docker.internal - Database:
weather - Username:
root - Password:
password - Port:
3306 - SSL Configuration:
disable
- MySQL Host:
- Additional configuration:
- Max Threads:
3(default) - Retry Count:
3(default) - SSH Config:
No Tunnel
- Max Threads:
- Connector:
- Set up the Destination:
- Connector:
Apache Iceberg - Catalog:
REST Catalog - Name of your destination:
olake_iceberg - Version: choose the latest available version
- Iceberg REST Catalog URL:
http://host.docker.internal:8181 - Iceberg S3 Path:
s3://warehouse/weather/ - S3 Endpoint (for Iceberg data files written by OLake Go workers):
http://host.docker.internal:9090 - AWS Region:
us-east-1 - S3 Access Key:
minio - S3 Secret Key:
minio123
- Connector:
- On the Jobs page, click on the "Create Job" button. Give your job a name and select a replication frequency. Then select the source and destination configurations that you created in the previous steps. Once done click on the Next button.
- Select Streams to sync:
- Make sure that the weather table has been selected for the sync.
- Click on the weather table and make sure that the Normalisation is set to
trueusing the toggle button.
- Save and Run the Job:
- Save the job configuration.
- Run the job manually from the UI to initiate the data pipeline from MySQL to Iceberg by clicking Sync now.
- Set up the Source:
3. Query in Presto
- Access Presto UI:
http://localhost:8088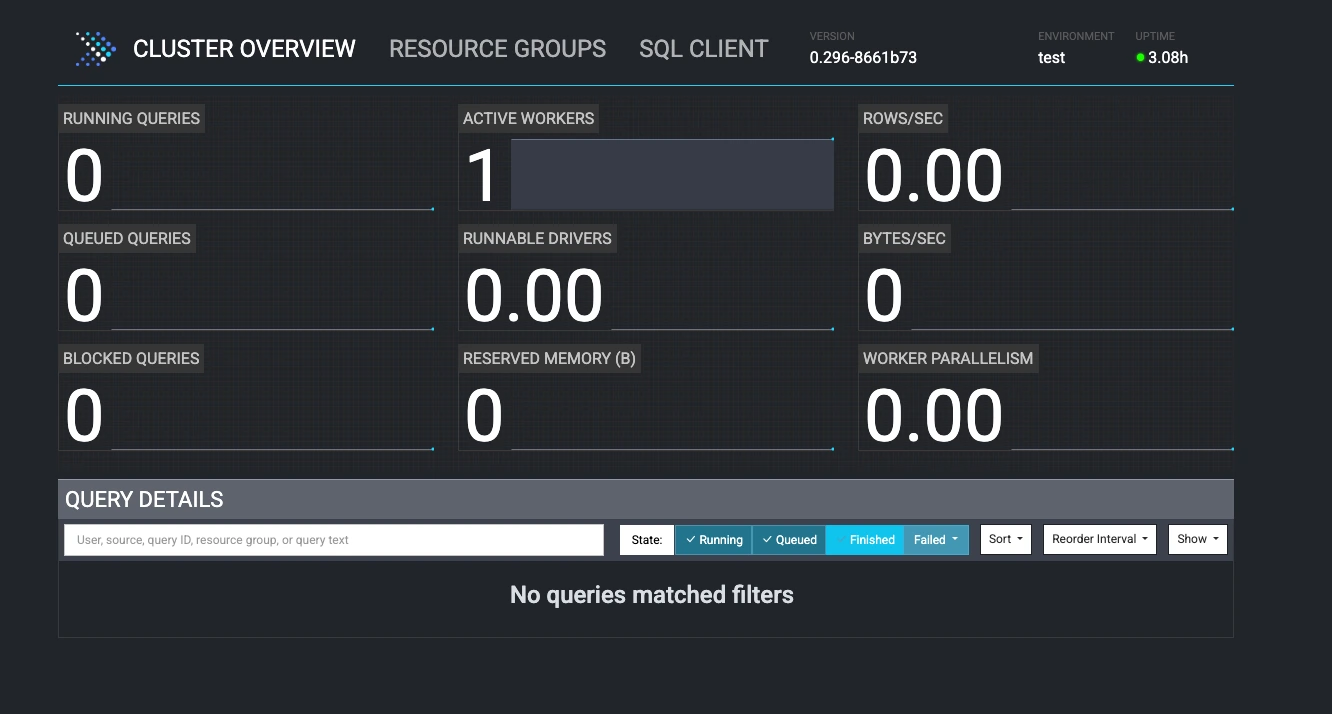
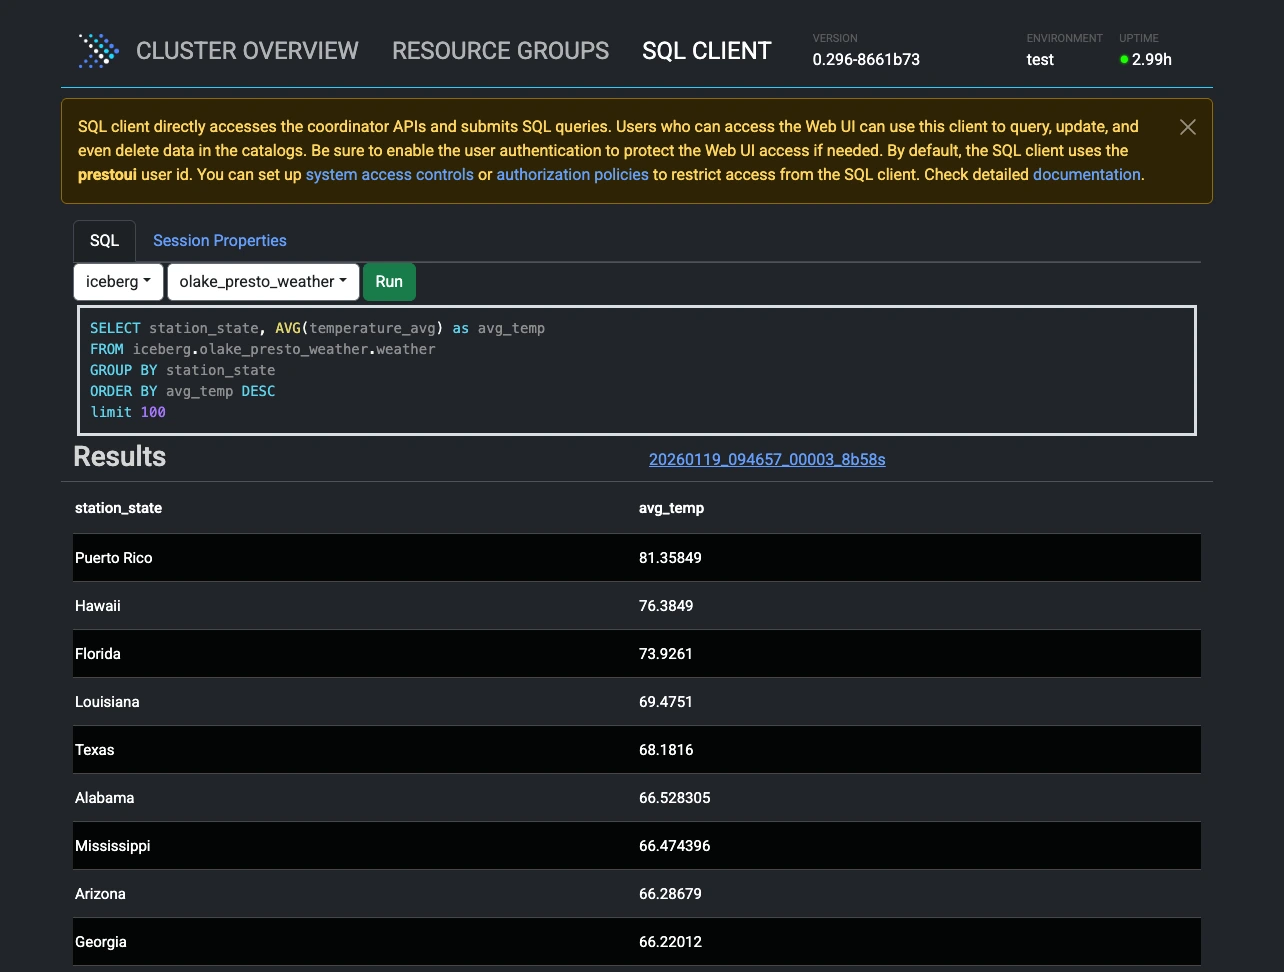
- Run Queries:
- Click on SQL CLIENT at the top
- Select Catalog:
iceberg, Schema:{job_name}_weather - Query example:
sqlSELECT station_state, AVG(temperature_avg) as avg_tempFROM iceberg.{job_name}_weather.weatherGROUP BY station_stateORDER BY avg_temp DESCLIMIT 10;
Service Validation
1. View Logs
# All services
docker compose logs -f

# Specific service
docker compose logs -f presto
2. Verify Data Load
# Connect to MySQL
docker exec -it primary_mysql mysql -u root -ppassword weather

# Check weather table
SELECT COUNT(*) FROM weather;
SELECT * FROM weather LIMIT 5;
3.Test Presto Connection
# Check if Presto can see Iceberg tables
# Make sure to replace {job_name} with your actual job name.
docker exec -it olake-presto-coordinator presto-cli --catalog iceberg --schema {job_name}_weather --execute "SHOW TABLES;"
Troubleshooting
1. Presto can't connect to Iceberg:
- Ensure the data pipeline in OLake Go has run successfully
- Check that MinIO bucket contains data:
http://localhost:8443 - Verify Iceberg REST catalog is responding:
http://localhost:8181/v1/namespaces
2. MySQL connection issues:
- Wait for
init-mysql-tasksto complete data loading - Check MySQL logs:
docker compose logs primary_mysql
3. MinIO access issues:
- Check MinIO credentials in docker-compose-v1.yml match OLake Go destination config
- Verify bucket permissions in MinIO console
Cleanup
Step 1: Stop this example
docker compose down
Step 2: Stop base OLake Go stack
curl -sSL https://raw.githubusercontent.com/datazip-inc/olake-ui/master/docker-compose-v1.yml | docker compose -f - down
Spark
Architecture:
┌─────────────┐    ┌─────────────┐    ┌─────────────┐
│    MySQL    │───▶│  OLake Go   │───▶│   MinIO     │
│  (Source)   │    │ (Pipeline)  │    │ (Storage)   │
└─────────────┘    └─────────────┘    └─────────────┘
                    │                  │
                    ▼                  │
            ┌─────────────┐            │
            │ Iceberg     │◀───────────┘
            │ REST Catalog│
            └─────────────┘
                    │
                    ▼
            ┌─────────────┐
            │   Spark     │
            │ (Query UI)  │
            └─────────────┘
Prerequisites
-
Docker: Latest version installed and running
-
Docker Compose: Latest version installed (usually included with Docker Desktop)
-
Resources: Allocate sufficient memory and CPU to Docker (e.g., 8GB+ RAM recommended)
-
Port Availability: The following ports must be available on your system:
- 8000 - OLake UI
- 8888 - Jupyter Notebook (Spark)
- 3306 - MySQL database
- 8181 - Iceberg REST catalog API
- 9091 - MinIO console UI
- 9000 - MinIO server API
Note: If any of these ports are in use, stop the conflicting services or modify the port mappings in the docker-compose-v1.yml file.
Configuration & Set Up
1. Start the demo stack
Step 1: Start base OLake Go stack
curl -sSL https://raw.githubusercontent.com/datazip-inc/olake-ui/master/docker-compose-v1.yml | docker compose -f - up -d
Step 2: Clone the repository and navigate to root directory
git clone https://github.com/datazip-inc/olake.git
cd olake
Step 3: Navigate and start services
cd examples/spark-tablurarest-minio-mysql
docker compose up -d
2. Accessing Services
-
Log in to the OLake UI at http://localhost:8000 with credentials
admin/password. -
Verify Source Data:
-
Access the MySQL CLI:
bashdocker exec -it primary_mysql mysql -u root -ppassword -
Select the
weatherdatabase and query the table:sqlUSE weather;SELECT * FROM weather LIMIT 10;This will display the first 10 rows of the
weathertable.
-
Create and Configure a Job:
- Set up the Source:
- Connector:
MySQL - Version: choose the latest available version
- Name of your source:
olake_mysql - Change data capture (CDC) (Enable CDC is on by default):
- Initial Wait Time:
120
- Initial Wait Time:
- Connection details:
- MySQL Host:
host.docker.internal - Database:
weather - Username:
root - Password:
password - Port:
3306 - SSL Configuration:
disable
- MySQL Host:
- Additional configuration:
- Max Threads:
3(default) - Retry Count:
3(default) - SSH Config:
No Tunnel
- Max Threads:
- Connector:
- Set up the Destination:
- Connector:
Apache Iceberg - Catalog:
REST Catalog - Name of your destination:
olake_iceberg - Version: choose the latest available version
- Iceberg REST Catalog URL:
http://host.docker.internal:8181 - Iceberg S3 Path:
s3://warehouse/weather/ - S3 Endpoint (for Iceberg data files written by OLake Go workers):
http://host.docker.internal:9000 - AWS Region:
us-east-1 - S3 Access Key:
minio - S3 Secret Key:
minio123
- Connector:
- On the Jobs page, click on the "Create Job" button. Give your job a name and select a replication frequency. Then select the source and destination configurations that you created in the previous steps. Once done click on the Next button.
- Select Streams to sync:
- Make sure that the weather table has been selected for the sync.
- Click on the weather table and make sure that the Normalisation is set to
trueusing the toggle button.
- Save and Run the Job:
- Save the job configuration.
- Run the job manually from the UI to initiate the data pipeline from MySQL to Iceberg by clicking Sync now.
- Set up the Source:
3. Query Data with Spark
Option 1: Using Spark SQL Shell
-
Access Spark SQL:
bashdocker exec -it olake-spark /opt/spark/bin/spark-sql -
Run Queries:
sqlSHOW CATALOGS;You will see the
olake_icebergcatalog available.sqlSHOW NAMESPACES IN olake_iceberg;You will be able to see the namespace created for your table as
{job_name}_weatherNow check the tables available in the namespace:
sqlSHOW TABLES IN {job_name}_weather;Now, query the iceberg table
sqlSELECT * FROM olake_iceberg.{job_name}_weather.weather LIMIT 10;
Option 2: Using Jupyter Notebook
-
Access Jupyter: http://localhost:8888 (no password required)
-
Create a new python notebook and run these commands in cells:
python%%sqlSHOW CATALOGS;sql%%sqlSHOW NAMESPACES IN olake_iceberg;sql%%sqlSHOW TABLES IN {job_name}_weather;sql%%sqlSELECT * FROM olake_iceberg.{job_name}_weather.weather LIMIT 10;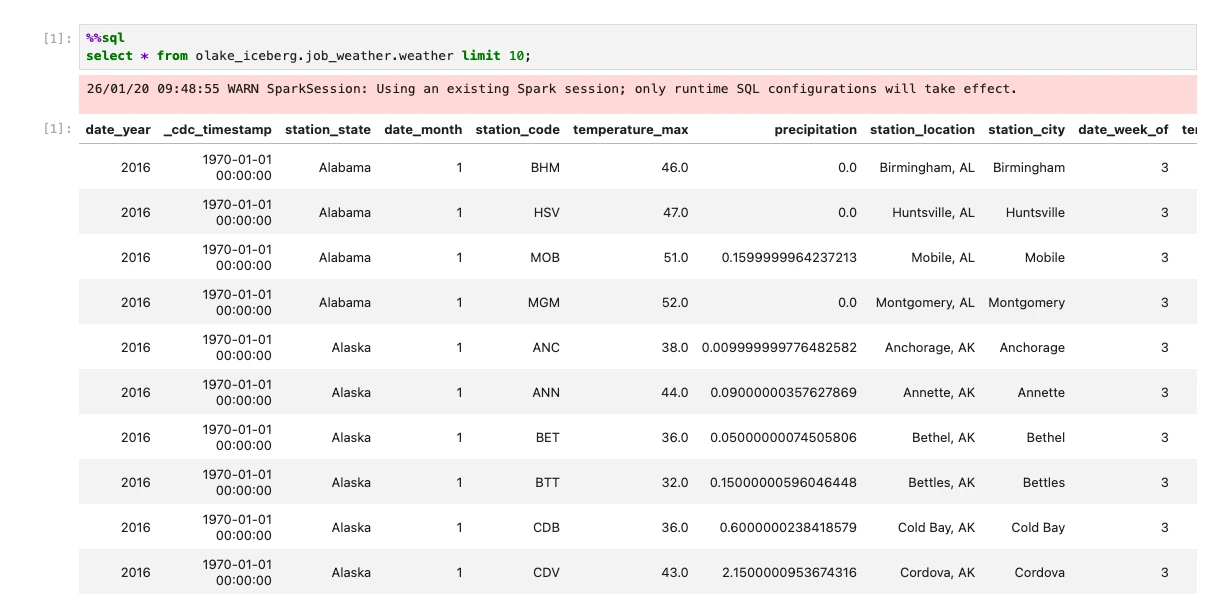
Troubleshooting
1. Spark can't connect to Iceberg:
- Ensure the data pipeline in OLake Go has run successfully
- Check that MinIO bucket contains data:
http://localhost:9091(credentials: minio/minio123) - Verify Iceberg REST catalog is responding:
http://localhost:8181/v1/namespaces
2. MinIO access issues:
- Check MinIO credentials in docker-compose-v1.yml match OLake Go destination config
- Verify bucket permissions in MinIO console
Cleanup
Step 1: Stop this example
docker compose down
Step 2: Stop base OLake Go stack
curl -sSL https://raw.githubusercontent.com/datazip-inc/olake-ui/master/docker-compose-v1.yml | docker compose -f - down