Iceberg Lakehouse on Azure: A Step-by-Step Guide with OLake and Lakekeeper
Running Iceberg on Azure usually means gluing together storage, catalogs, and data-loading scripts yourself. OLake does that for you: it streams database changes, writes Iceberg-compatible Parquet files directly to ADLS Gen2, and updates the catalog automatically.
The result is a query-ready Iceberg table on Azure with almost zero manual setup.
In this guide, we will demonstrate how OLake makes it easy to build a production-ready data pipeline on Azure. We will use OLake to orchestrate a best-in-class open-source stack:
- Lakekeeper: As our open-source Iceberg REST Catalog to manage table metadata.
- Apache Iceberg: As the open table format for reliability and performance.
- Azure Data Lake Storage (ADLS) Gen2: As the scalable storage layer for our data.
By following these steps, you will see firsthand how OLake can help you set up a fully functional pipeline, writing data into a query-ready Iceberg table on your Azure subscription with minimal friction.
Architecture Overview
Before we begin, it's important to understand how these components interact:
- OLake (The Writer): Connects to your source database, reads data, formats it into Parquet files, and writes those files directly to Azure ADLS Gen2.
- Lakekeeper (The Catalog): Manages the metadata for our Iceberg tables. OLake communicates with Lakekeeper's REST API to commit new data files and update table versions. It does not store the data itself.
- Azure ADLS Gen2 (The Storage): This is the durable, scalable storage layer in Azure where all the actual Iceberg data (Parquet files) will reside.
Prerequisites
To follow this guide, you will need:
- An active Azure subscription with permissions to create resources.
- Docker and Docker Compose installed on your local machine.
- Git for cloning the required repositories.
Step 1: Prepare Azure Resources (via the Azure Portal)
First, we need to set up the storage foundation and credentials on Azure. All these steps are performed in the Azure Portal.
-
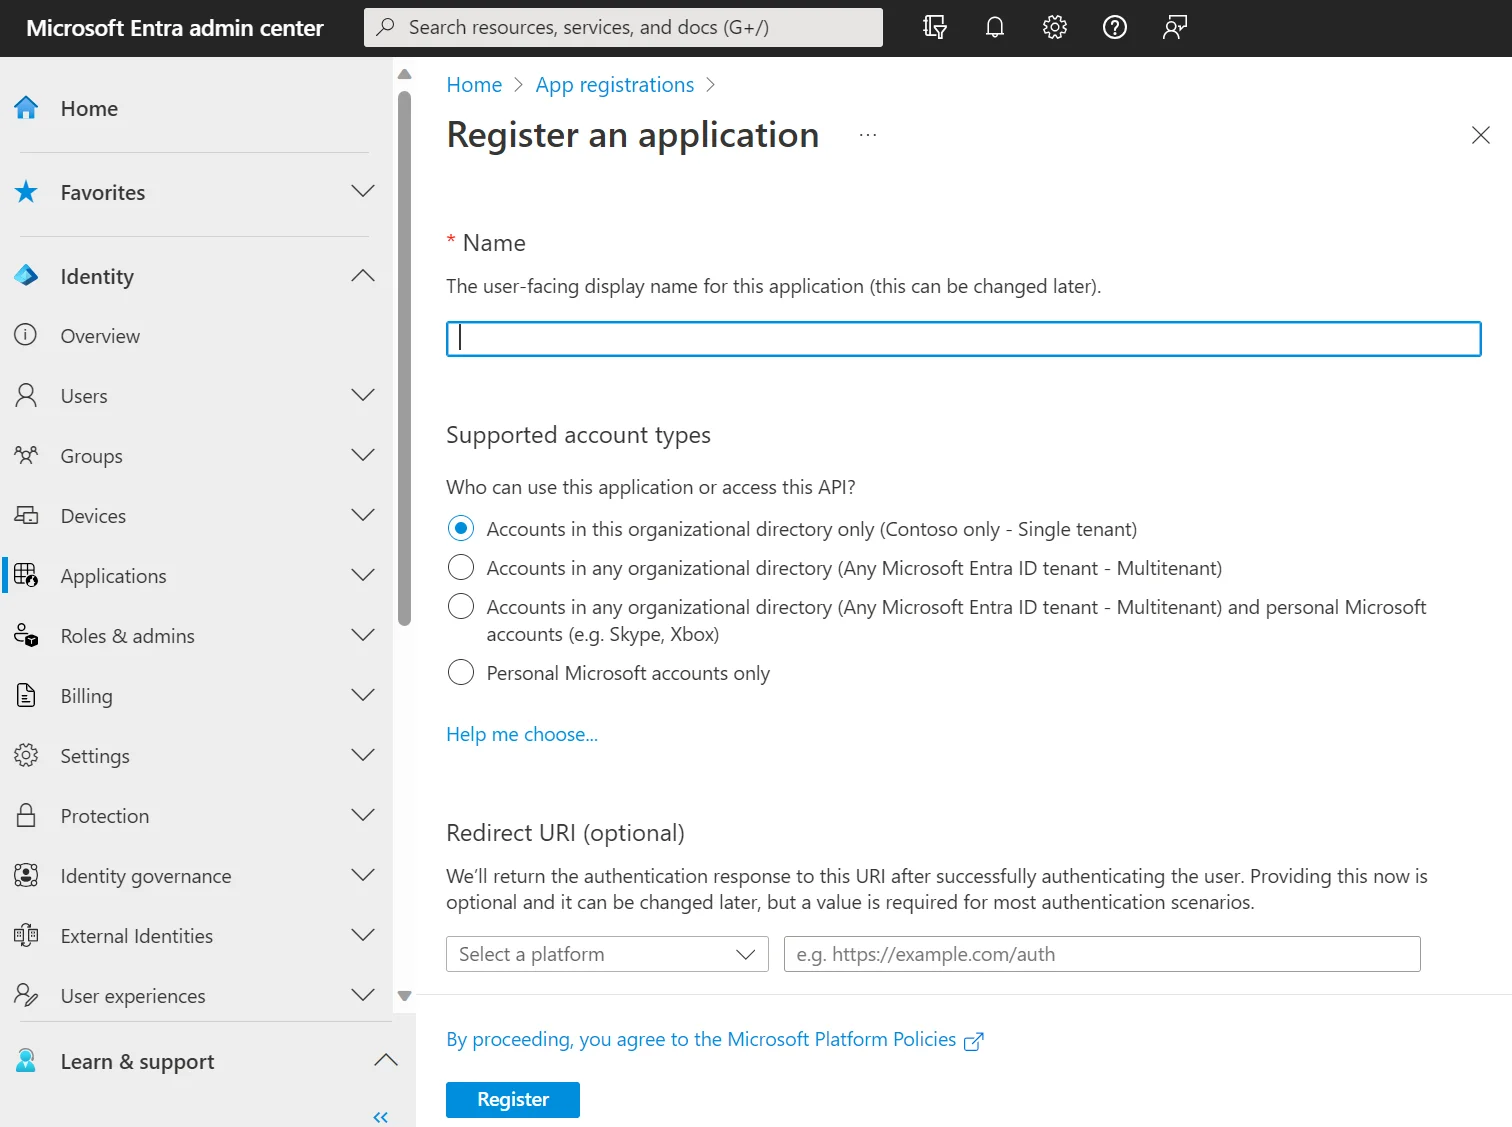
Create Service Principal: Create a new App Registration. This will be our application's identity.
Name:Olake Warehouse (Development)
Redirect URI: Leave emptya. When the App Registration is created, select "Manage" -> "Certificates & secrets" and create a "New client secret". Note down the secrets "Value".
b. In the "Overview" page of the "App Registration" note down the
Application (client) IDand theDirectory (tenant) ID.
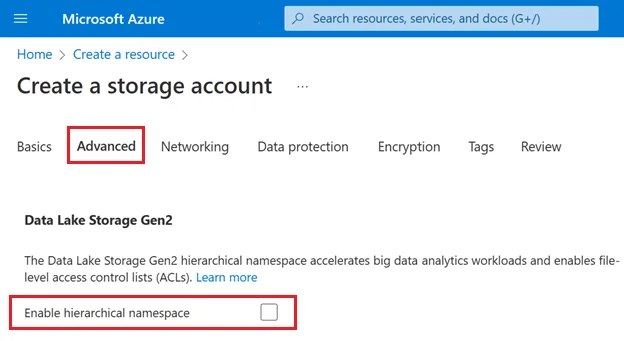
- Create Storage Account: Create a new storage account with name "olakehouse". On the "Advanced" tab during creation, ensure you enable the "Hierarchical namespace" option to make it an ADLS Gen2 account.
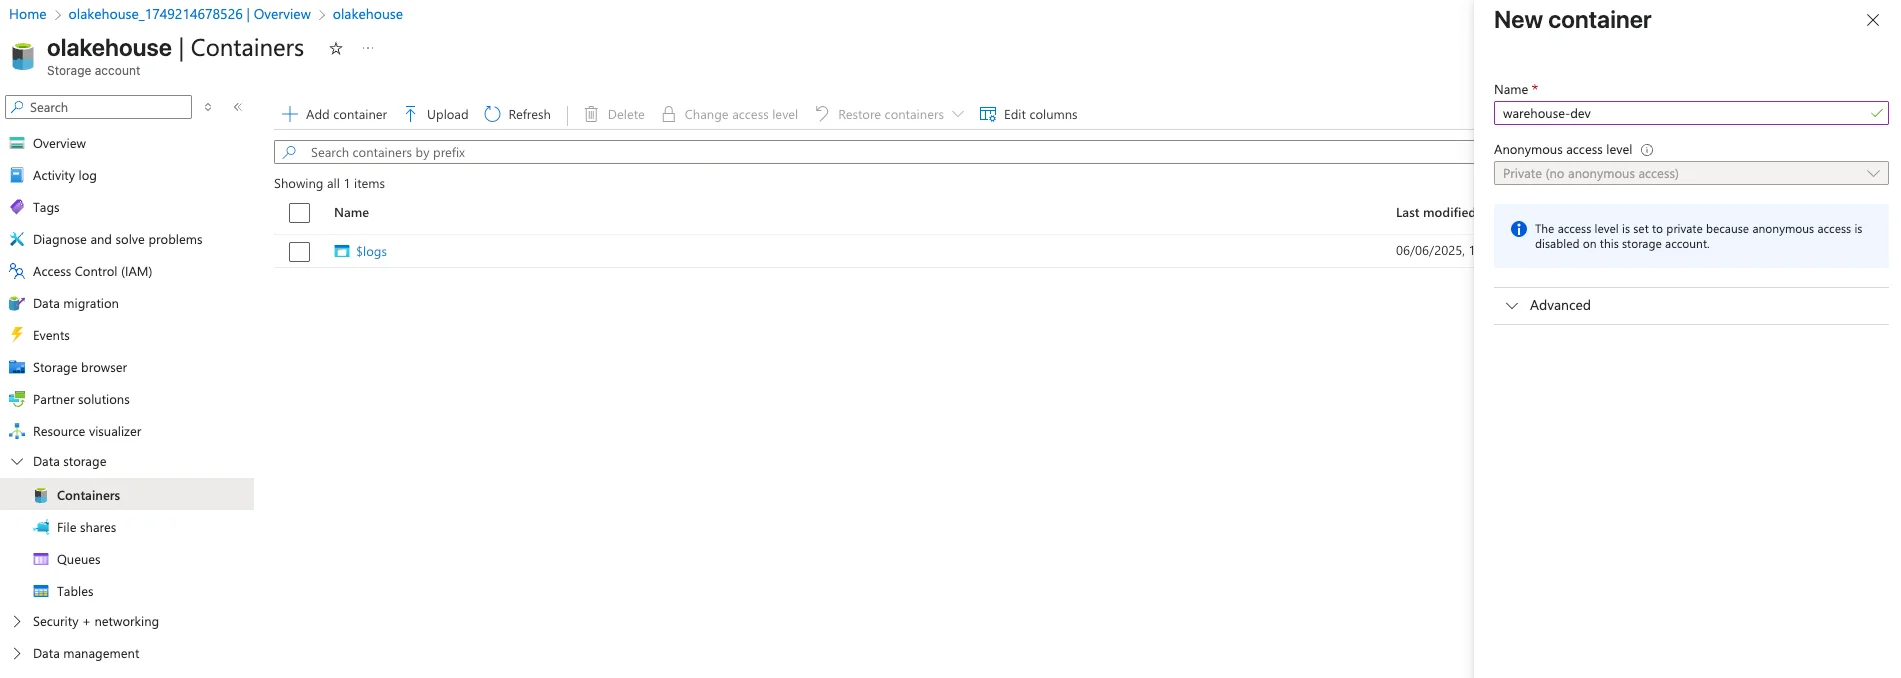
- Create Storage Container: Inside your new storage account, create a container by heading over to "Data Storage" → "Containers" → "Add container". We will name it
warehouse-devfor this guide.
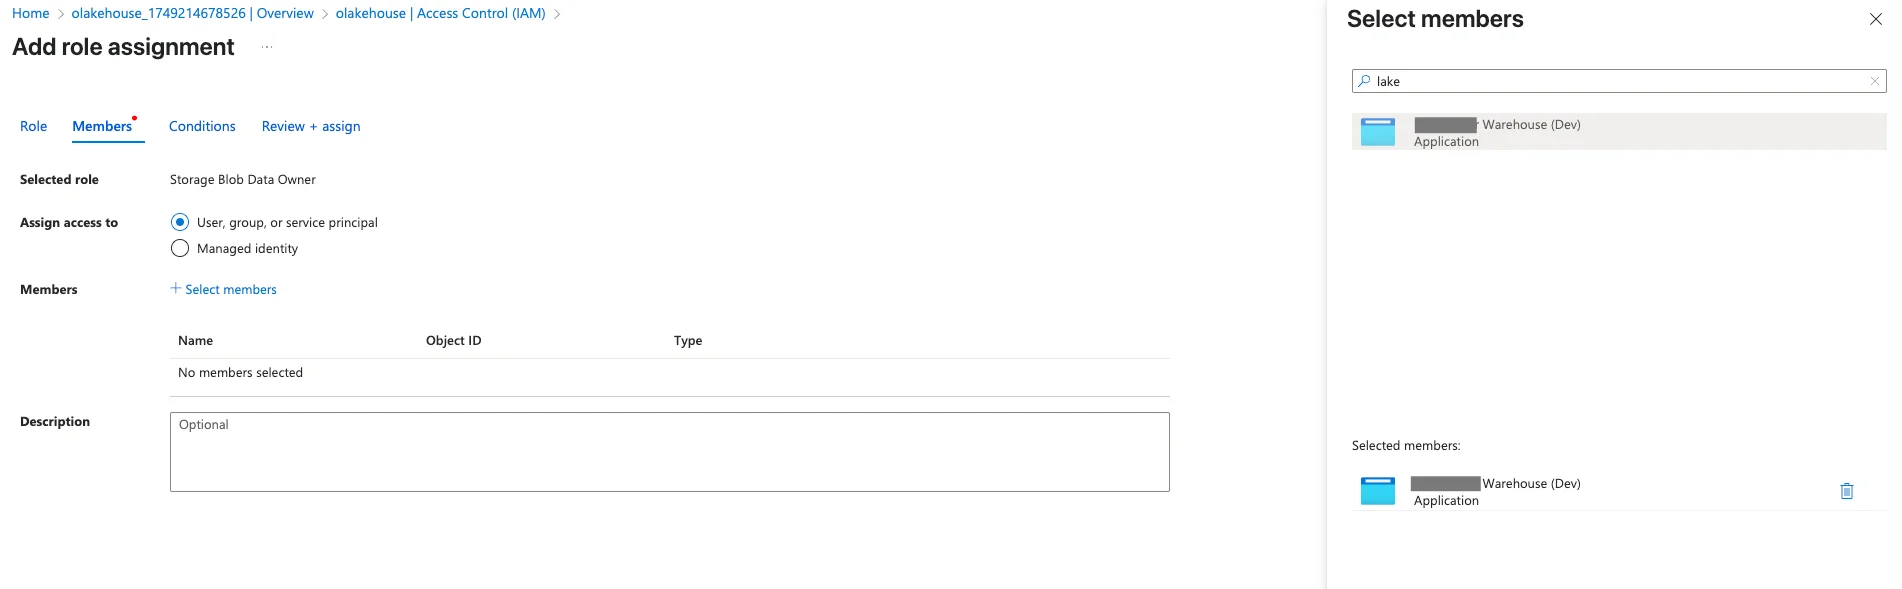
- Assign Permissions: The Service Principal needs permission to manage data in the storage account. Navigate to your storage account's Access Control (IAM) page and add two separate role assignments for the Service Principal you just created:
- Role 1: Storage Blob Data Owner: This grants essential permissions to read, write, and delete data files, which Iceberg needs for managing table content.
- Role 2: Storage Blob Delegator: Allows the service principal to generate user delegation SAS tokens, a secure mechanism used by some libraries for granting temporary access.
Step 2: Set Up the Lakekeeper Environment
Now, let's get the Lakekeeper REST Catalog running using its official Docker Compose setup.
-
Get the Lakekeeper Docker Compose file: Follow the instructions at the Lakekeeper Getting Started Guide to get their
docker-compose.ymlfile. This will typically involve cloning their repository. -
Start Lakekeeper: In the directory containing the Lakekeeper docker-compose.yml, run the following command:
docker compose up -dThis will start the Lakekeeper REST catalog service and its required PostgreSQL backend. Lakekeeper's API will now be available on your local machine at
http://localhost:8181.
Step 3: Add the Azure Warehouse to Lakekeeper
Before Olake can use Lakekeeper, we must configure Lakekeeper to be aware of our ADLS Gen2 storage.
- Access the Lakekeeper UI: Open your browser and navigate to
http://localhost:8181. - Add a New Warehouse: Find the section for adding a new storage profile or warehouse.
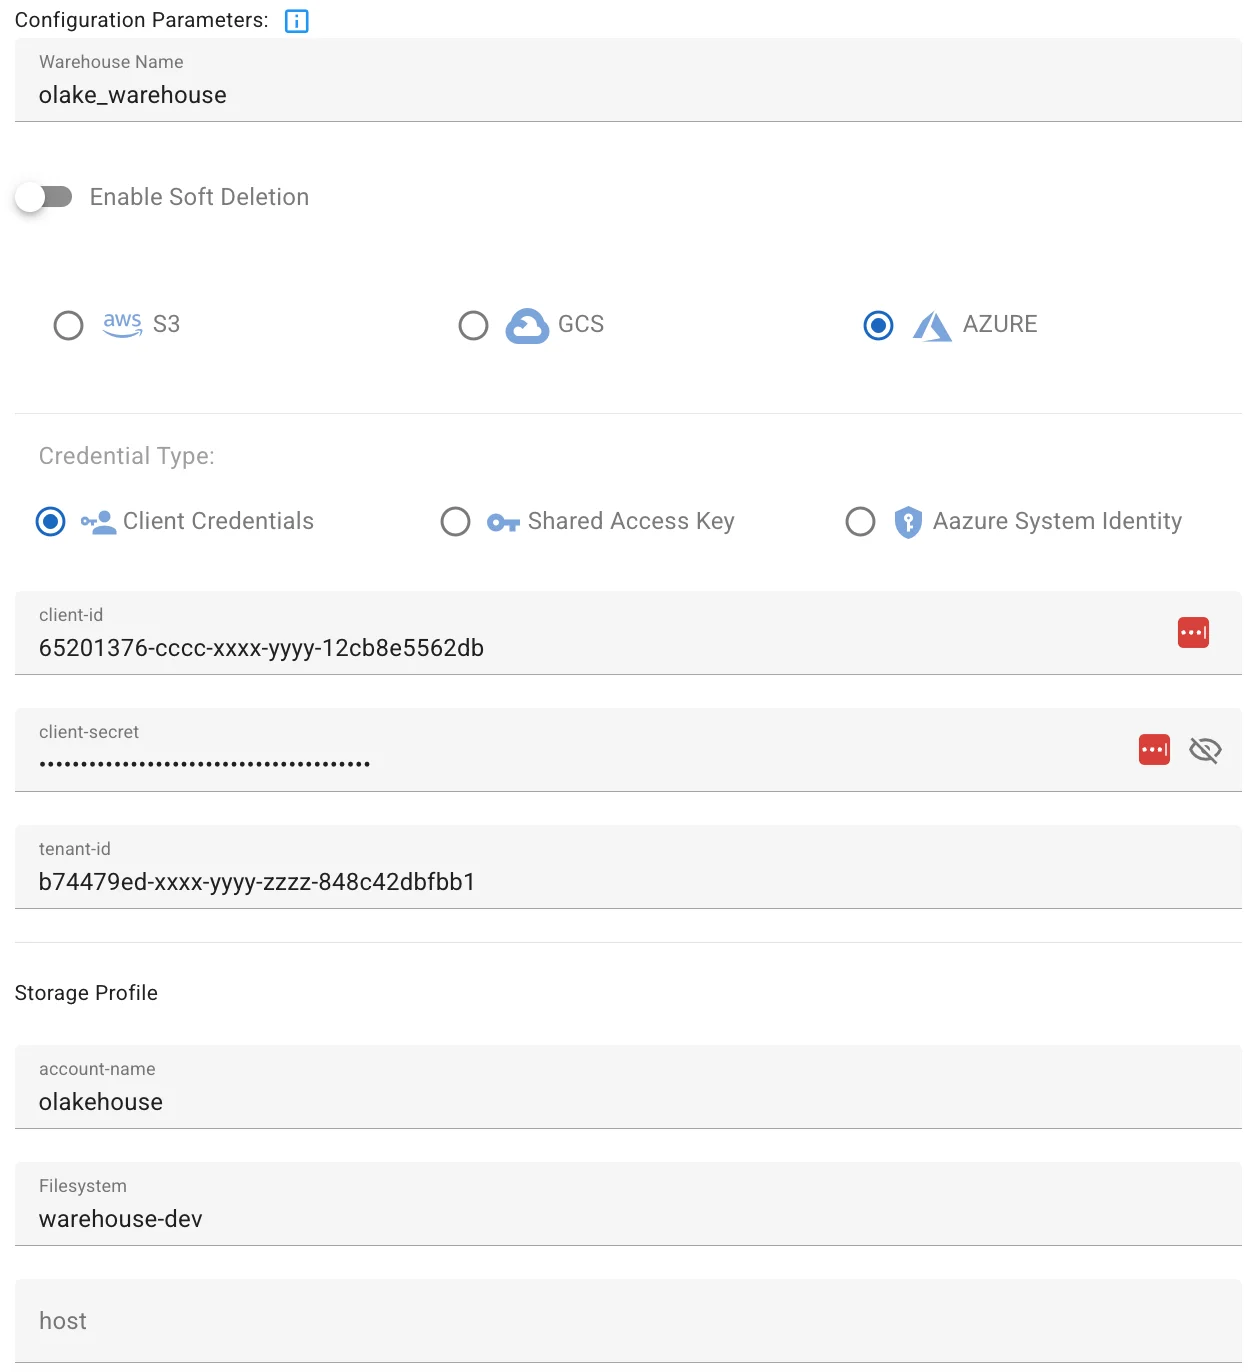
- Configure the ADLS Gen2 Profile:
- Warehouse Name:
olake_warehouse - Storage Type: Select "Azure".
- Credential Type: Select "Client Credentials".
- Client ID: The
Application (client) IDof theOlake Warehouse (Development)App Registration from Step 1. - Client Secret: The "Value" of the client secret that we noted down previously in Step 1.
- Tenant ID: The
Directory (tenant) IDfrom the Applications Overview page from Step 1. - Account Name: olakehouse
- Filesystem: Name of the container previously created. In our example its
warehouse-dev.
- Warehouse Name:
- Save the Warehouse Profile. Lakekeeper is now connected to your Azure storage.
Step 4: Set Up the OLake Environment
Now, let's get the Olake UI running using its official Docker Compose setup.
-
Get the OLake Docker Compose file: Follow the instructions at the OLake Getting Started to get the
docker-compose.ymlfile. -
Start OLake: Follow the steps from the docs and remember to modify the directory in
docker-compose.ymlwhere OLake's persistent data and configuration will be stored, once done, run the following command:docker compose up -dThis will start the OLake UI along with Temporal and PostgreSQL services. OLake’s UI will now be available on your local machine at http://localhost:8000.
Step 5: Configure the Iceberg Destination in the Olake UI
With all services running, we will now connect Olake to Lakekeeper and Azure.
- Log in to Olake UI: Open your browser and navigate to http://localhost:8000.
- Navigate to Destinations: Go to the Destinations page and click "Create Destination", then select Apache Iceberg.
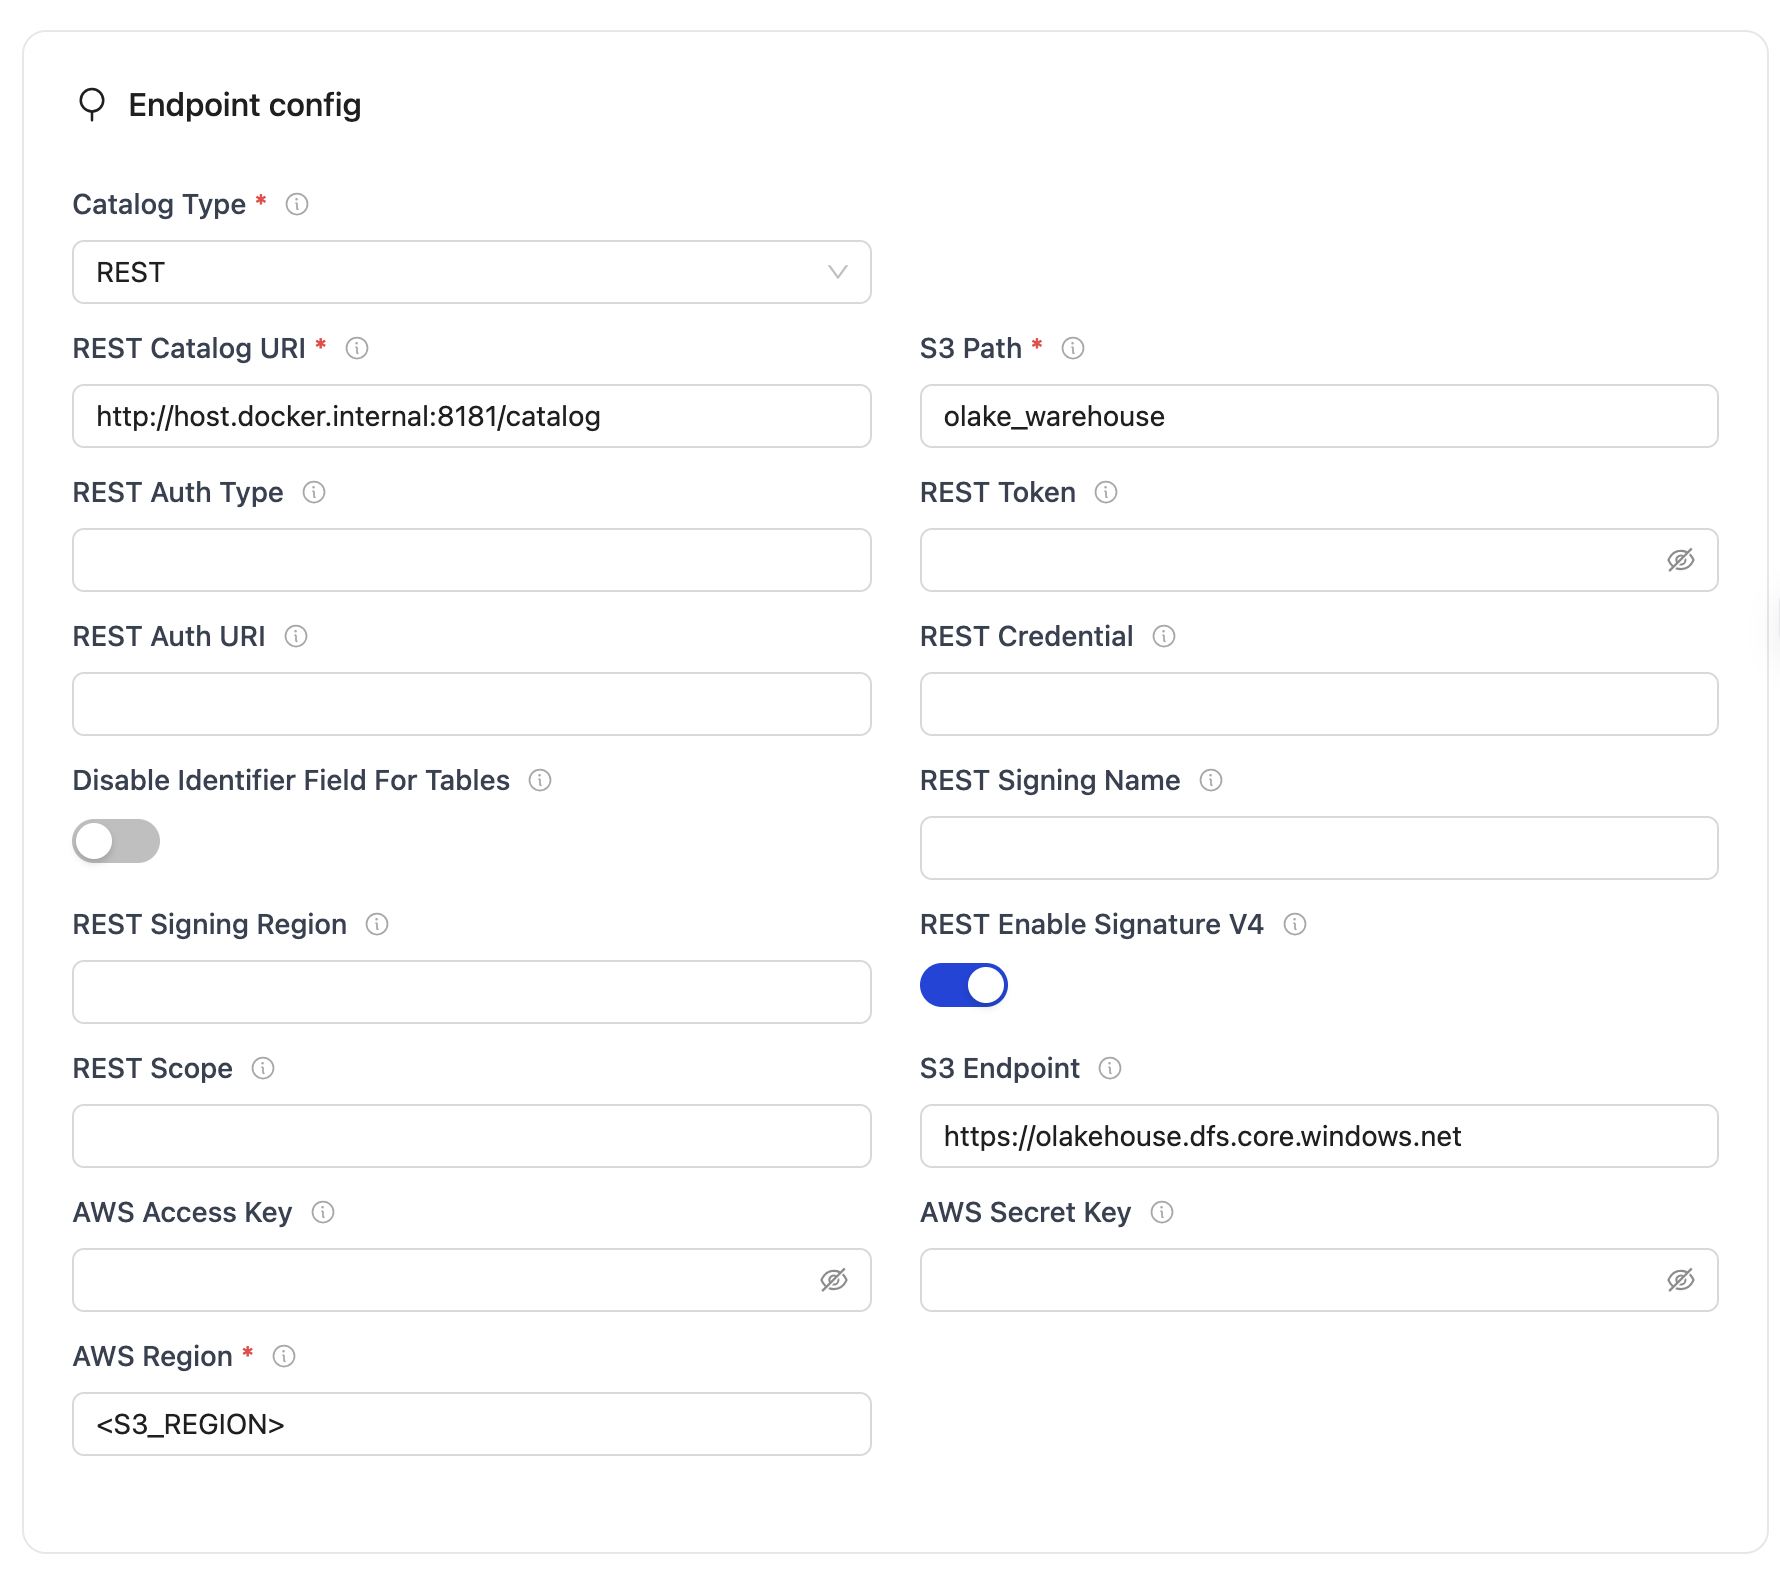
- Fill in the Endpoint config:
- Catalog Type:
REST Catalog - REST Catalog URL:
http://host.docker.internal:8181/catalog - Iceberg S3 Path:
olake_warehouse - REST Enable Signature V4:
disable - S3 Endpoint:
https://olakehouse.dfs.core.windows.net - AWS Access Key: Leave empty.
- AWS Secret Key: Leave empty.
- Catalog Type:
- Save and Test the destination to ensure Olake can communicate with both Lakekeeper and Azure.
Step 6: Create and Run a Sync Job
You are now ready to replicate data!
- Set up a Job by following this documentation on Creating Jobs.
- Under the "Set up your destination", select "Use an existing destination" and choose the destination you set up in Step 5.
Conclusion
Congratulations! You have successfully configured a complete, end-to-end pipeline to replicate data into a modern, open data lakehouse on Azure. This setup provides a powerful and scalable foundation for all your analytics and data science needs.
From here, you can connect powerful query engines like Spark, Trino, or Dremio to your Lakekeeper catalog to analyze your newly ingested data directly in the lakehouse.